COBISS System Management Zebra GC420t User Guide
© IZUM, 21. 1. 2014, VIF-NA-26-EN, V1.0 17/23
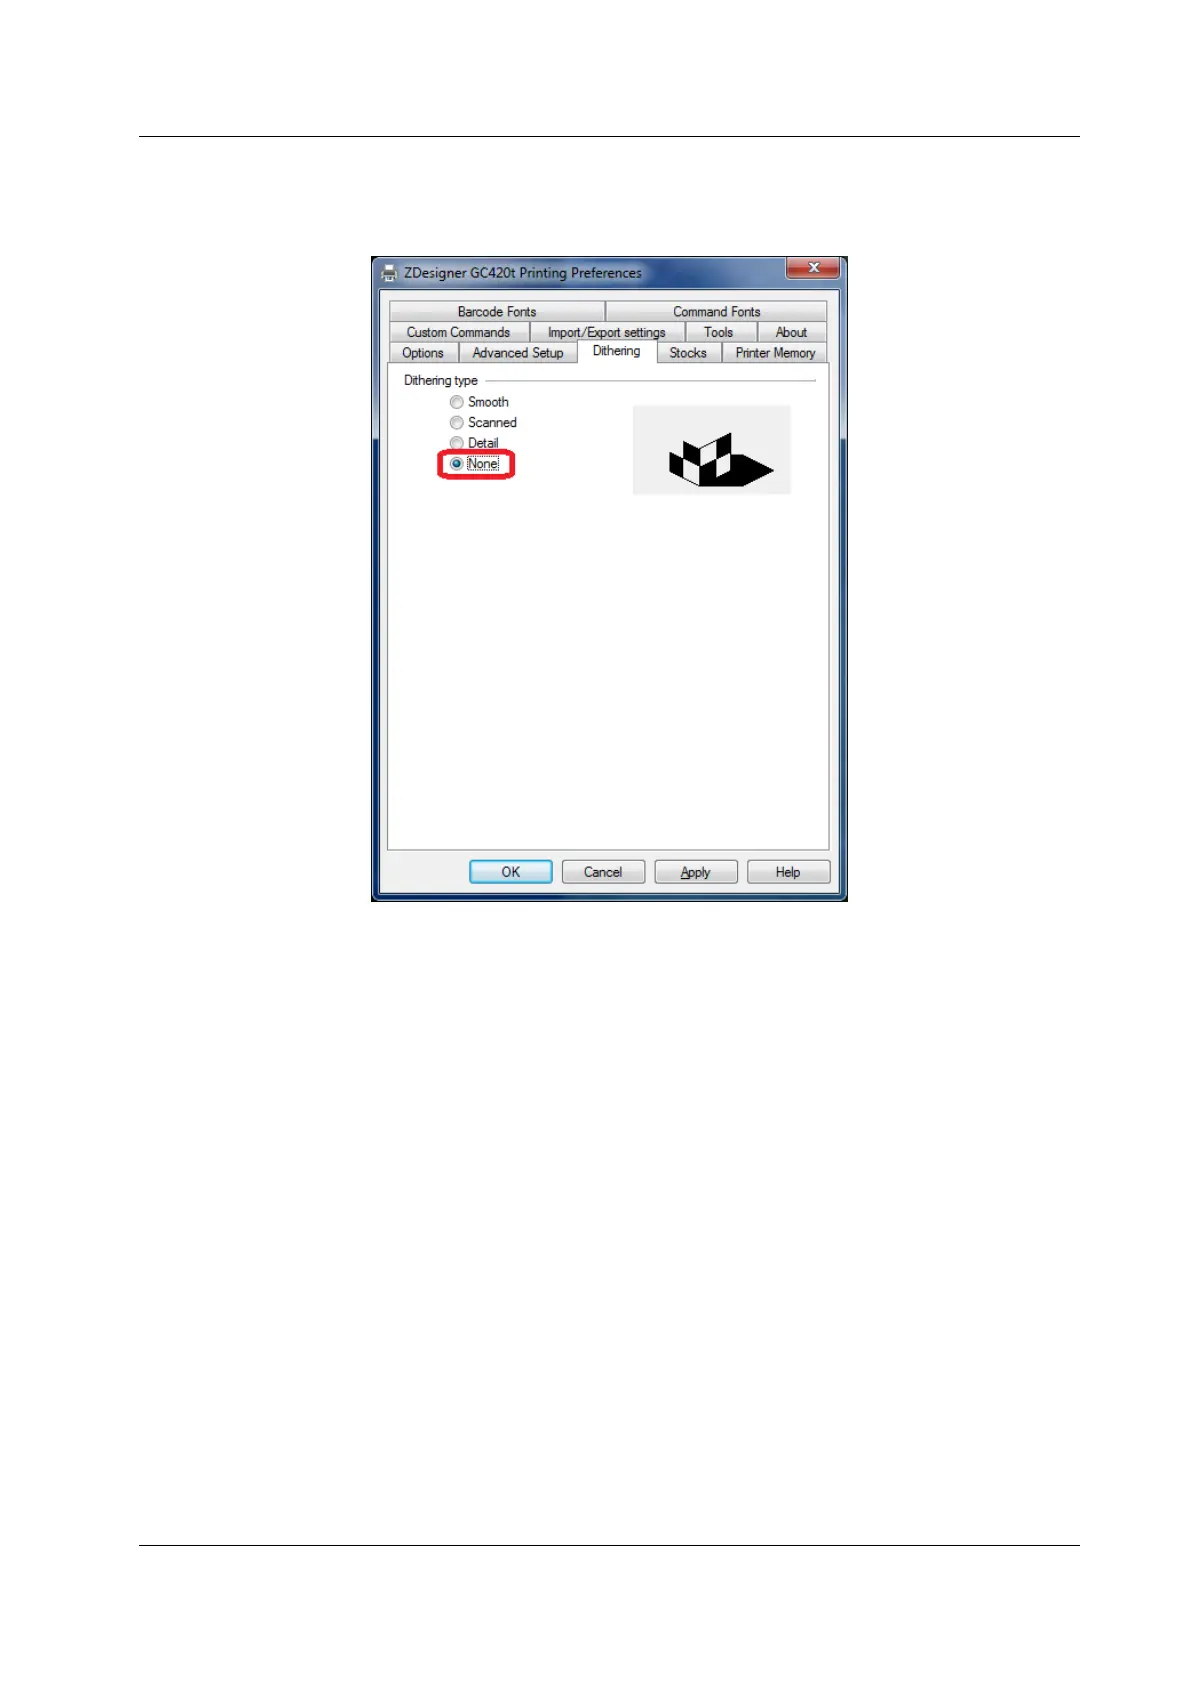
Lastly, check if None is selected under Dithering type (see Figure 22).
Figure 22: Dithering type
8.2 Settings in COBISS/Connect for COBISS2
In COBISS/Connect, there are three options to set up the selected GC420t printer for printing
from the COBISS2 system.
The first option is to set up the printer in the Editing connection window, which you open from
a list of connections in the Connection, Editing connection menu (see Figure 23). In this case,
the GC420t printer will always be set up for this connection. For every connection you can select
a printer you will use when the connection is active. For the selected tab, you will be able to print
on a previously defined printer. This setting is intended for application printing in the COBISS2
system.
The second option is to set up the printer for all active tabs – connections. In the Settings,
Printer settings menu, open the window and in the Application printing tab select GC420t
from the Printer drop-down menu (see Figure 24).
The third option is to set up the printer for the selected tab – connection only. In this case, it will
only be possible to use this printer in the selected tab while the connection is established. Right-
click the tab – connection to open the shortcut menu, where you select Printer settings, and then
select GC420t from the Printer drop-down menu (see Figure 25).
 Loading...