INSTALLATION Stereo microscope
ZEISS Mounting optional components Stemi 305
24 435063-7044-001 01/2015
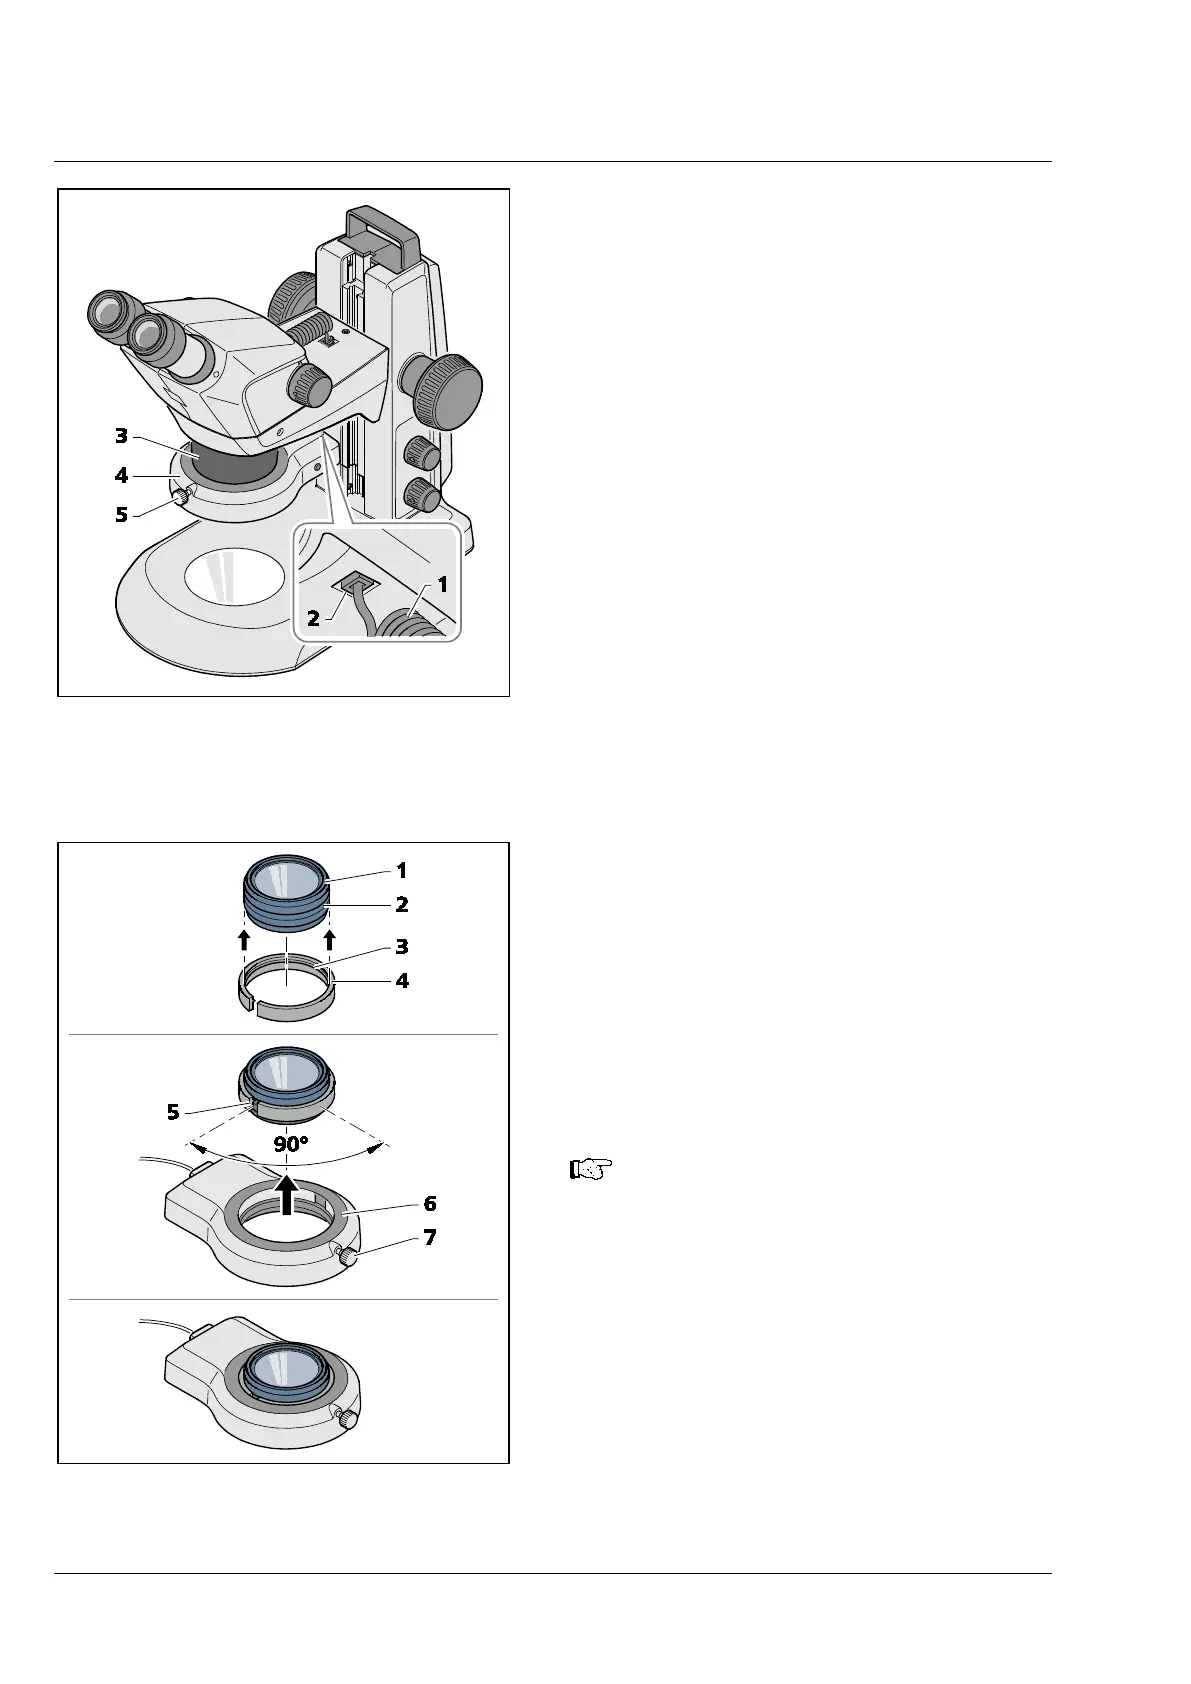
3.3.1.2 Mounting ring illuminator K LED
(segmentable)
Mounting ring illuminator to microscope body
• Insert the connection cable (Fig. 13/1) of the
ring illuminator (Fig. 13/4) into the lower socket
(Fig. 13/2) of the Stemi mount and into the
socket of the ring illuminator.
• Push ring illuminator onto the microscope body
(Fig. 13/3) from below, and secure using the
knurled screw (Fig. 13/5).
Mounting ring illuminator to front optics 3
• Put the slotted adapter (Fig. 14/4) supplied with
the device (OD 66 mm, ID 58 mm) onto the
front optics (Fig. 14/1) from below. The
circumferential bead (Fig. 14/3) inside the
adapter must lock into the outer groove
(Fig. 14/2) of the front optics.
• Push ring illuminator (Fig. 14/6) onto the AD of
the adapter and secure it by means of clamping
screw (Fig. 14/7).
The best clamping effect is achieved if
the slot (Fig. 14/5
the clamping screw (Fig. 14/7
illuminator are offset by approx. 90°.
Fig. 13 Mounting ring illuminator on
microscope body
Fig. 14 Mounting ring illuminator to front
optics 3