Smart Connect Single Loop Touch Screen Panel
Doc: GLT-229-7-1 67
Issue: 3
Date: 12/05/2017
9.3 DEVICE DISABLEMENT
Rather than disable an entire zone, it is often useful to just disable one or more input devices or points (detector, call point, or
interface) within a zone, especially if they are malfunctioning and likely to cause a false alarm or repeatedly indicate a fault.
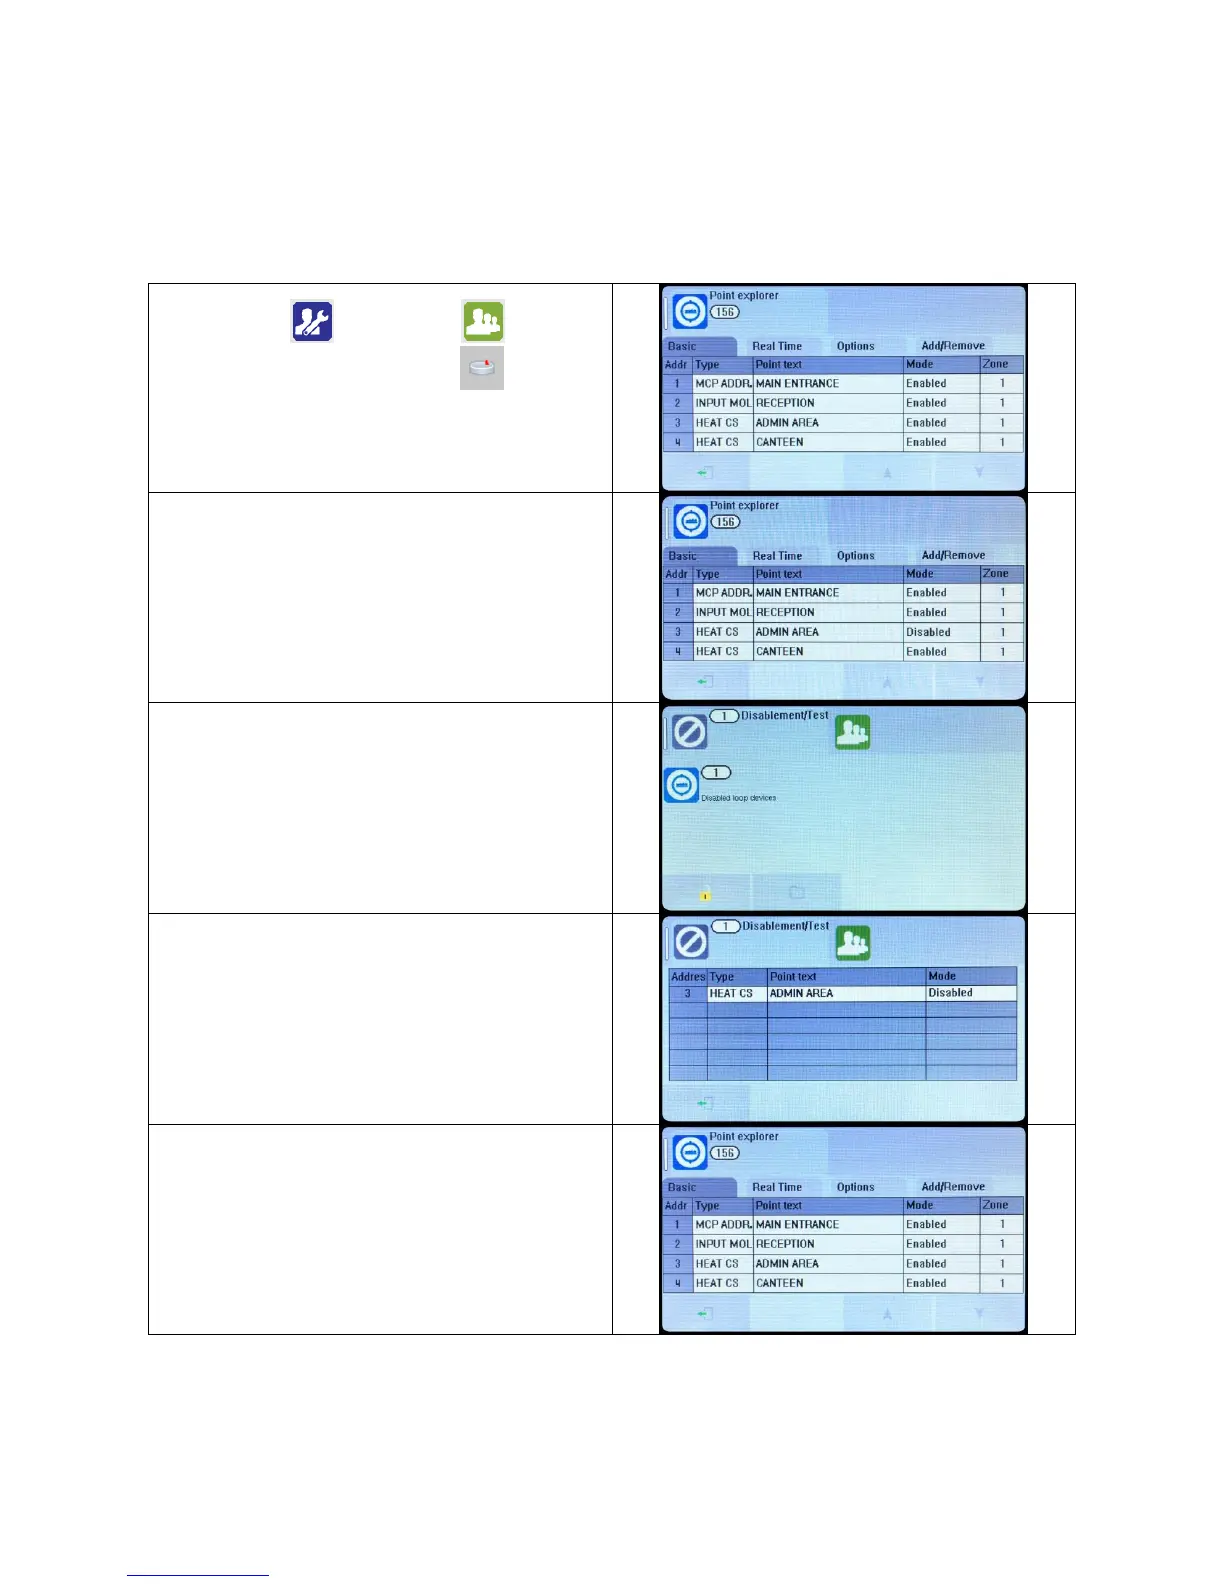
Enter the Engineer or User Password , Press the
menu access icon, and select the Point Icon
(The disabling function is available to engineer & users).
The panel shows the Point menu.
Press on the MODE field for the device to be disabled.
Select further devices to disable if necessary, then press Exit to
save.
When zones have been disabled, the LCD display changes from
SYSTEM NORMAL to Disablement/Test, as shown.
The screen shows the number of devices disabled.
The General Disablement LED will be lit, but the zonal
disablement LEDs will not light, unless all devices in that zone
have been disabled.
Details of the individual devices disabled can be viewed by
pressing the disabled loop devices icon
To re-enable a device, use the same procedure, pressing the
Mode field until it shows Enabled.
Once a device is disabled, the panel ignores any alarms or faults generated by the device. If all devices in a zone are disabled, the
panel will indicate a zone disablement. If subsequently one or more devices are re-enabled then the zone disablement indication
will be automatically cancelled.
To re-enable a disabled device, repeat the same procedure used for disabling the device, selecting Enable instead of Disable.