Operation Manual / 4 Product description / A200-L
Figures
© Copyright 2020 ABB. All rights reserved. HZTL4036_EN Revision Q July 2020
Figures
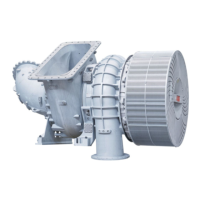
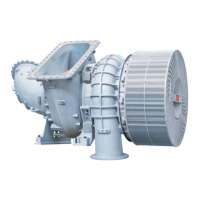
Fig.1: Layout and function of the turbocharger...... 4
Fig.2: Warning plate locations .................................... 6
Fig.3: Locations of the rating plates .......................... 7
Fig.4: Fitting the lifting gear....................................... 9
Fig.5: Placing the turbocharger................................. 10
Fig.6: Compressor-end foot....................................... 11
Fig.7: Turbine-end foot................................................ 11
Fig.8: Oil temperature at the outlet.......................... 17
Fig.9: Layout and overview of the speed measure-
ment system................................................................... 19
Fig.10: Replacing the speed sensor .......................... 21
Fig.11: U-tube manometer at the filter silencer...... 22
Fig.12: Noise insulation, bellows .............................. 24
Fig.13: Layout and overview of filter silencer ......... 32
Fig.14: Dismantling filter ring circumferential part....
34
Fig.15: Opening filter ring lock.................................. 34
Fig.16: Attaching new filter ring ............................... 35
Fig.17: Fitting new filter ring ..................................... 35
Fig.18: Overview of wet cleaning of compressor.. 38
Fig.19: Filter plug view................................................ 39
Fig.20: Overview of dry cleaning device................... 41
Fig.21: Drain pipe diagram......................................... 44
Fig.22: Weights of assemblies ................................. 54
Fig.23: Dismantling the filter silencer casing ........ 55
Fig.24: Fitting the filter silencer casing .................. 56
Fig.25: Fitting the filter silencer casing .................. 57
Fig.26: Fitting the filter silencer casing .................. 57
Fig.27: Fitting the filter silencer casing .................. 58
Fig.28: Fitting the filter silencer casing .................. 58
Fig.29: Fitting the bellows ......................................... 59
Fig.30: Dismantling the filter silencer ..................... 60
Fig.31: Dismantling the filter silencer....................... 61
Fig.32: Dismantling the wall insert (A255-L … A260-
L) ....................................................................................... 62
Fig.33: Moving out wall insert .................................... 63
Fig.34: Putting down wall insert ................................ 63
Fig.35: Dismantling the wall insert (A265-L … A280-
L) ....................................................................................... 64
Fig.36: Moving out wall insert .................................... 65
Fig.37: Putting down wall insert ................................ 65
Fig.38: Putting down wall insert ................................ 66
Fig.39: Dismantling the diffuser ............................... 67
Fig.40: Measuring axial clearance A.......................... 68
Fig.41: Removing the insulation (A275-L and smal-
ler)..................................................................................... 69
Fig.42: Dismantling the gas inlet casing (275-L and
smaller) ............................................................................ 70
Fig.43: Dismantling the nozzle ring (A275-L and
smaller) ............................................................................. 71
Fig.44: Dismantling the gas inlet casing (A280-L) . 72
Fig.45: Fitting the nozzle ring holder........................ 73
Fig.46: Dismantling the nozzle ring .......................... 74
Fig.47: Put down the nozzle ring................................ 74
Fig.48: Fitting the nozzle ring (A275-L and smaller) ...
75
Fig.49: Fitting the gas outlet casing (A275-L and
smaller) ............................................................................ 76
Fig.50: Fitting the insulation (A275-L and smaller) 77
Fig.51: Fitting the nozzle ring (A280-L) ................... 78
Fig.52: Attaching the nozzle ring (A280-L) .............. 79
Fig.53: Fitting the gas inlet casing (A280-L) ........... 80
Fig.54: Measuring axial clearance A .......................... 81
Fig.55: Fitting the diffuser.......................................... 82
Fig.56: Positioning wall insert.................................... 83
Fig.57: Fitting the wall insert (A255-L … A260-L)... 84
Fig.58: Fitting the wall insert (A265-L … A280-L) .. 86
Fig.59: Fitting the filter silencer ................................ 88
Fig.60: Fitting the filter silencer ................................ 89
Page 108 / 110Page 108 / 110