System installation – Configuration via the ABL Configuration Software |
17
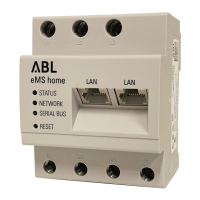
Wallbox eMH1 with E2I interface (from mid-2021)
1 Remove the upper part of the housing.
y This procedure is described in the section “Prepar-
ing and mounting the wallbox” in the installation
instructions for the eMH1 Wallbox.
2 Connect the patch cable5 to one of the RJ45 ports
located on the left hand side of the interior of the last
wallbox.
3 Connect the USB extension cable1 to one of the
computer's USB ports.
4 Use the USB to RJ45 adapter2 to connect the patch
cable
5 to the USB extension cable1.
The wallbox is now connected to the computer by cable.
ABL – Configuration Software
1
2
5
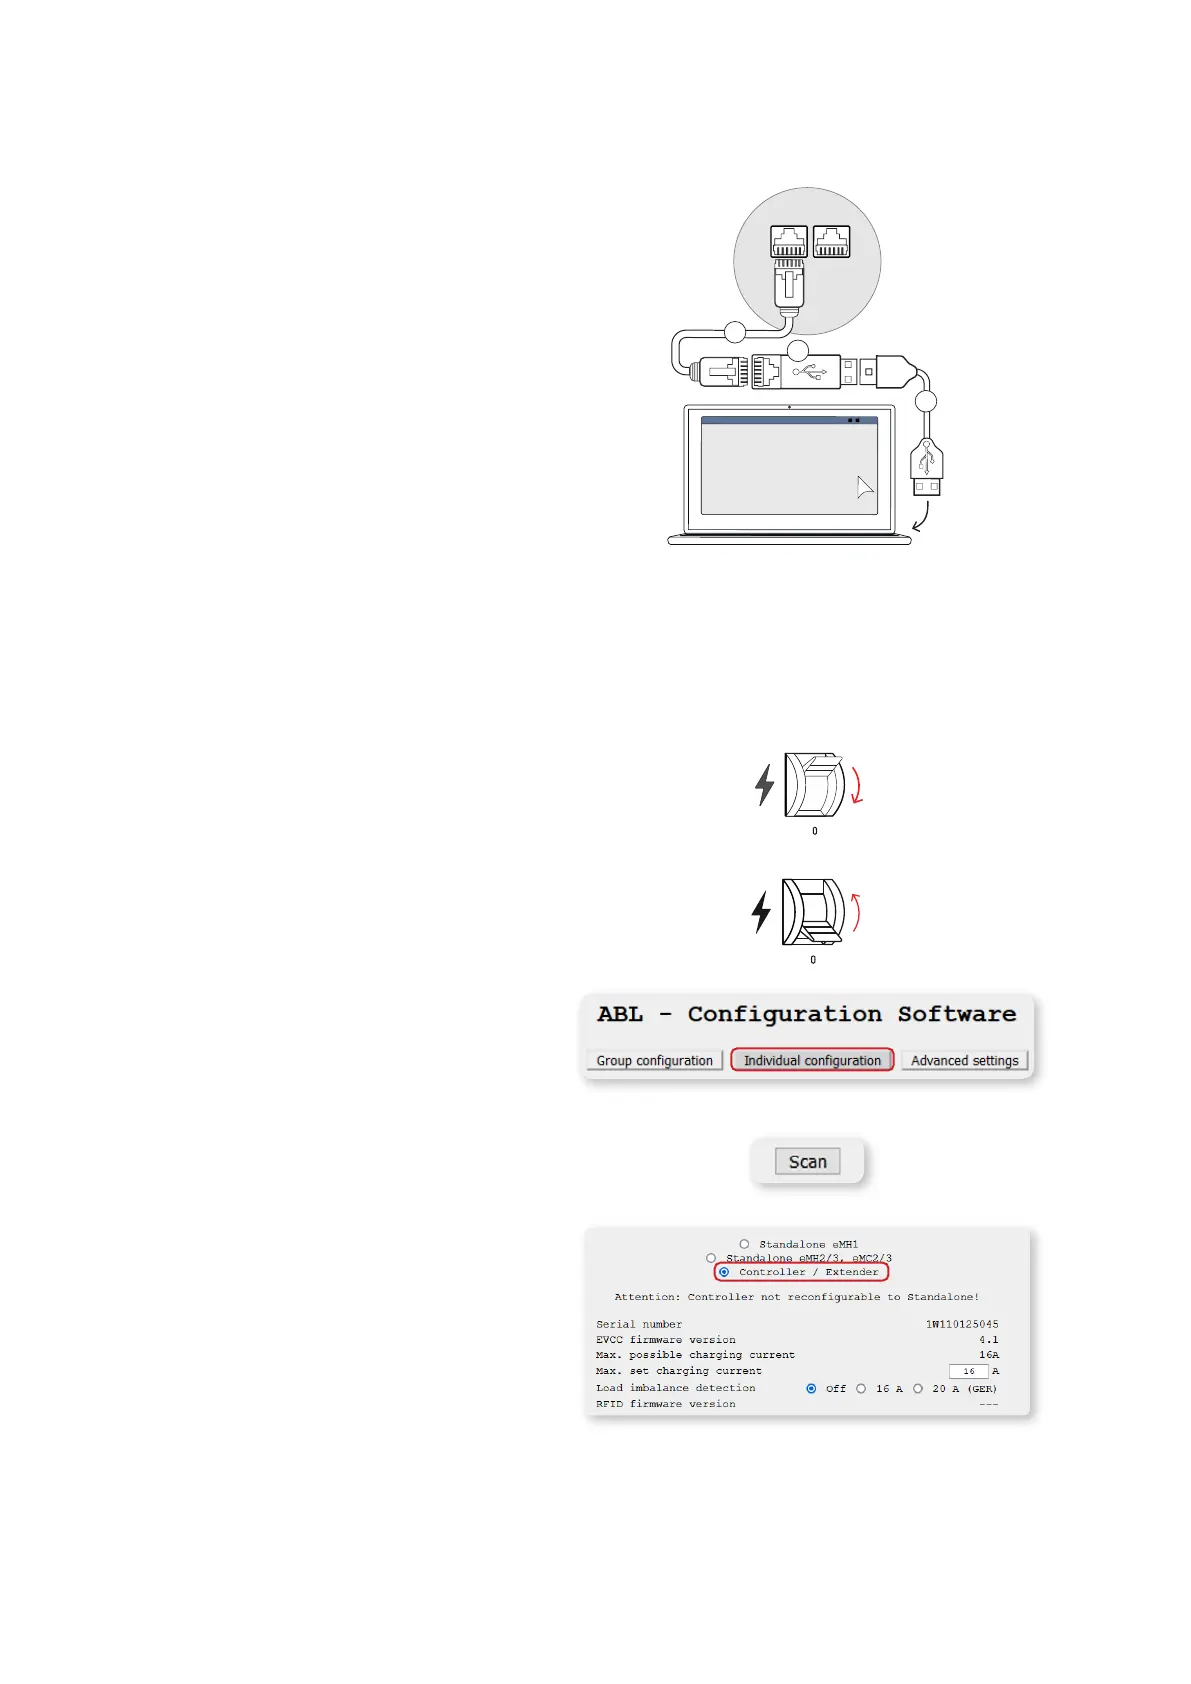
Configuration via the ABL Configuration Software
After you have set up the cabling between the wallbox(es) and the computer, you can start configuring the wallboxes
in the ABL Configuration Software.
Proceed as follows to set the operating mode of the wallboxes.
1 Set the RCD of all charging stations to position 0.
y This means that all charging stations are discon-
nected from the power supply.
2 Set the RCD of the last charging station to positionI.
3 Start the ABL Configuration Software and click on
the Individual configuration tab on the start page.
4 Click the Scan button.
y Basic information about the detected charging
station is now displayed below the Scan button.
5 Click on the Controller / Extender radio button to set
the operating mode for this charging station.
 Loading...