www.accuenergy.com
V: 1.0 Revised: Jan. 2018
Chapter 3: Installation - Conguration Parameter Set-up
33
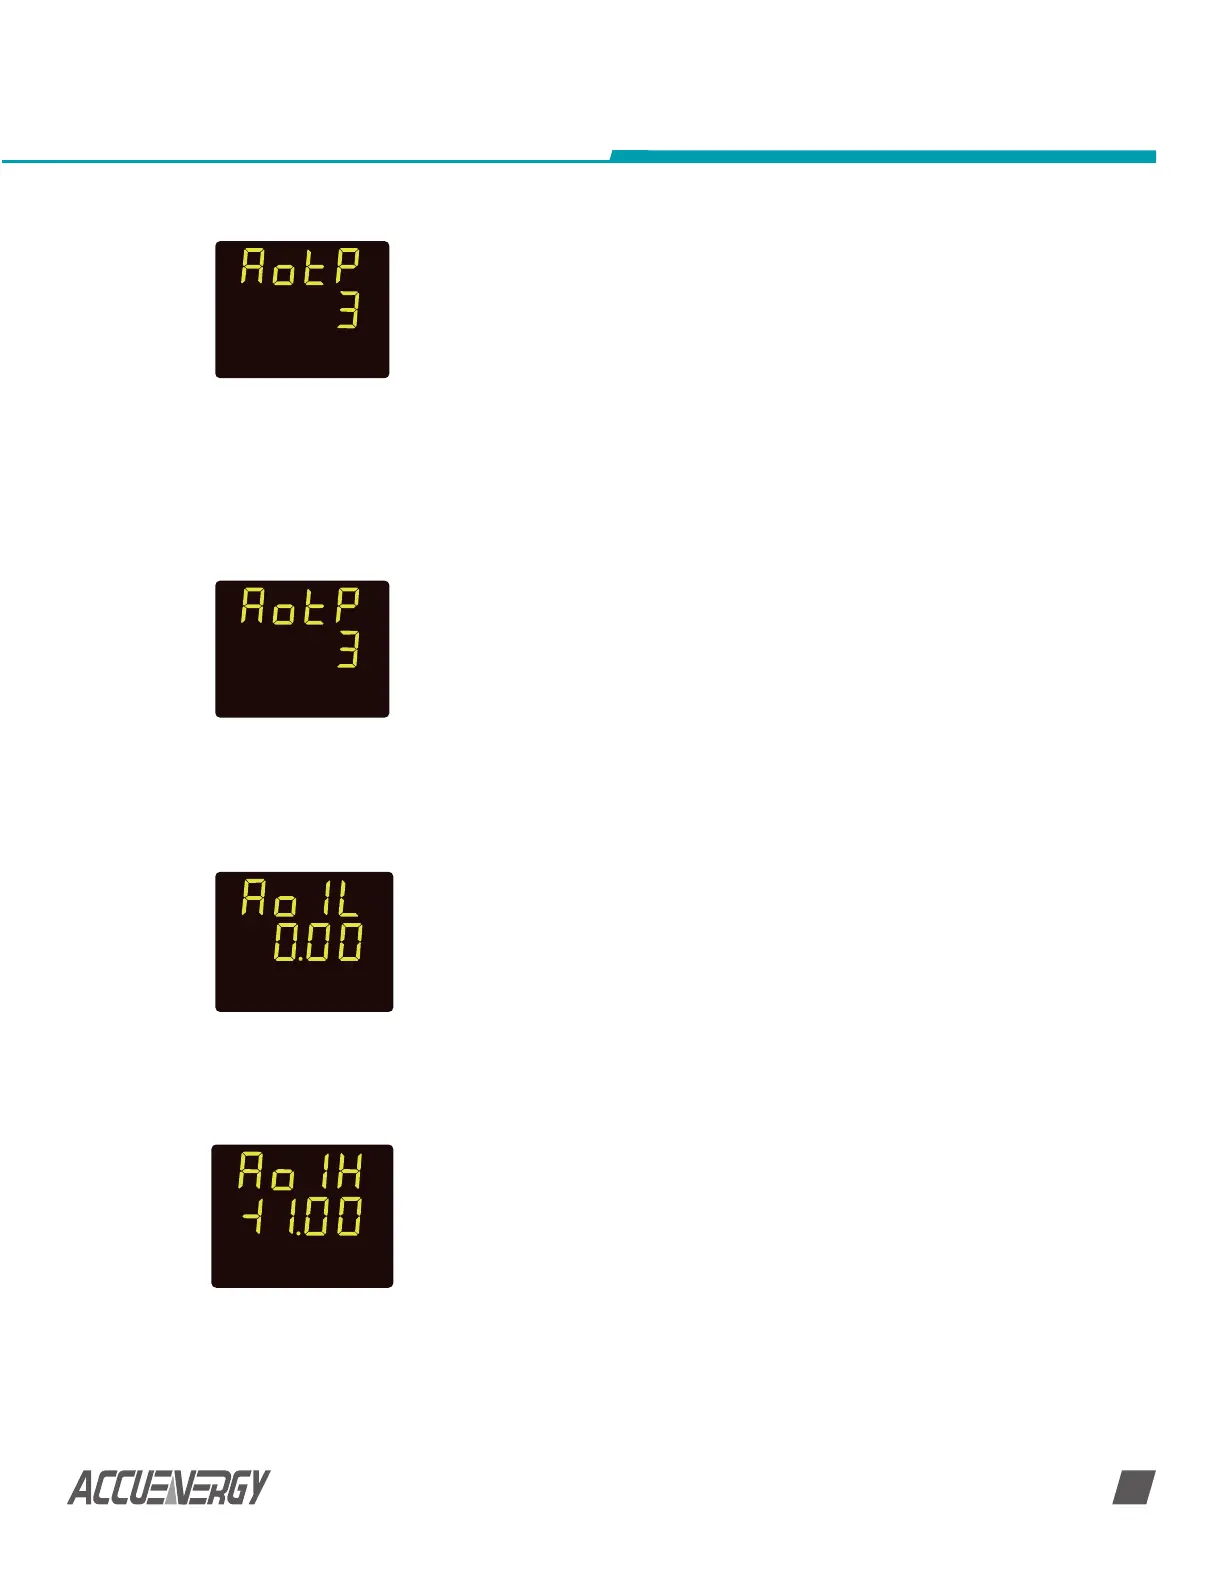
In parameter setting mode, hold ‘F’ for 3 seconds until the screen
‘AotP’ displays (as shown in Fig 3-18), the meter is in AO parameter
setting mode. It is the AO output setting. There are four AO
output modes: 0: 0 ~ 5V; 1: 1 ~ 5V; 2: 0 ~ 20mA; 3: 4 ~ 20mA. Press
‘F’ key to select the type number (0, 1, 2 or 3), and then press
‘V/A’ key to confirm and scroll to the next screen setting page.
For example, Fig 3-18 shows the output type is 3, it means its AO
output type is 4~20mA mode.
In AO parameter setting mode, press ‘V/A’ until the screen ‘Ao 1P’
displays (as shown in Fig 3-19). It is AO1 parameter setting. There
are three options: 0: voltage; 1: current; 2: power. Press ‘F’ key to
select the parameter number (0, 1, or 2), and then press ‘V/A’ key
to confirm and scroll to the next screen setting page. Fig 3-19
shows the AO1 is se t as current.
In AO parameter setting mode, press ‘V/A’ until the screen ‘Ao 1L’
displays (as shown in Fig 3-20). It is AO1 lower limit setting, range
is ‘0.00 ~ 1.00’. There is no ‘sign’ digit when the limit is 0. When
the limit is not 0, the ‘sign’ digit will be visible, the sign can be
adjusted by moving the cursor to the digit. Press ‘F’ and ‘V/A’ to
edit the value, and then press ‘V/A’ key to confirm and scroll to the
next screen setting page. Fig 3-20 shows the AO1 lower limit is set
as 0.
In AO parameter setting mode, press ‘V/A’ until the screen ‘Ao 1H’
displays (as shown in Fig 3-21). It is AO1 upper limit setting, range
is ‘-100% ~ +100%’. The entire upper limit’s absolute value cannot
be smaller or equal to the lower limit’. Under no circumstance
can the upper limit be 0. Press ‘F’ to edit the value, and then press
‘V/A’ key to confirm and scroll to the next screen setting page. Fig
3-21 shows the AO1 up limit is set as +100%.
Fig 3-18 AO Output
Setting
Fig 3-19 AO1
Parameter Setting
Fig 3-20 AO1 Lower
Limit Setting
Fig 3-21 AO1 Up Limit
Setting
NOTE: AO output type is determined by the equipped I/O module you ordered; incorrect
parameter setting will result in invalid AO output value.
NOTE: AcuDC 241 and 242 do not have this screen. AO1 is set as what is being measured.
SET
SET
SET
SET
 Loading...