c) Connect the cable to the terminal block located inside the enclosure.
d) Make sure the circuit board is free
of metallic debris such as screws, lockwashers, and
wire strands.
e) If any of the cables have been removed, shorte
ned, or modified in any way, make sure
the connections agree with the appropriate connection and wiring diagrams located on
page
137.
5. Static Test
a) Apply power to the system.
b) Press the MANUAL button.
c) Press the IN and OUT buttons several times.
The actuator and web guide mechanism
should move freely and without hesitation.
d) Press and hold the IN button. When the guide
mechanism gets near the In limit, release
the button.
e) Jog the IN button repeatedly until the actuato
r automatically stops at its end-of-travel
limit.
Caution: If the a
ctuator or web guide mechanism hits a mechanical obstruction before
the actuator stops automatically at its end-of-travel limit, release the button immediately.
Continued activation will cause serious damage to the actuator motor and/or guide
mechanism.
f) Repeat the previous two steps using the OUT button in order to check the Out limit.
g) Press the SERVO-CENTER button and verify that the actu
ator drives to the center of its
stroke.
6. Dynamic Test
a) Press the SERVO-CENTER button and verify that the actu
ator drives to the center of its
stroke. This also places the web guide in its center (or tram) position.
b) Thread the web through the machine and put a slight tension on it so that the web is in its
norm
al operating position.
Repeat steps c) through h) for each sensor:
c) Press the SERVO-CENTER button.
d) Position the sensor.
Edge detector: Pla
ce at the edge of the web. The edge detector’s null indicator LED will
turn off when the edge detector is positioned correctly. The scribed lines on the edge
detector indicate the approximate location of the detector’s guide point.
Note: T
he default calibration supplied with the system should work for most materials.
However, if the null indicator LED does not turn off, then the detector may need to be
calibrated. Refer to page 58 for calibration instructions.
Digital line guide: Position the sensor so that it is approximately centered over the
registration line or edge. Calibrate the sensor (refer to page 65 for calibration
instru
ctions). When the sensor is calibrated and positioned correctly an indicator dot will
appear in the display under the line or edge you want to track.
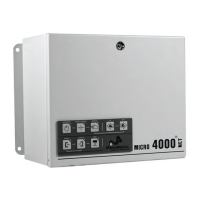
MICRO 4000
NET Web Guide Control System
8
Artisan Technology Group - Quality Instrumentation ... Guaranteed | (888) 88-SOURCE | www.artisantg.com