Do you have a question about the ADT ACCORD XPC and is the answer not in the manual?
General safety and connection requirements for the product's installation and use.
Details the product's compatibility with relevant safety and electrical standards.
Guidelines for installing the control panel in a secure, ventilated, and accessible location.
Emphasizes the importance of adequate airflow around the cabinet for temperature management.
Rules for routing and securing cables, maintaining safety barriers, and preventing strain.
Requirements for connecting the AC mains supply, emphasizing qualified installer.
Specifies the required cross-sectional area and insulation for the mains cable.
Details approvals for connecting to the PSTN and PBX systems.
Instructions for hard-wiring the panel to the PSTN via a BT master socket.
Lists countries where the panel is approved for PSTN and PBX connections.
Approval for Pan-European single terminal connection to PSTN.
Approval for use with BABT approved PBXs.
Specifications for Ringer Equivalence Number (REN) and Series Equivalence Number (SEN).
Specifies standard alarm cable for zones and detectors.
Details mains input voltage, frequency, and current consumption.
Information on mains fuse rating, construction, and onboard fuses.
Requirements for the 12V sealed lead-acid rechargeable battery.
Lists components included in the ancillaries pack for installation.
Instructions for mounting the enclosure base using keyhole slots.
Steps for safely removing and reinstalling the control panel PCB.
Details the function of the tamper switch on the PCB.
Instructions for installing the tamper actuator using a spring and post.
Steps for mounting and wiring the LCD remote keypad.
Wiring connections for Self Actuating Bells and Bell/Siren combinations.
Instructions for connecting a loudspeaker to the LS and Aux terminals.
Explains zone wiring modes and cable run recommendations.
How to use zone links or resistors for unused or specific zone configurations.
Details on connecting the 230V AC mains supply to the control cabinet.
Guidance on calculating and installing a stand-by battery.
Instructions for connecting the panel to the PSTN via a BT master socket.
Specifications for Ringer Equivalence Number and Series Equivalence Number.
Information on connecting the panel to BABT approved PBXs.
Instructions for securely mounting the enclosure after cabling.
Steps for opening, closing, and securing the enclosure lid.
Steps for initial system power-up and testing.
Procedures for testing keypads and ancillary devices.
Recommendation to test all programmed zones.
Procedure for sending a test report via the digicom.
Overview of system programming using the LCD keypad.
Steps to enter and exit programming mode.
Procedure to reset master and engineer codes to factory defaults.
Explanation of how system parameters are organized into programming groups.
How to select programming groups and parameters.
How to view programmed options for different groups.
How to program zones for different setting modes.
Programming zone types for Full Set mode.
Programming zone types for Part Set mode.
Programming zone types for Night Set mode.
Introduction to system options programming.
Details on configuring system options.
Setting the time allowed for users to exit after setting.
Setting the time allowed for users to enter and unset the system.
How to program the duration of sounder/bell activation.
Configuring audible/silent exit warnings for Part Set.
Enabling external bells and strobes for Part Set alarms.
Enabling external bells and strobes for Night Set alarms.
Defining the operation of the TRIG output.
Enabling users to set the system without a code.
Configuring prevention of setting due to power issues.
Introduction to Group 5 system options.
Enabling audible indication for AC mains failure.
Configuring behaviour for not unsetting at entry time.
Determining how the system is reset after an alarm.
Enabling Assistance, Fire, and Panic hotkeys.
Enabling keypad omission after multiple invalid entries.
Configuring the bell output polarity.
Configuring the alarm trigger output polarity.
How to reset the system after day tamper conditions.
Selecting zone wiring modes (NC, Double Balanced, EOL).
Entering the ARC primary telephone number.
Entering the ARC secondary telephone number.
Entering the account number for the ARC.
Assigning User 8 as a duress code.
Entering the telephone number for remote downloader access.
Specifying an I.D. number for downloader communication.
Setting the number of rings before the panel answers.
Selecting the communication format (High Speed, Contact ID).
Setting the handshake protocol for ARC communication.
Configuring single or dual reporting modes.
Selecting Pulse or DTMF dialling.
Preventing setting if a line failure is detected.
Setting a delay for bell activation after an alarm.
Enabling push-to-set functionality for system arming.
Determining conditions for communication reporting.
Configuring internal alarm indication for line failure.
Setting access conditions for downloader software.
Setting zone omission after multiple activations.
Enabling/disabling fire alarm communication.
Enabling/disabling PA signal communication.
Enabling/disabling intruder alarm communication.
Enabling/disabling set/unset signal communication.
Enabling/disabling tamper alarm communication.
Enabling/disabling abort signal communication.
Enabling/disabling verified alarm communication.
Enabling/disabling low battery/AC failure communication.
Configuring periodic test report communication.
Enabling communication of omitted zones for Contact ID.
Inverting set/unset signal reporting logic.
Programming a zone for double knock detection.
Allowing users to omit zones.
Configuring restore signal timing.
Allowing or disallowing entry deviation.
Enabling printing of the event log.
Resetting the control panel programming to factory defaults.
Displaying the system software version.
Programming the Technistore version number.
Setting the time window for verified alarms.
Assigning a zone as an assistance channel.
Overview of the ten zone types available.
How to program unused zones.
Function of the Final Exit zone for entry/exit.
Function of a Keyswitch zone for system setting.
Function of an Intruder zone for instant alarms.
Function of a Walk Through zone for user access.
Function of a 24 Hour Tamper zone.
Function of a PA Silent zone for panic buttons.
Function of a PA Audible zone for panic buttons.
How Push-to-Set zones become active.
Function of a Fire zone for fire detection.
General procedure for setting and unsetting the system.
Steps to perform a Full Set of the alarm system.
Steps to perform a Part Set of the alarm system.
Steps to perform a Night Set of the alarm system.
Procedure for unsetting the alarm system.
How to handle unsetting when an alarm is active.
Using the Engineer Code for system setting/unsetting.
How to test zones and outputs on the system.
Procedure for omitting specific zones from setting.
How to change user codes and engineer codes.
Steps to reprogram user and master codes.
Adding new user codes to the system.
Procedure for deleting user codes.
How to enable or disable zone chime functions.
Steps to enable chime for specific zones.
Procedure to disable chime for all zones.
How to view the event log using the keypad.
Accessing the event log via downloader software.
Instructions for printing the event log via a serial printer.
Setting the system time and date via the keypad.
Functionality of hotkeys for alarms when enabled.
Importance of user instructions for minimizing false alarms.
Technical specifications of the control panel.
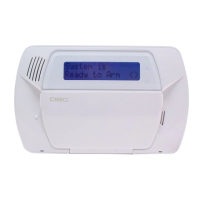
Physical and electrical details of the control panel.
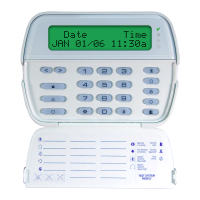
Technical specifications for the remote keypad.
Instructions for connecting a printer to the panel.
Steps and settings for connecting a serial printer.
| Brand | ADT |
|---|---|
| Model | ACCORD XPC |
| Category | Security System |
| Language | English |