Page 19 of 42
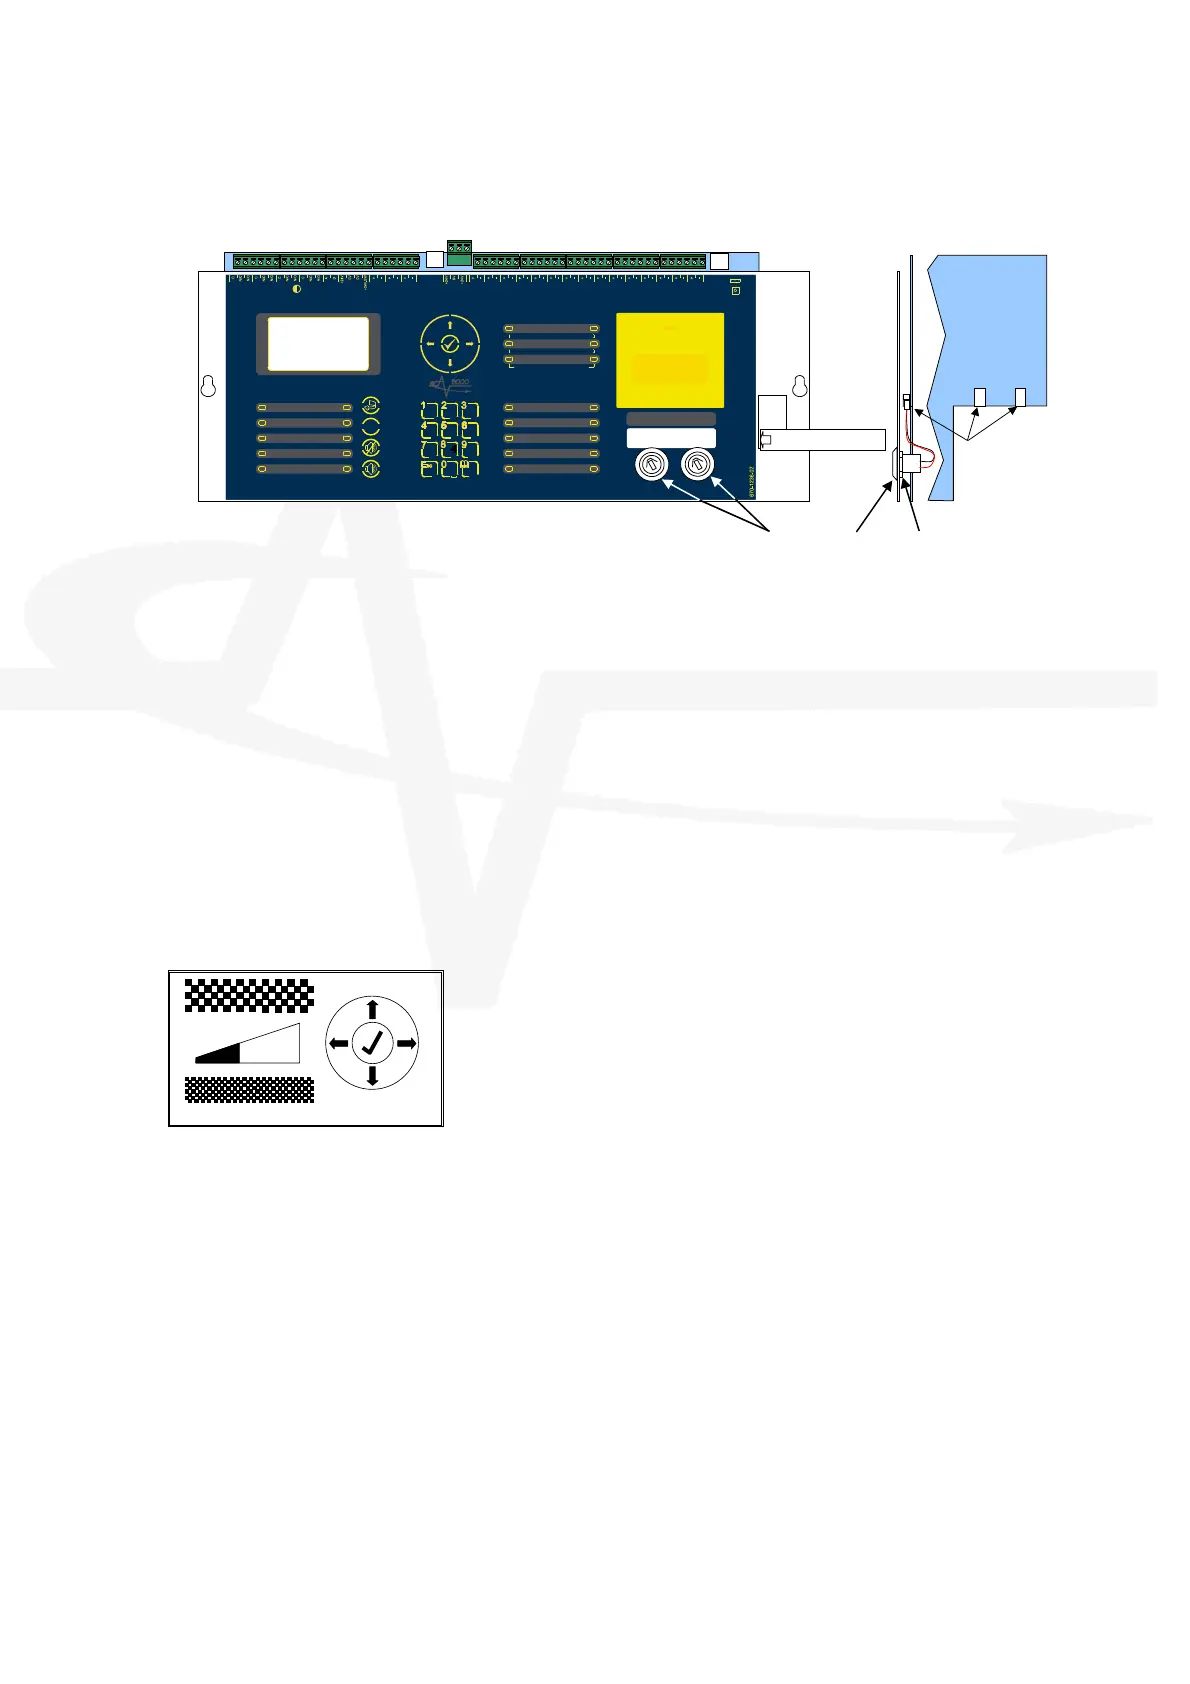
2.4 Key-Switch Installation
USB
S
U
P
P
L
Y
P S U
C o m m s
PROGRUN
uP MO DE
REBO OT
R
e
l
a
y
-
1
F
I
R
E
R
e
l
a
y
R
e
l
a
y
-
2
F
A
U
L
T
R
e
l
a
y
R
S
4
8
5
AU X
S
up ply
Z
O
N
E
-
1
-
Z
O
N
E
-
2
-
Z
O
N
E
-
3
-
S
N
D
R
-
1
-
S
ND R
-
2 -
SN DR
- 3 -
MO DE
Se lect
Ma nua l
Trig ger
HO LD A BOR T Pressu re
Mon itor
VAL VE
Mo nitor
FLO W
Mo nitor
Act uator
Ou tput
PROG
Input-1
PROG
Input-2
PROG
Input-3
PROG
Input-4
MANUALONL
AUTO +
MANUAL
LOW PRESSURE
MANUAL
DISABLED
DISABLED
FAULT
TIMER HELD
ABORTED
RELEASE
IMMINENT
RELEASED
EXTIN GU ISH AN T
P
O
W
E
R
S
S
T
E
M
F
A
U
L
T
T
E
S
T
S O U N D E R D E L A
E D
D
I
S
A
B
L
E
S
O
U
N
D
E
R
D
I
S
A
B
L
E
D
F
A
U
L
T
S
O
U
N
D
E
R
F
A
U
L
T
F
I
R
E
S
I
L
E
N
C
E
D
G
E
N
E
R
A
L
- 1 -
DE TECTION ZONES
F IRE FA UL T/
TE ST/
DI SA BLE
- 2 -
- 3 -
E
S
C
M
E
N
U
W X Y Z T U V P Q R S
G
H
I
J
K
L
M
N
O
D E F A B C
R E S E T
S I L E N C E /
R
E
S
O
U
N
D
M U T E
!
S O U N D
A
L
A
R
M
S
(
H
O
L
D
2
s
)
BS EN 54-2: 1998 BS EN 54-4: 1998
BS EN 12094-1: 2003 CLASS-A
EXTIN GU ISH AN T
RE LEASE
PULL DOWNAND PRESS BUTTON
Key-Switch Assembly Nut
PL4: KEY-SW #1
PL3: KEY-SW #2
PL3 PL4
SLIDE-IN LABEL
Using a sharp knife, cut through the fascia label using the key-switch mounting hole as a
template.
Insert the key-switch assembly through the hole and secure with the fixing nut. Before fully
tightening, insert the slide-in label with the required function description into the pocket in the
fascia label.
Plug the connector into the respective connector on the card.
Key-Switch assemblies are available in both trapped and non-trapped versions.
Refer to the Programming section to define the action of the key-switch.
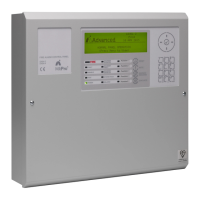
2.5 Adjusting the LCD Contrast
Press the CONTRAST ADJUST button. This display will show the contrast adjust option.
Use the ÏÐ buttons to adjust the contrast (viewing angle) darker
or lighter as required. The bar graph adjusts to show the contrast
setting.
Press the button to confirm the setting.
The display will then revert to the normal operating display.