3. Remove the plug and O-ring from the sample freezing chamber (see
figure 4) and store them in case of possible future transport of the
instrument.
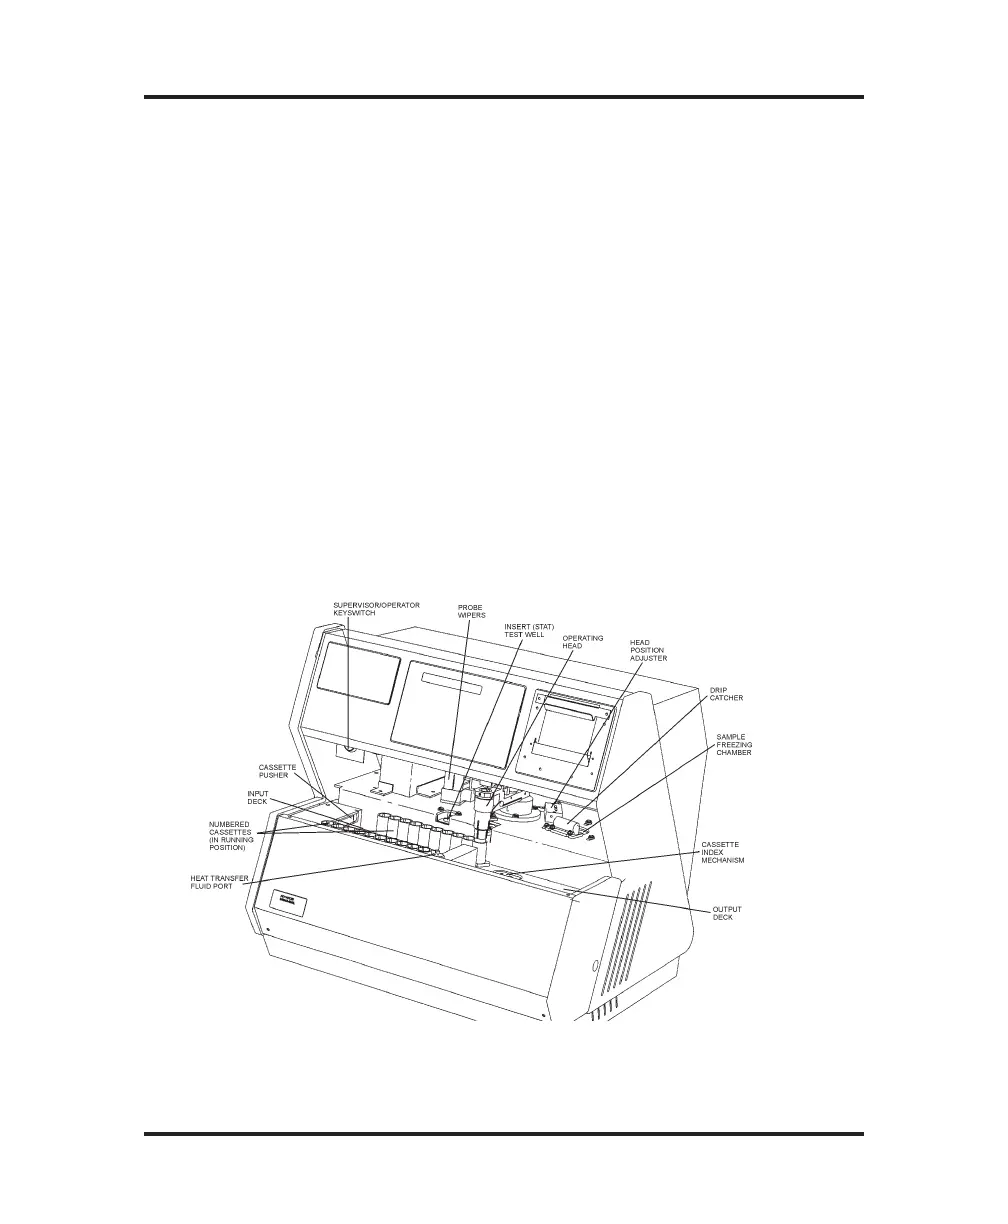
4. Lift the operating head and remove the protective material (see
figure 4) from the probe and stir/freeze wire and from the insert
(STAT) test well. Then manually rotate the operating head for-
ward to the position shown in figure 5 and gently lower the probe
between decks to avoid damage.
5. Install a new drip catcher sponge (see figure 5). Make sure that
the new installation is lined up so that it does not obstruct the head
motion.
6. Install two wiper sponges as probe wipers (see figure 5).
6
The Advanced
®
Model 4C3 User’s Guide
Figure 5: Cassette Deck