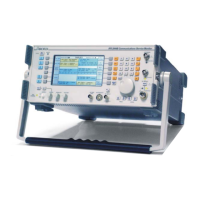
LOCAL OPERATION
3-7
DISPLAY HOLD key. To the left of the variable control is the [DISPLAY HOLD] key. Pressing this
key at any time will freeze the display and prevent any adjustment to parameters displayed on the
screen. The soft key menu changes to show two keys, [Store] and [Print].
The [Store] key, gives access to the
STORE/RECALL screen and menu. The use of this feature is
explained on page 3-90
The [Print] key is used to start the Screen Print function. This causes a hard copy of the held
screen to be printed onto a suitable printer.
The use of the Screen Print feature is explained under the heading 'Printer' on page 3-93.
AC/DC. AF input coupling option key Located above the AF input socket, this key toggles the AF
input circuit between direct and capacitive coupling. The option selected is displayed on the
screen.
(11) Volume. This control varies the level of the AF signal fed to the loudspeaker.
(12) RF receiver squelch level control. When monitoring the demodulated output through the
loudspeaker or headphones, the RF level below which signals are isolated from the AF circuits can
be controlled. Clockwise rotation of the squelch control raises this level and anti-clockwise
rotation decreases it.
(13) Scope trace vertical position. This adjusts the vertical position of the trace within the graticule.
(14) SUPPLY switch. Pressing in this push-button powers up the instrument from either the AC or
DC source. See Getting started on page3-9.
(15) Oscilloscope sweep mode keys. The [SINGLE] and [REP] keys, located above the scope vertical
position control, select the oscilloscope sweep mode.
(16) Test mode select keys. On the left of the front panel are five blue keys. These are the ‘Test
Mode Select’ keys, used to put the instrument into one of the basic test modes. They are active
whenever the instrument is powered up and under local control.
(17) HELP/SETUP key. Above the test mode select keys is the ‘HELP/SETUP’ key.
Pressing this key will cause the HELP/SETUP access screen to be displayed if the instrument is
under local control. This does not interrupt any on-going function of the Service Monitor. See
HELP/SETUP on page 3-11
When the instrument is under remote control, pressing this key will return control to LOCAL
unless an instruction to prevent local operation has been sent from the remote control device.