Do you have a question about the Aeroflex 9102 and is the answer not in the manual?
Explains the guide's aim to help users successfully operate the 9102 Handheld Spectrum Analyzer.
Assumes users have basic telecommunication concepts and terminology knowledge.
Lists other Aeroflex 9100 Series documentation for further reference.
Provides contact information for Aeroflex support for product-related questions.
Details typographical, keyboard, menu, and symbol conventions used throughout the guide.
Provides critical warnings regarding product usage, electrical safety, and environmental conditions.
General description of the instrument's capabilities and applications.
Highlights features and improvements in different software versions.
Lists key functionalities and performance specifications of the analyzer.
Details available hardware options and accessories for the 9102.
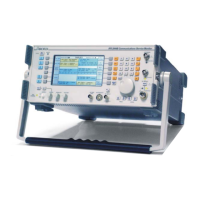
Describes the physical layout and accessible parts of the instrument.
Guidance on calibration and general upkeep of the instrument.
Details on connecting external devices and power sources to the instrument.
Explains the layout and functions of the instrument's front panel controls and display.
Guides users on how to choose among the various operational modes of the 9102.
Describes how to enable, move, and utilize marker functions for signal analysis.
Explains how to set and apply predefined limits for measurement pass/fail verdicts.
Details how to print measurement results and screen captures from the instrument.
Describes how to use GPS for location logging during measurements.
Covers how to view and configure instrument settings like date, time, and connectivity.
Explains how to save, recall, and manage instrument configurations.
Guides on resetting the instrument to its default factory configuration.
How to choose the primary Spectrum Analysis mode.
Methods for setting start, stop, center frequencies, and span.
Configuration of resolution bandwidth, video bandwidth, and sweep time.
Adjusting reference level and attenuation for optimal signal display.
How to adapt the instrument for 50 ohm or 75 ohm measurements.
Using triggers for measurement control.
Configuring trace display modes, copying, and managing trace data.
Procedures for saving and recalling measurement traces.
Details on channel power, ACPR, and OBW measurements.
How to access and review all active parameters in the current mode.
Introduction to measuring radiated power within a frequency band.
How to select Channel Power mode and specific measurement types (CP, ACPR, OBW).
Procedures for performing channel power measurements, including system setup.
How to interpret and display channel power results.
Adjusting the percentage for OBW calculations.
Managing predefined or custom communication system parameters.
Adjusting reference level and attenuation for channel power measurements.
Configuring the instrument for 50 Ohm or 75 Ohm measurements.
Configuring trace display modes and data handling.
Procedures for saving and recalling channel power measurement traces.
Accessing and reviewing all active parameters in Channel Power mode.
Introduction to broadband power measurements using the 9162 Insertion Power Sensor.
Details on the physical connections required for power sensor measurements.
Configuring the instrument for power sensor operation.
How to interpret and display forward and reverse power measurements.
Introduction to using the instrument as a signal generator for stimulating circuits.
How to access and select the Signal Generator mode.
Procedure to enable or disable the signal generator output.
Setting the output signal's frequency parameters.
Adjusting the output power level of the generated signal.
Utilizing features like limiting the number of sweeps.
Introduction to measuring frequency characteristics of devices using the tracking generator.
How to access and select the Transmission mode.
Procedure to enable or disable the tracking generator.
Using the Normalize function to eliminate measurement ripples.
Adjusting the output power level of the tracking generator.
Methods for setting frequency ranges in Transmission mode.
Configuring bandwidths and sweep time for transmission measurements.
Adjusting reference level and vertical scale for signal display.
Using triggers for measurement control.
Configuring trace display modes and data handling.
Procedures for saving and recalling transmission measurement traces.
Accessing and reviewing all active parameters in Transmission mode.
Introduction to the reflection measurement capabilities.
Technical specifications for the 9130 option and 9160 bridge.
Overview of available modes: Reflection, Distance to Fault, Cable Loss.
Lists necessary hardware for reflection measurements.
Instructions for connecting the measurement bridge.
Procedure for calibrating the instrument for reflection measurements.
Introduction to testing antenna system performance and match.
How to select the Reflection mode.
Actions required before starting reflection measurements.
Methods for setting frequency ranges in Reflection mode.
Steps for calibrating the instrument for reflection measurements.
Selecting units for return loss, VSWR, reflection factor, etc.
Adjusting reference level and vertical scale for reflection measurements.
Controlling the number of measurement sweeps.
Configuring trace display modes and data handling.
Procedures for saving and recalling reflection measurement traces.
Applying limit lines for pass/fail criteria in reflection measurements.
Accessing and reviewing all active parameters in Reflection mode.
Introduction to analyzing cable issues by measuring reflection along the cable.
How to select the Distance to Fault mode.
Actions required before starting DTF measurements.
Choosing units for reflection measurements (dB, mRho, VSWR).
Setting the cable length for accurate DTF analysis.
Using predefined or manually defining cable parameters.
Setting frequency parameters for DTF measurements.
Procedure for calibrating the instrument for DTF measurements.
Adjusting reference level and vertical scale for DTF results.
Configuring trace display modes for DTF measurements.
Applying limit lines for DTF measurements.
Accessing and reviewing all active parameters in DTF mode.
Introduction to measuring cable transmission quality.
How to select the Cable Loss mode.
Actions required before starting cable loss measurements.
Methods for setting frequency ranges in Cable Loss mode.
Procedure for calibrating the instrument for cable loss measurements.
Controlling the number of measurement sweeps.
Applying limit lines for cable loss measurements.
Accessing and reviewing all active parameters in Cable Loss mode.
Introduction to measuring electromagnetic field strength and power density.
Overview of EMF measurement principles and approaches.
Describes stirring and multipoint methods for EMF measurements.
Details different antenna types for EMF measurements and their specifications.
How the 9102 performs EMF measurements using various options.
Procedures for connecting different antenna types.
How to select the EMF (EMI) mode.
Choosing units for EMF measurements (logarithmic or linear).
Methods for setting frequency ranges in EMF mode.
Configuring bandwidths and sweep time for EMF measurements.
Choosing between electrical field strength and power density display.
Adjusting reference level for EMF measurements.
Using Auto and Quick measurement options with isotropic antennas.
Steps for manual EMF measurements with biconical antennas.
Applying limit lines for EMF measurements.
Employing markers for detailed analysis of EMF results.
Accessing and reviewing all active parameters in EMF mode.
Steps to resolve battery charging issues.
Guidance on managing instrument errors and software updates.
How to access the software update utility.
Procedures for setting a password to protect software updates.
Steps to update the instrument software via a serial connection.
Steps to update the instrument software via a LAN connection.
How to find the PC's IP address for LAN updates.
Introduction to the software for loading and displaying measurements.
System requirements for installing the software.
Information regarding software usage and licensing.
Step-by-step guide for software installation.
How to launch the 9100 Data Exchange Software.
Configuration steps for serial or LAN connections.
Procedures for loading traces from the instrument or memory.
Managing measurement data on the PC.
Using the tool to capture and save screen images.
Manipulating and analyzing loaded measurement traces.
Creating and applying custom limits for measurements.
Compensating for gain or attenuation from external devices.
Configuring and managing communication system parameters.
Uploading and defining cable parameters for DTF.
Transferring and activating antenna correction factors.
Transferring and activating cable correction factors.
Transferring, editing, and managing instrument settings.
Procedures for file transfer and management.
Recording and displaying GPS coordinates with measurement traces.
Introduction to SCPI command structure and subsystems.
Basic SCPI commands for instrument control and status.
Commands for managing system settings like date, time, and communication.
Commands related to measurement settings and parameters.
Commands for configuring the instrument's input stage.
Commands for managing non-volatile memory storage and retrieval.
Commands for controlling instrument modes and features.
Commands affecting the instrument's screen display and output formatting.
Commands for marker functions, limit analysis, and measurement calculations.
Commands for formatting SCPI output.
Commands for retrieving instrument status and diagnostic information.
List and descriptions of SCPI error codes.
Introduction to using SCPI commands for instrument control.
Practical examples of SCPI commands for various functions.
Examples of SCPI command sequences for specific tasks like signal monitoring.
Lists common settings files for various measurement modes.
Details on preinstalled and downloadable communication systems.
Lists common cable types with their parameters for DTF measurements.
Diagram showing the hierarchy accessed via the Mode function key.
Detailed flowcharts of the instrument's application menus.
Details on Aeroflex's product warranty terms and conditions.
Procedures for returning equipment for service or repair.
Terms and conditions for using the software.
| Brand | Aeroflex |
|---|---|
| Model | 9102 |
| Category | Measuring Instruments |
| Language | English |