Chapter 15 9100 Data Exchange Software
Connecting the PC to the 9102
226 9102 Handheld Spectrum Analyzer Software version 5.31
Connecting the PC to the 9102
In order to connect the PC to the 9102, you need to configure the 9100
Data Exchange Software first.
From the menu bar, select
Connection Settings > Serial / LAN for 9100...
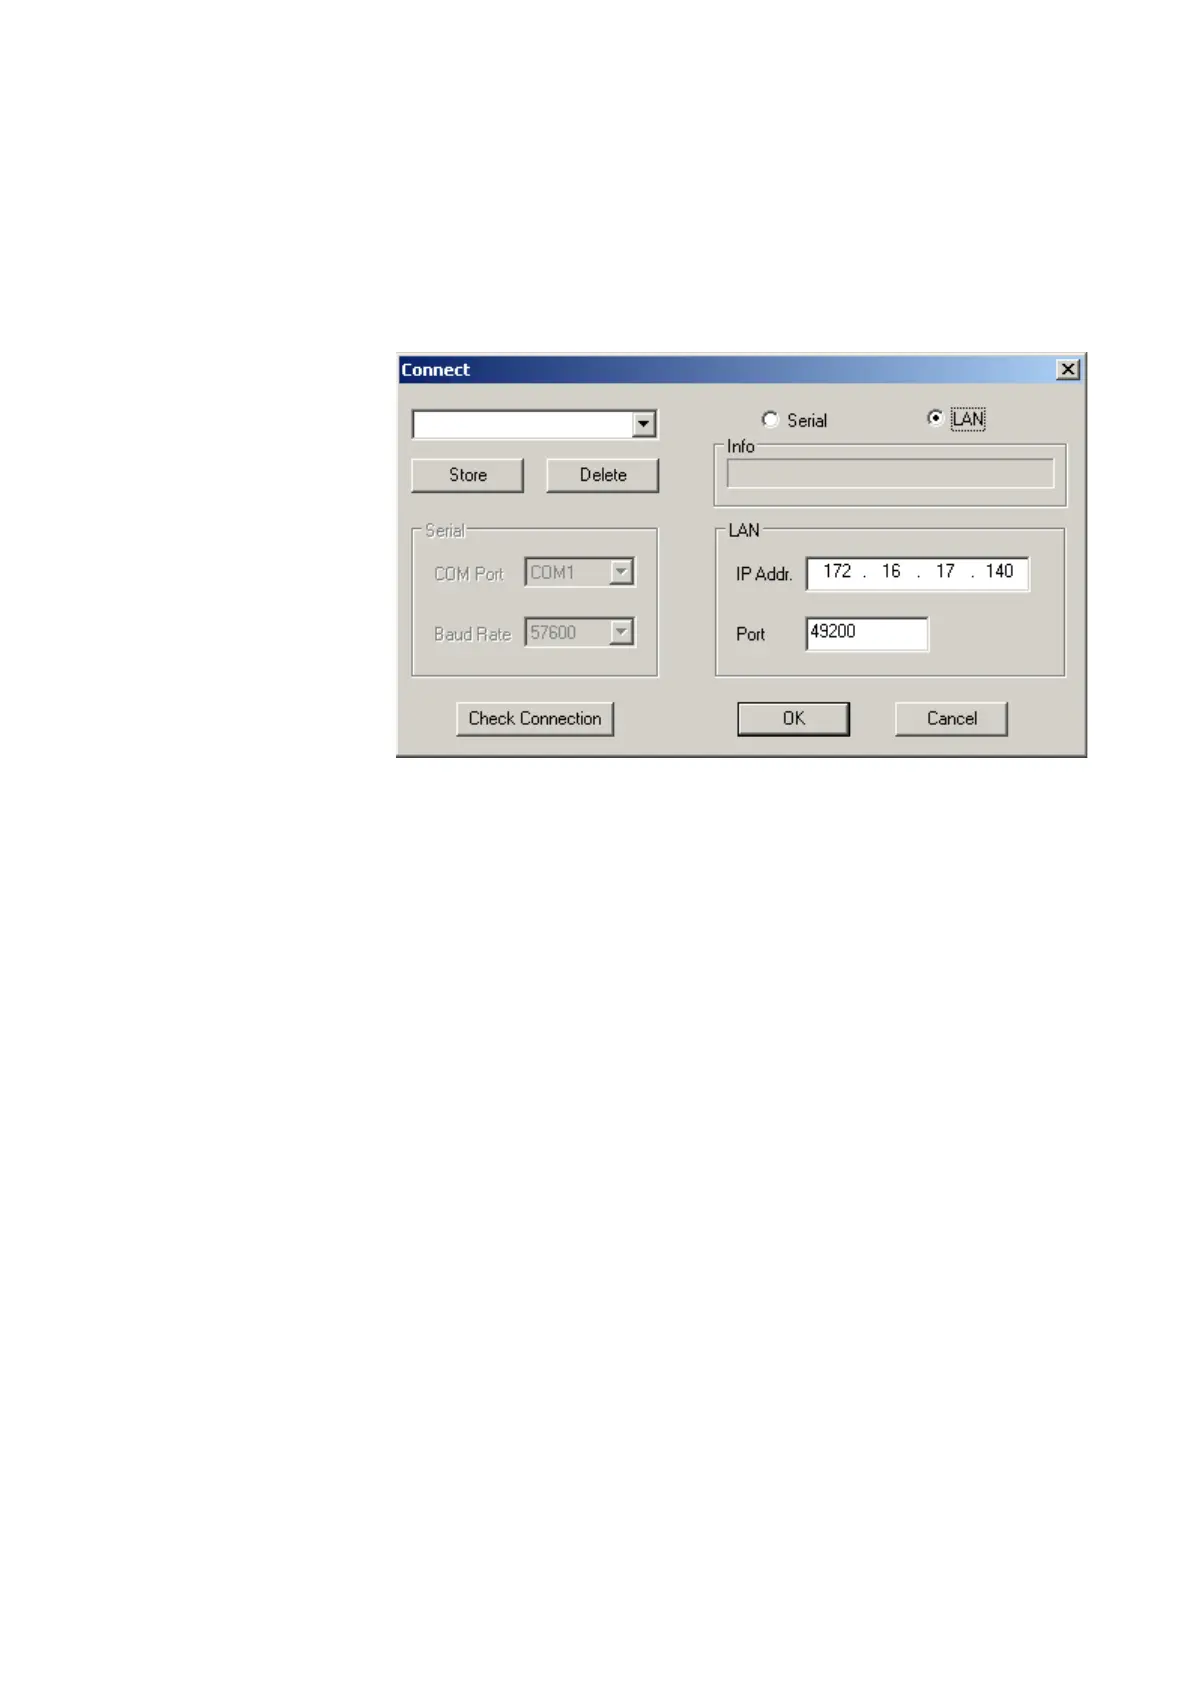
This will open the Connect pull-up menu as shown below:
Using a predefined
configuration for the
connection
If you have previously stored configuration data for a successful
connection with the 9102, you can proceed as follows:
1 Connect the 9102 with the PC using a serial interface cable or the
LAN, depending on the configuration you want to use.
2 In the Connect dialog box of the 9100 Data Exchange Software
(see above), load the configuration by selecting a name from the
drop-down list box or in the upper left-hand corner of the Connect
menu. Click on
OK to load this configuration.
The PC will now attempt to exchange messages with the 9102 over
the interface defined in the configuration file. The Connect dialog
box will disappear and if a connection has been set up successfully,
the status bar of the PC software will indicate CONNECTED.
Serial interface
connection
1 Select the Serial radio button.
2 Select the baudrate (bit rate) that is set up in the 9102 as well.
3 Select a serial port (e.g. COM1).
4 Switch on the 9102 and connect it to the PC using a null modem
cable as specified in “Connecting the PC to the 9102” on
page 226.


 To Next Page