Chapter 11 Cable Loss Operation
Cable loss calibration
178 9102 Handheld Spectrum Analyzer Software version 5.31
3 Enter a new frequency step value and close the entry field by
pressing
Enter. The auto/manual selection switches to manual and
the selected frequency step size is displayed on the softkey.
Setting the frequency step size selection to automatic
1 From the Reflection main menu, select
Freq.
2 Push the
FStep softkey several times until the “auto” selection is
highlighted.
Cable loss calibration
Before starting the measurement the instrument needs to be calibrated
with a reference match resistor. For details on available calibration sets
refer to “Options and accessories” on page 5 and “Calibration” on
page 142. On the lefthand side of the results display a red icon reading
“Calibrate“ informs you that a calibration needs to be performed. In
order to calibrate the instrument for your cable loss measurement
proceed as follows:
1 Connect the test port extension cable to the 9160 VSWR/DTF
Bridge.
2 In the reflection main menu press
Cable Loss Cal. softkey. The
cable loss Calibration menu is displayed.
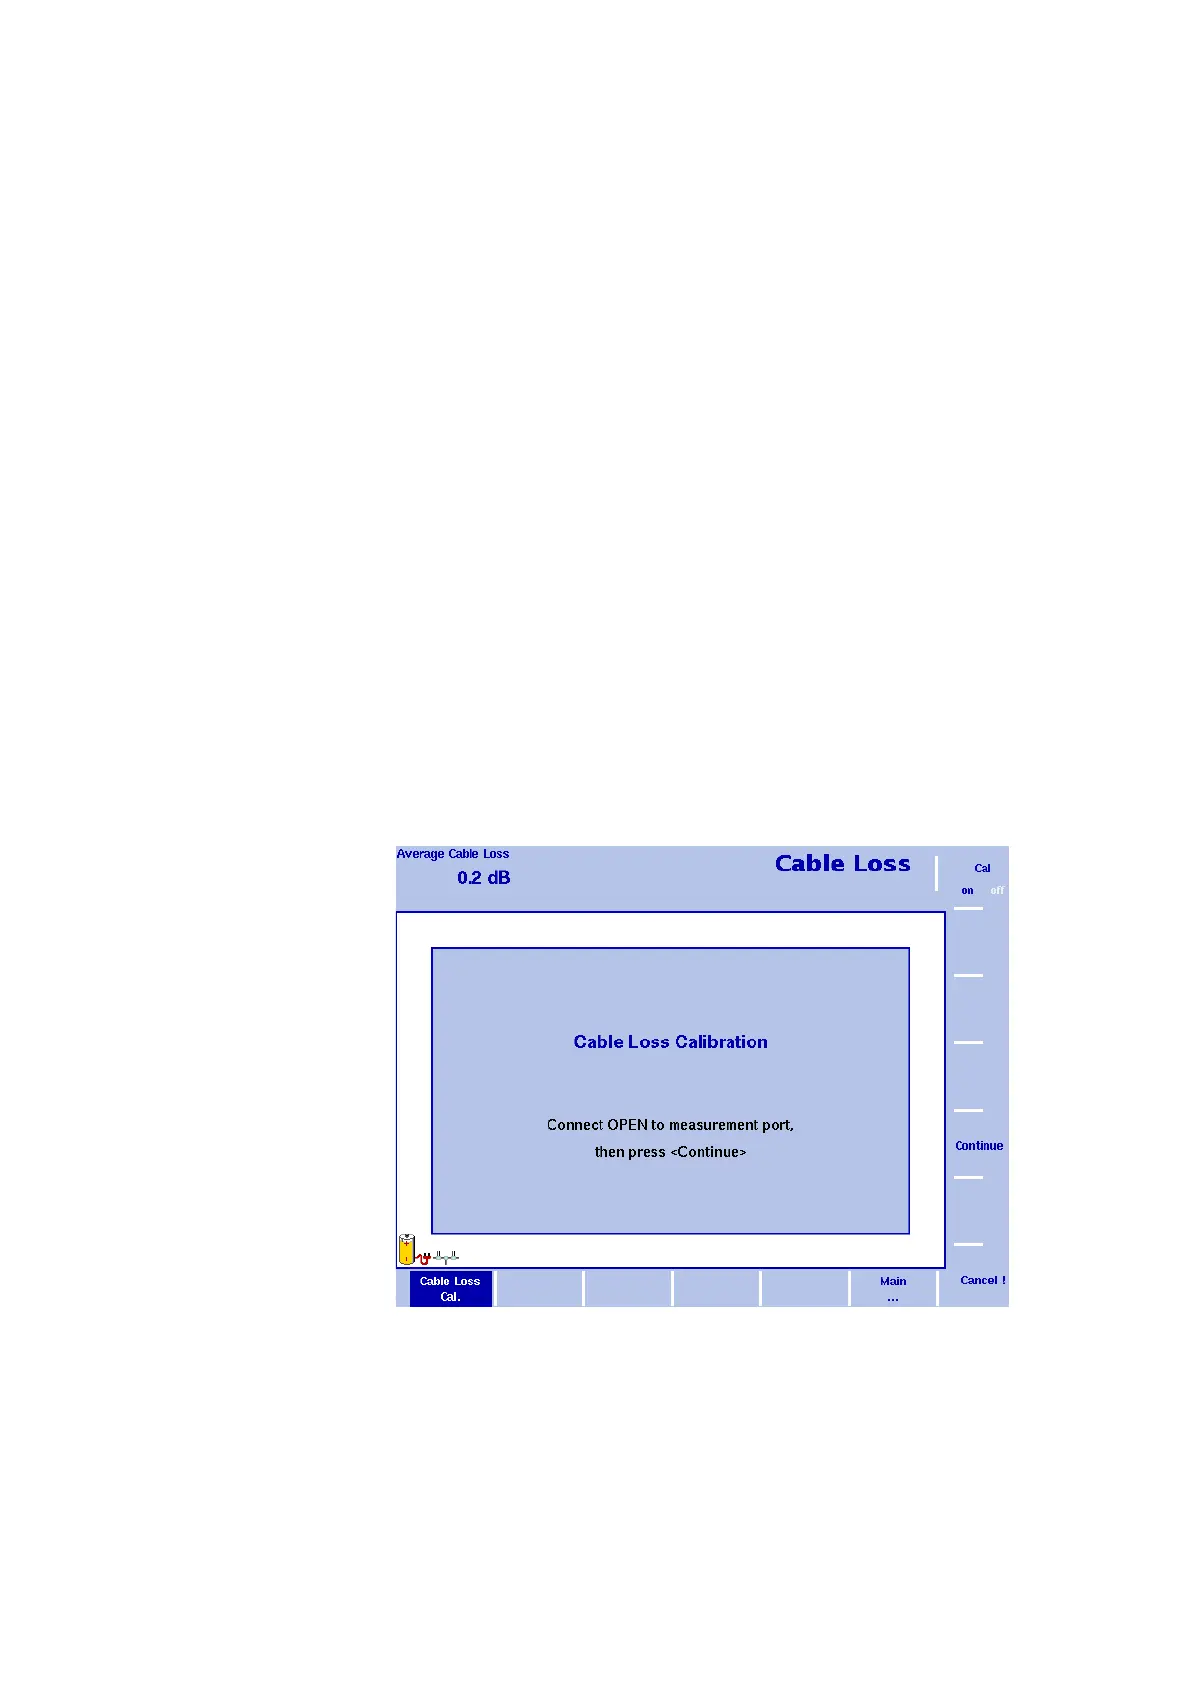
3 The 9102 will guide you through the calibration process by
onscreen messages as shown in Figure 52. When prompted as
shown connect the calibration set to the test port extension cable
and press
Continue. You can abort the calibration process by
pressing the
Cancel ! softkey.
Figure 52 Cable Loss Calibration menu


 To Next Page