Chapter 2 General Operation
Working with the markers
9102 Handheld Spectrum Analyzer Software version 5.31
31
The main menu of the selected mode appears. If you select a new
mode, all parameters are set to the values which were used when
the mode was last active. If, however, you resume the last active
mode, measurements are continued.
Working with the markers
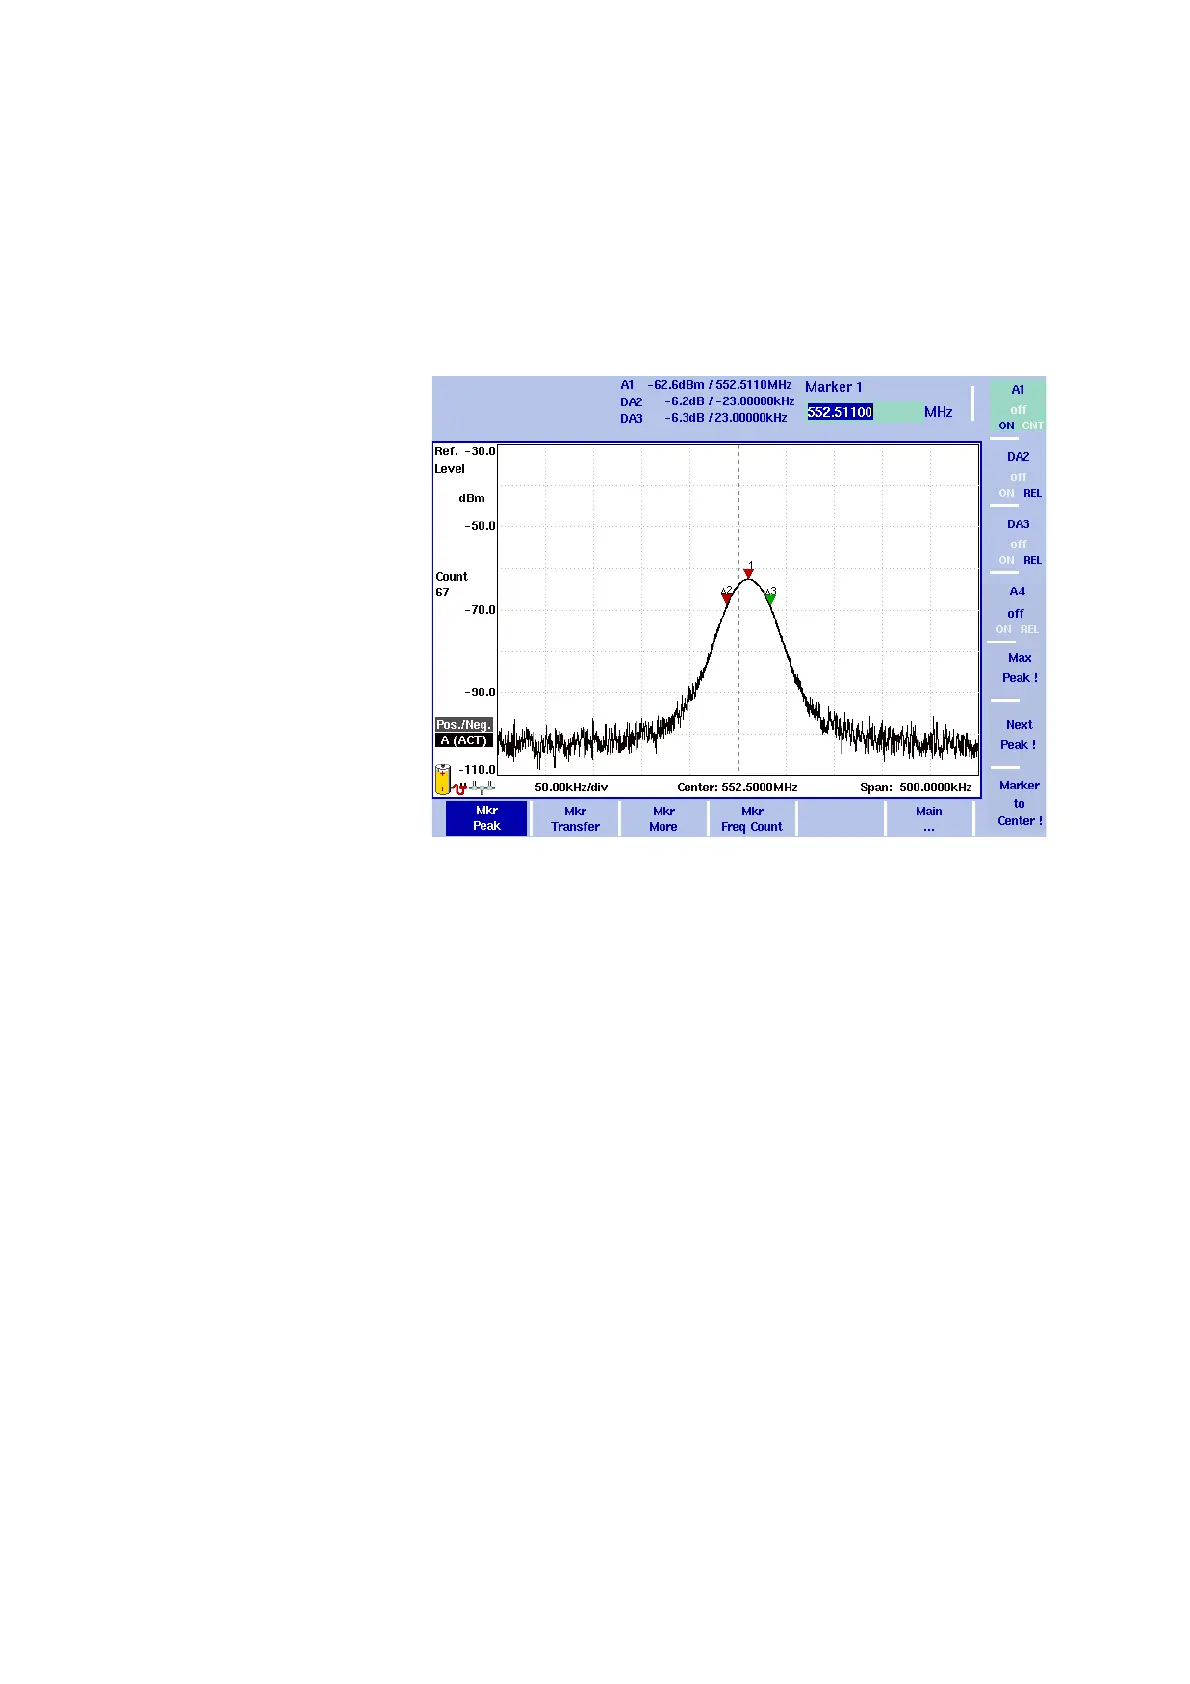
The 9102 includes powerful and easy-to-use marker functions. Up to
six markers can be used; up to five of them can be delta markers.
Markers are easy to place and you can easily affect the center
frequency and the reference level upon a keypress. If you use two
traces you can also use markers on trace A and trace B. The markers
are named accordingly (e.g. A1, B1). Delta markers are identified by D
(e.g. DA1).
It is important to note that if you place the cursor on a signal peak and
then reduce the span, the marker position may be offset a little from
the peak. This is due to the limited resolution of the displayed frequen-
cies when using a high span. After reducing the span, the marker
should be readjusted to the new peak.
Enabling and moving a
marker
1 From the main menu, select Marker. Or push the MKR function key
in any menu.
If you select
Marker from the main menu when no marker is active,
the softkey for marker 1 is highlighted.
To enable marker 1, toggle the softkey until “ON“ is highlighted.
The input field for marker 1 appears.
Figure 6 Example of markers