Deployment Guide 123
Chapter 11 Basic Configuration Examples
This chapter introduces the HiveManager GUI in Enterprise mode through a series of examples showing how to
create a basic configuration of an SSID, hive, and WLAN policy. It then explains how to connect several HiveAPs to
HiveManager, accept them for management, and push the configuration to them over the network.
You can look at any of the following examples individually to study how to configure a specific feature or view all of
them sequentially to understand the basic workflow for configuring and managing HiveAPs through HiveManager.
The examples are as follows:
• "Example 1: Defining an SSID" on page 124
Define the security and network settings that wireless clients and HiveAPs use to communicate.
• "Example 2: Creating a Hive" on page 127
Create a hive so that the HiveAPs can exchange information with each other to coordinate client access,
provide best-path forwarding, and enforce QoS policy.
• "Example 3: Creating a WLAN Policy" on page 128
Define a WLAN policy, which contains the SSID and hive defined in the first two examples.
• "Example 4: Connecting HiveAPs to HiveManager" on page 129
Cable two HiveAPs to the network to act as portals and set up a third one as a mesh point. Put the HiveAPs
on the same subnet as HiveManager and allow them to make a CAPWAP connection to HiveManager.
• "Example 5: Assigning the Configuration to HiveAPs" on page 135
Assign the WLAN policy to the HiveAPs. Also, change HiveAP login settings and—if necessary—country codes.
In the first three examples, you define configuration objects in the Configuration section of the GUI. In the last two
examples, you connect some HiveAPs to the network, enable them to make a CAPWAP connection to HiveManager,
and then manage them in the Monitor section of the GUI.
Note: Although maps provide a convenient method for organizing and managing your HiveAP deployment, they
are not strictly required and are not covered in this chapter. For information about using maps, see
"Example 1: Mapping Locations and Installing HiveAPs" on page 140.
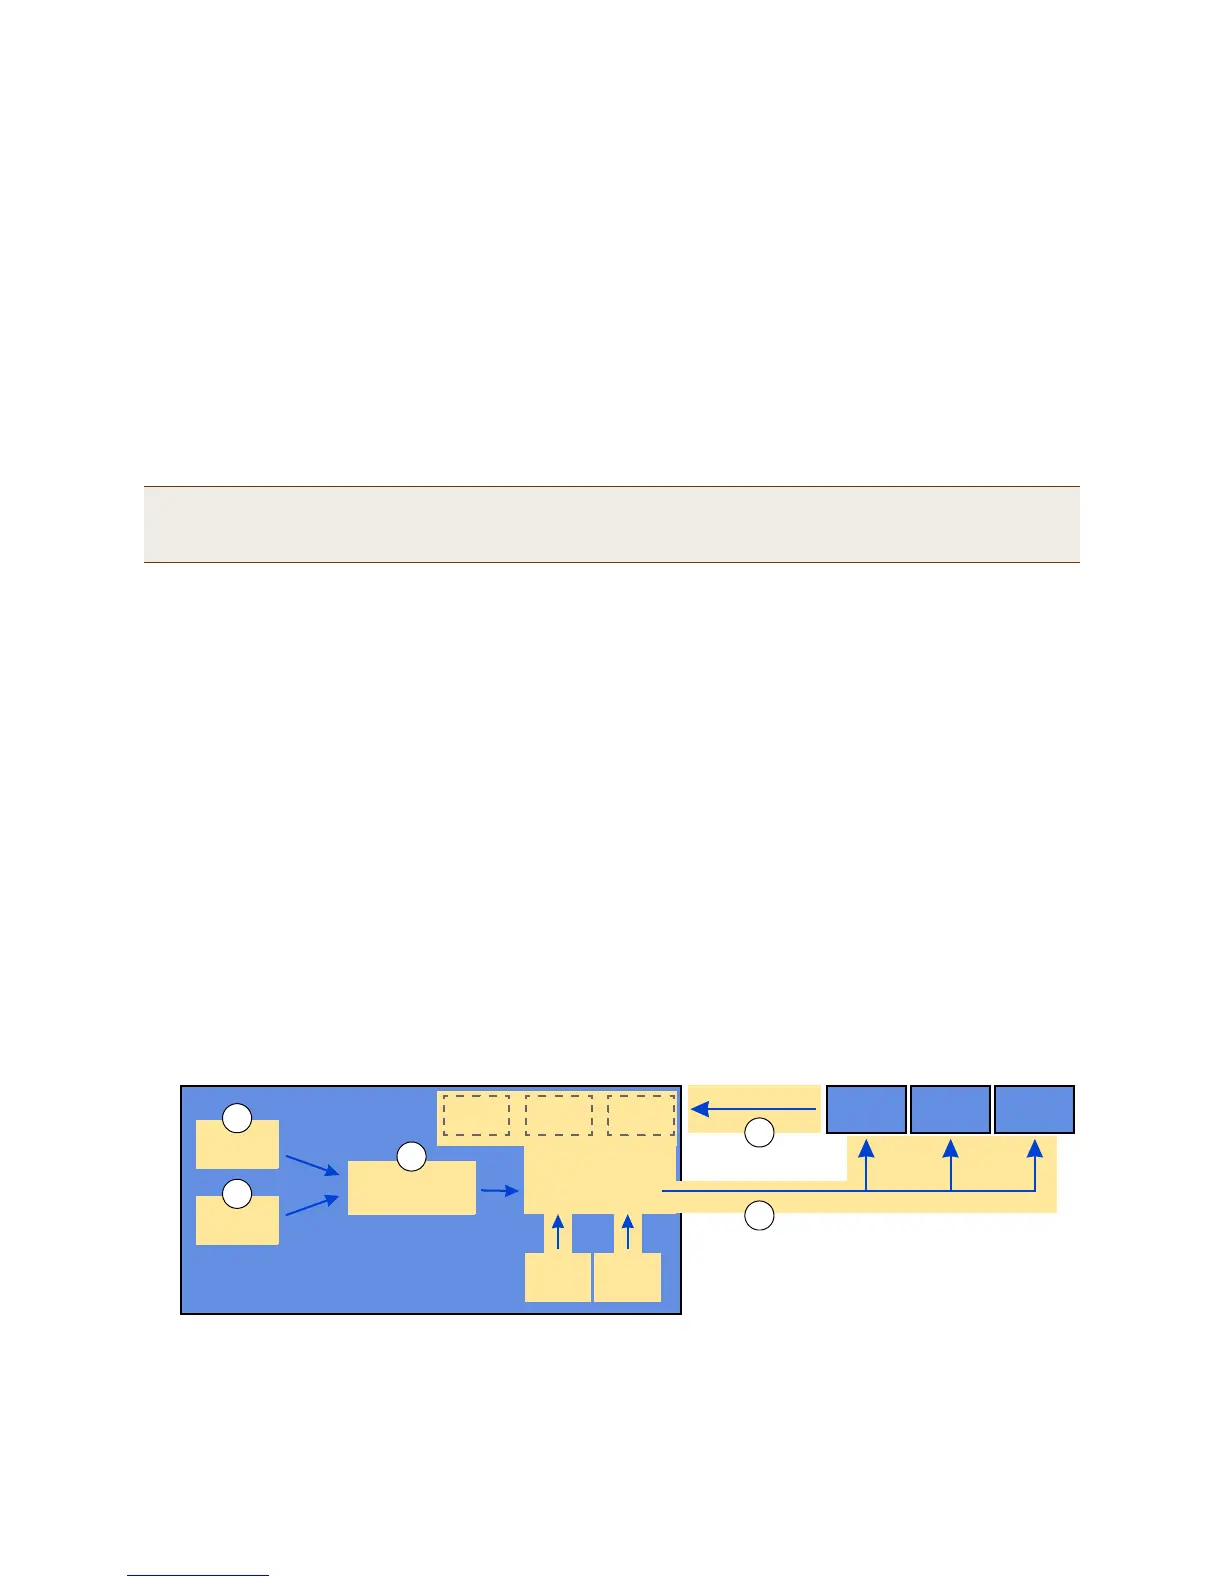
Hive
SSID
WLAN Policy
1
2
3
4
Managed
HiveAP
Objects
5
New
Login
(Country
Code)
HiveAP1 HiveAP2 HiveAP3
Connect
HiveManager
Configuration
The conceptual relationships among the
configuration examples in this chapter.
HiveAP1 HiveAP2 HiveAP3
Physical devices on the network