Chapter 12 Common Configuration Examples
140 Aerohive
EXAMPLE 1: MAPPING LOCATIONS AND INSTALLING HIVEAPS
HiveManager allows you to mark the location of HiveAPs on maps so that you can track devices and monitor their
status. First, you must upload the maps to HiveManager, and then name and arrange them in a structured hierarchy
(see "Setting Up Topology Maps"). After that, you can follow one of two ways to install HiveAPs so that you can later
put their corresponding icons on the right maps (see "Preparing the HiveAPs" on page 144).
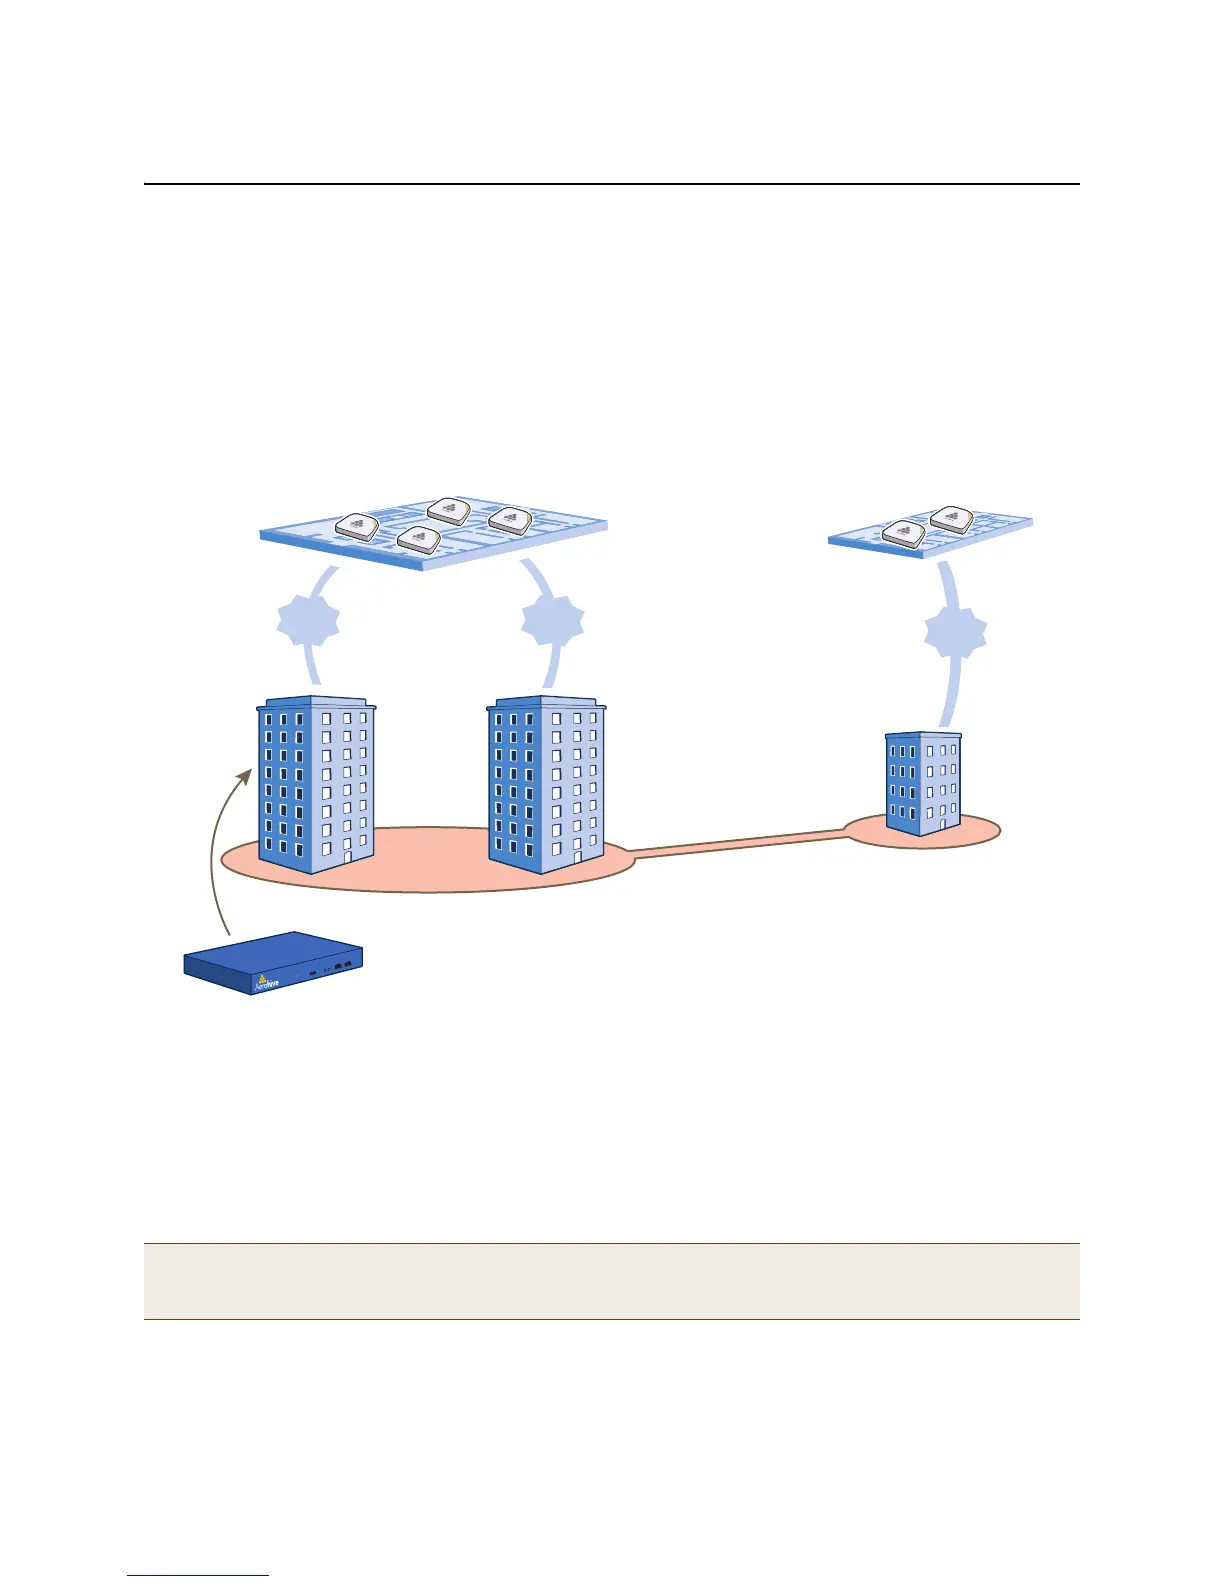
In this example, you set up maps and install over 70 HiveAPs at three locations in a corporate network. After that,
you can use HiveManager to create configurations for them, and then push the configurations to them over the
network. The general design of the deployment is shown in Figure 1.
Figure 1 Deployment overview
Setting Up Topology Maps
In this example, you upload maps to HiveManager showing floor plans for three office buildings and organize them in
a hierarchical structure. You need to make .png of .jpg files of drawings or blueprints showing the layout of each
floor. Also, as an easy means of organizing the maps in the HiveManager GUI, you create a file showing the three
buildings HQ-B1, HQ-B2, and Branch-1. By using this drawing at the top topographical level, you can display icons for
each floor of each building. You can then click an icon to link to its corresponding map. This is shown in Figure 2 on
page 141.
Note: Instead of using an illustration of buildings, you can also set the image of the root map as None and use the
Add Wall tool to draw three simple rectangles. This option is useful when you have floor plans but not an
illustration depicting the external buildings.
x 8
Floors
4 HiveAPs
per Floor
x 8
Floors
2 HiveAPs
per Floor
x 4
Floors
Corporate
Headquarters
Branch
Office
64
HiveAPs
Tot al
8
HiveAPs
Tot al
Branch1
HQ B1 HQ B2
VPN Tunnel
HiveManager
(in “HQ B1”)