Chapter 6 HiveAP 100 Series Platforms
86 Aerohive
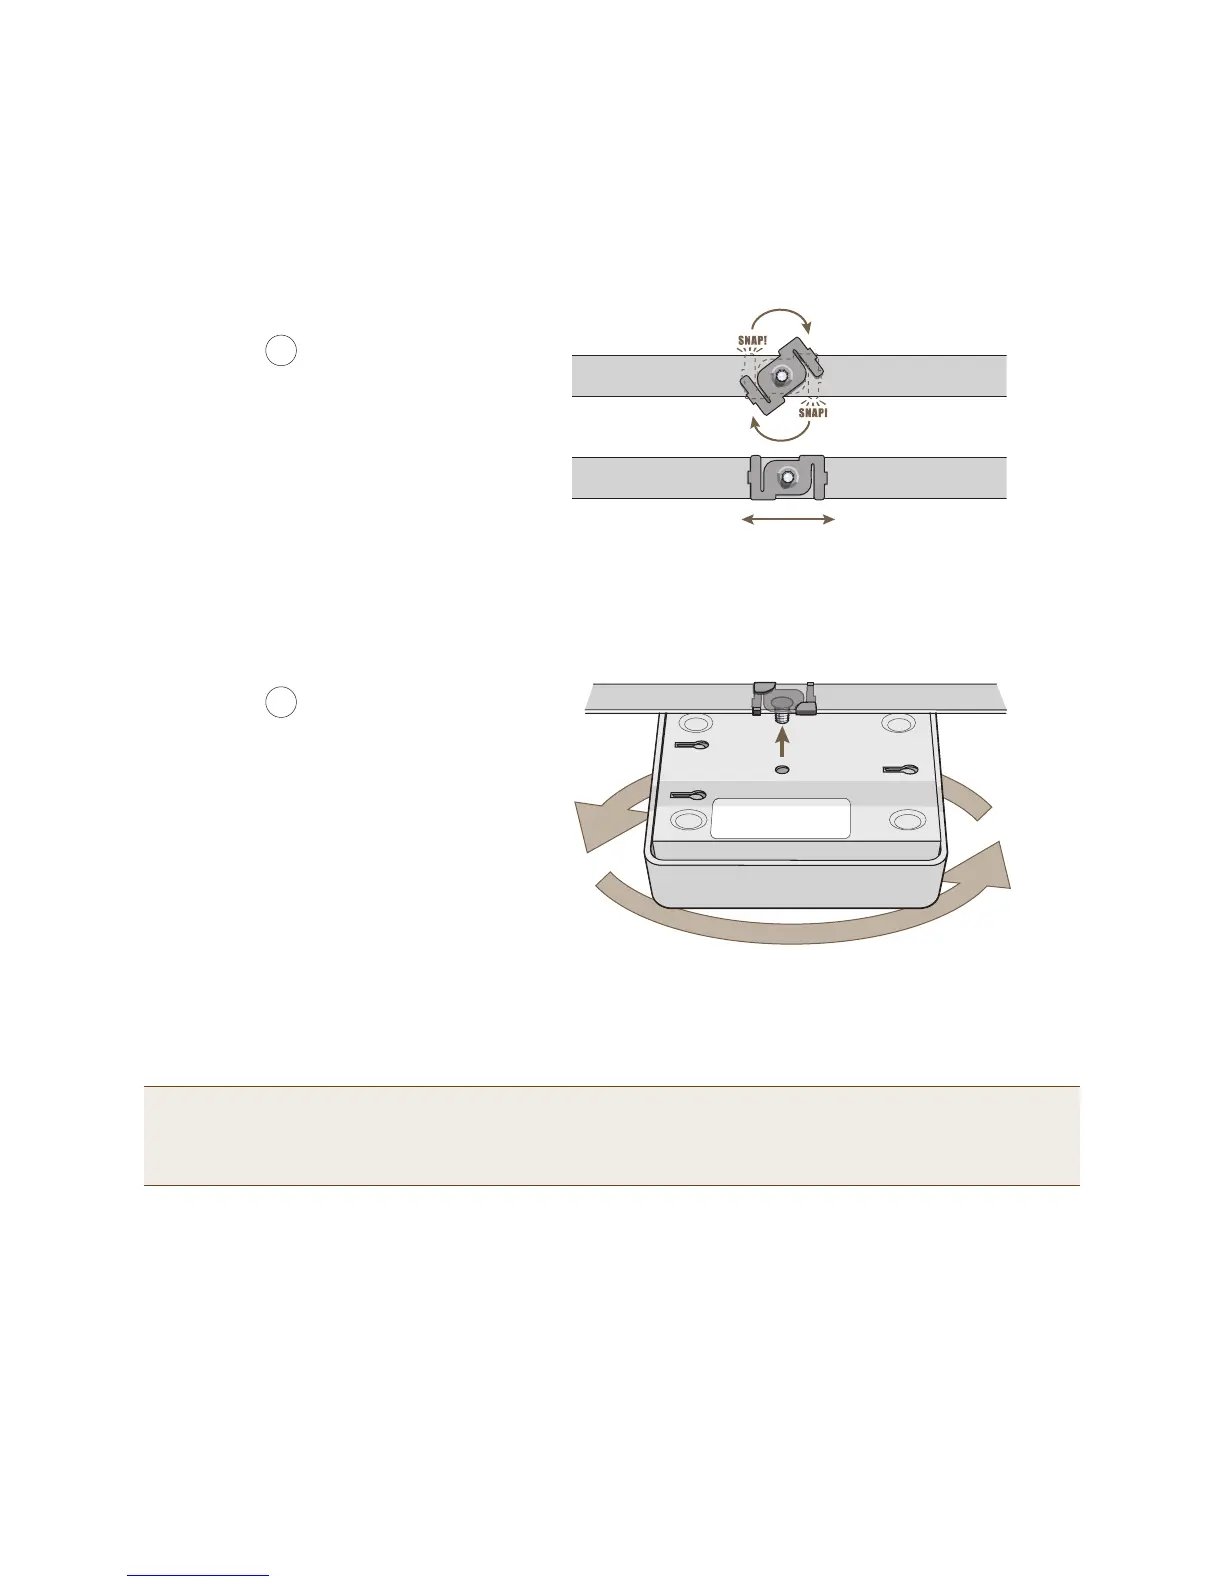
3. Twist the track clip until it snap onto the ceiling track, as shown in Figure 5. You can then slide the clip along
the track to reposition it if necessary.
Figure 5 Securing the clip to the track and repositioning it if necessary
4. Holding the HiveAP upside down, raise it until the threaded stud on the track clip enters the hole on the HiveAP.
Then revolve the HiveAP until it is firmly attached to the clip (see Figure 6).
Figure 6 Attaching the HiveAP to the track clip
5. When you have the HiveAP in the correct location, cut or drill a hole in the ceiling through which you can then
pass the Ethernet and power cables. Pass the cables through the hole and attach them to the HiveAP.
6. When done, adjust the ceiling tiles back into their former position.
Note: You can also mount the HiveAP 100 series device to a solid ceiling—or the underside of any horizontal
object such as a cross beam—using three #6 or #8 screws. Position the three screws in a T-shaped layout:
two screws 2" (5 cm) apart from each other and the third screw center-aligned between them and 4.75" (12
cm) away. Then attach the HiveAP to the screws as explained in "Surface Mount" on page 87.
Twist the clip until the prongs
snap into place and grip the
edges of the track.
If necessary, slide the clip along
the track to position it exactly
where you want it to be.
(worms’s eye view with ceiling tiles removed for clarity)
3
4
With the HiveAP upside down, lift it
until the threaded stud on the track
clip enters the hole in the HiveAP.
Revolve the HiveAP until it is
securely attached to the clip.
HiveAP 110 or 120