Mount Drum belt
1. Take drum belt from accessories box.
11/20
2903S EN 201212072903S EN 20121207
8
Mount Drum belt
1 Take drum belt from accessories box.
3 Push drum belt tensioner down and
hold it.
5 Close drum compartment door.
2 Open drum compartment door.
4 Mount drum flat belt with the text head
up on the inner side. Gently release belt
tensioner.
If the printer is not used for a long time
(at least 4 weeks),
it is recommended to remove the belt.
2. Open drum compartment door.
11/20
2903S EN 201212072903S EN 20121207
8
Mount Drum belt
1 Take drum belt from accessories box.
3 Push drum belt tensioner down and
hold it.
5 Close drum compartment door.
2 Open drum compartment door.
4 Mount drum flat belt with the text head
up on the inner side. Gently release belt
tensioner.
If the printer is not used for a long time
(at least 4 weeks),
it is recommended to remove the belt.
3. Push drum belt tensioner down and hold it.
11/20
2903S EN 201212072903S EN 20121207
8
Mount Drum belt
1 Take drum belt from accessories box.
3 Push drum belt tensioner down and
hold it.
5 Close drum compartment door.
2 Open drum compartment door.
4 Mount drum flat belt with the text head
up on the inner side. Gently release belt
tensioner.
If the printer is not used for a long time
(at least 4 weeks),
it is recommended to remove the belt.
4. Mount drum flat belt with the text head up on the inner side. Gently
release belt tensioner.
11/20
2903S EN 201212072903S EN 20121207
8
Mount Drum belt
1 Take drum belt from accessories box.
3 Push drum belt tensioner down and
hold it.
5 Close drum compartment door.
2 Open drum compartment door.
4 Mount drum flat belt with the text head
up on the inner side. Gently release belt
tensioner.
If the printer is not used for a long time
(at least 4 weeks),
it is recommended to remove the belt.
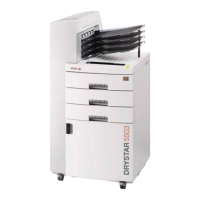
Drystar 5500, Drystar 5503 | Plug & Play Installation Manual | 153
2901J EN 20191018 0826
 Loading...