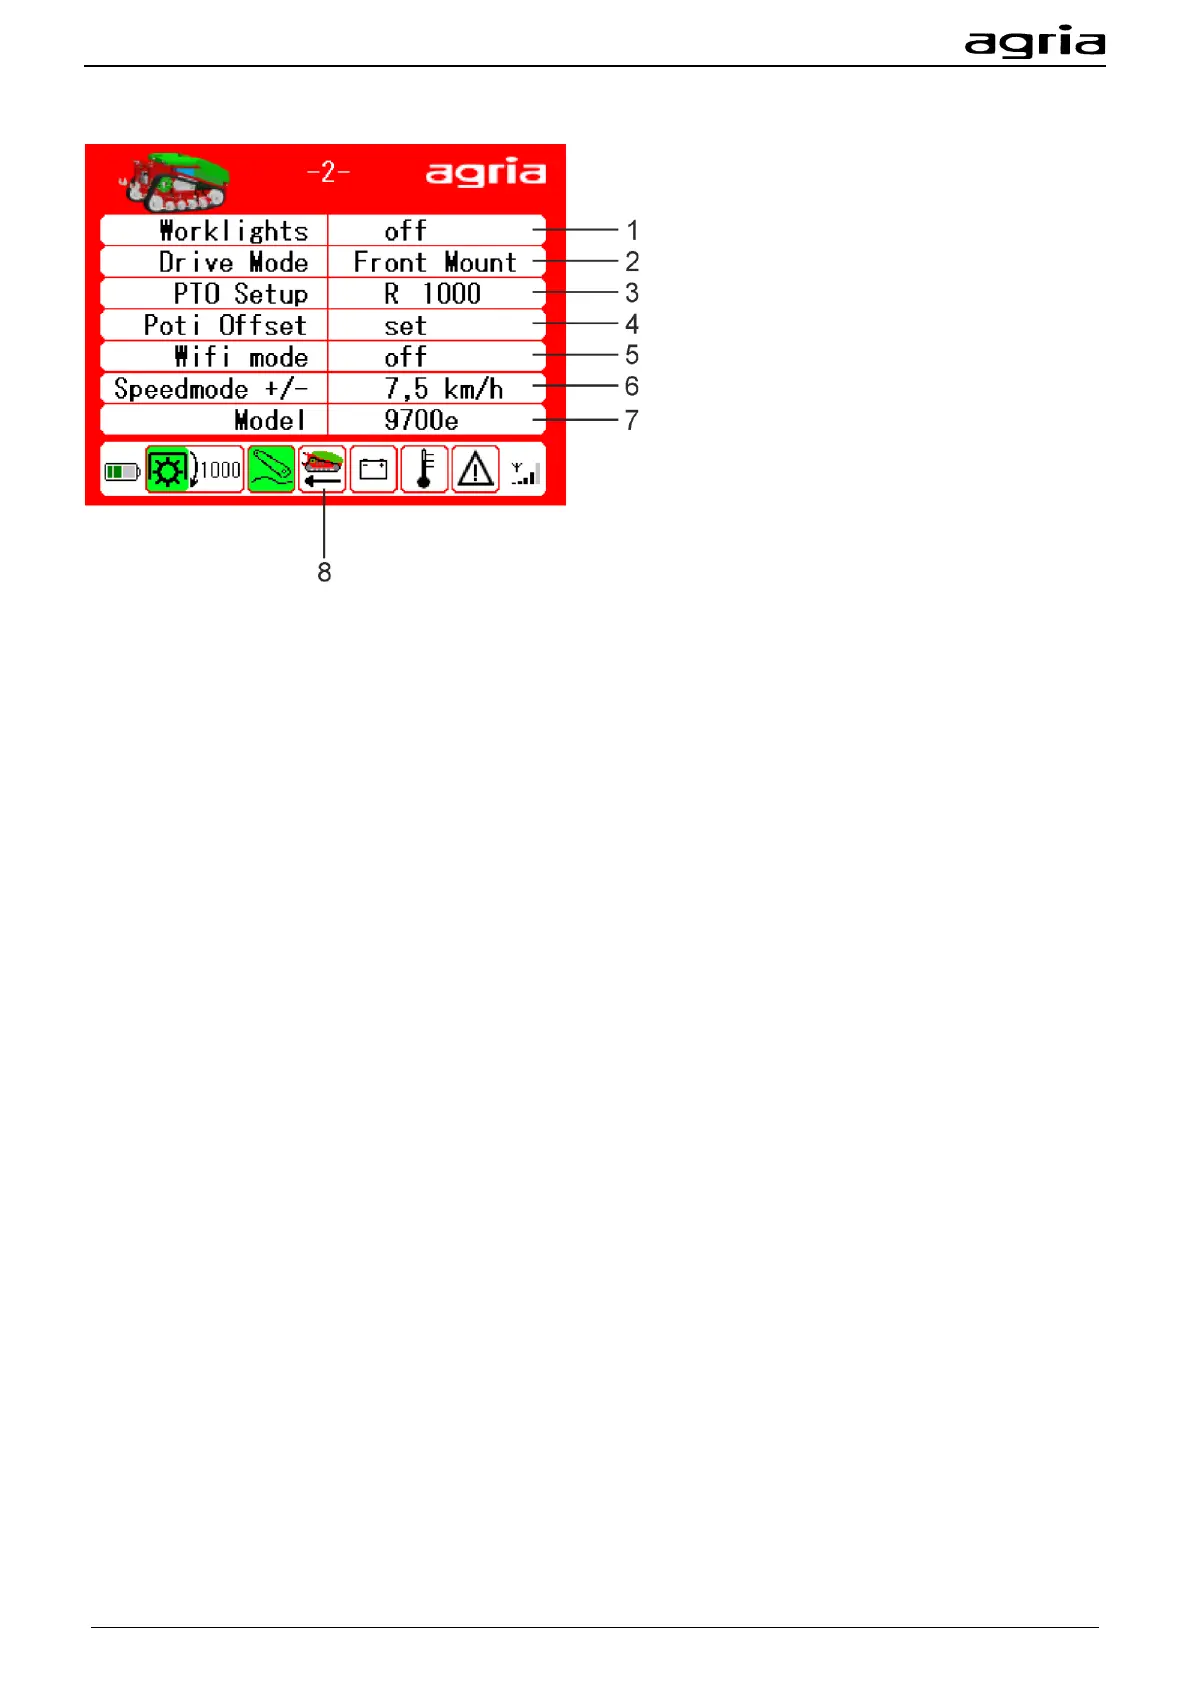
Menu page 2 Options and settings
Here you can see additional options and setting possibilities of the remote control:
(1) Option: LED working lights - not assigned
(2) Driving direction setting
Navigate with the arrow keys (B/18, B/19) to the field Drive Mode and press Enter (B/20) to change the
driving direction setting.
The position lamps indicate the driving direction. Red position lamps indicate a reverse driving direction
and white position lamps a forward driving direction.
(3) Adjustment sense of rotation and speed
Navigate with the arrow keys (B/18, B/19) to the field R/L and press Enter (B/20) to change the sense of
rotation right to left.
Navigate with the arrow keys (B/18, B/19) to the numeric field and press Enter (B/20) to switch on the PTO
shaft speed with the arrow keys (B/18, B/19). Press Enter (B/20) to confirm your entry.
(4) Drift potentiometer
Adjusting the drift potentiometer: Move the cursor with the arrow keys (B/18, B/19) to the position Potenti-
ometer offset - Move the drift potentiometer (B/14) to the mechanical centre position - Press Enter (B/20)
(5) Option Wi-Fi mode - not assigned
(6) Adjustment travel speed
Navigate with the arrow keys (B/18, B/19) to the field Speed mode +/-. Press Enter (B/20) to confirm.
Select the required driving position with (B/3).
Driving position 1 ranges up to 2.5 km/h, driving positions 2 and 3 are individually adjustable. Using the
arrow keys (B/18, B/19), set the selected driving position and press Enter (B/20) to confirm.
(7) Model
(8) Note driving direction
The arrow indicates the set driving direction.