6.3 USB diagnostics
In case you get errors displayed on the remote control, you can read and save the errors on the controller.
You can send this data to your agria dealer for diagnostic purposes. To do this, proceed as follows:
• Unlock the emergency stop switch on the machine. To carry out a diagnosis, the remote control must
be connected but the machine must not be ready to travel.
• Open the service flap (A/24).
• Undo the six hexagon socket screws (M5) of the hood of the electric box.
• Put the hood aside so that you can work well on the electrical box.
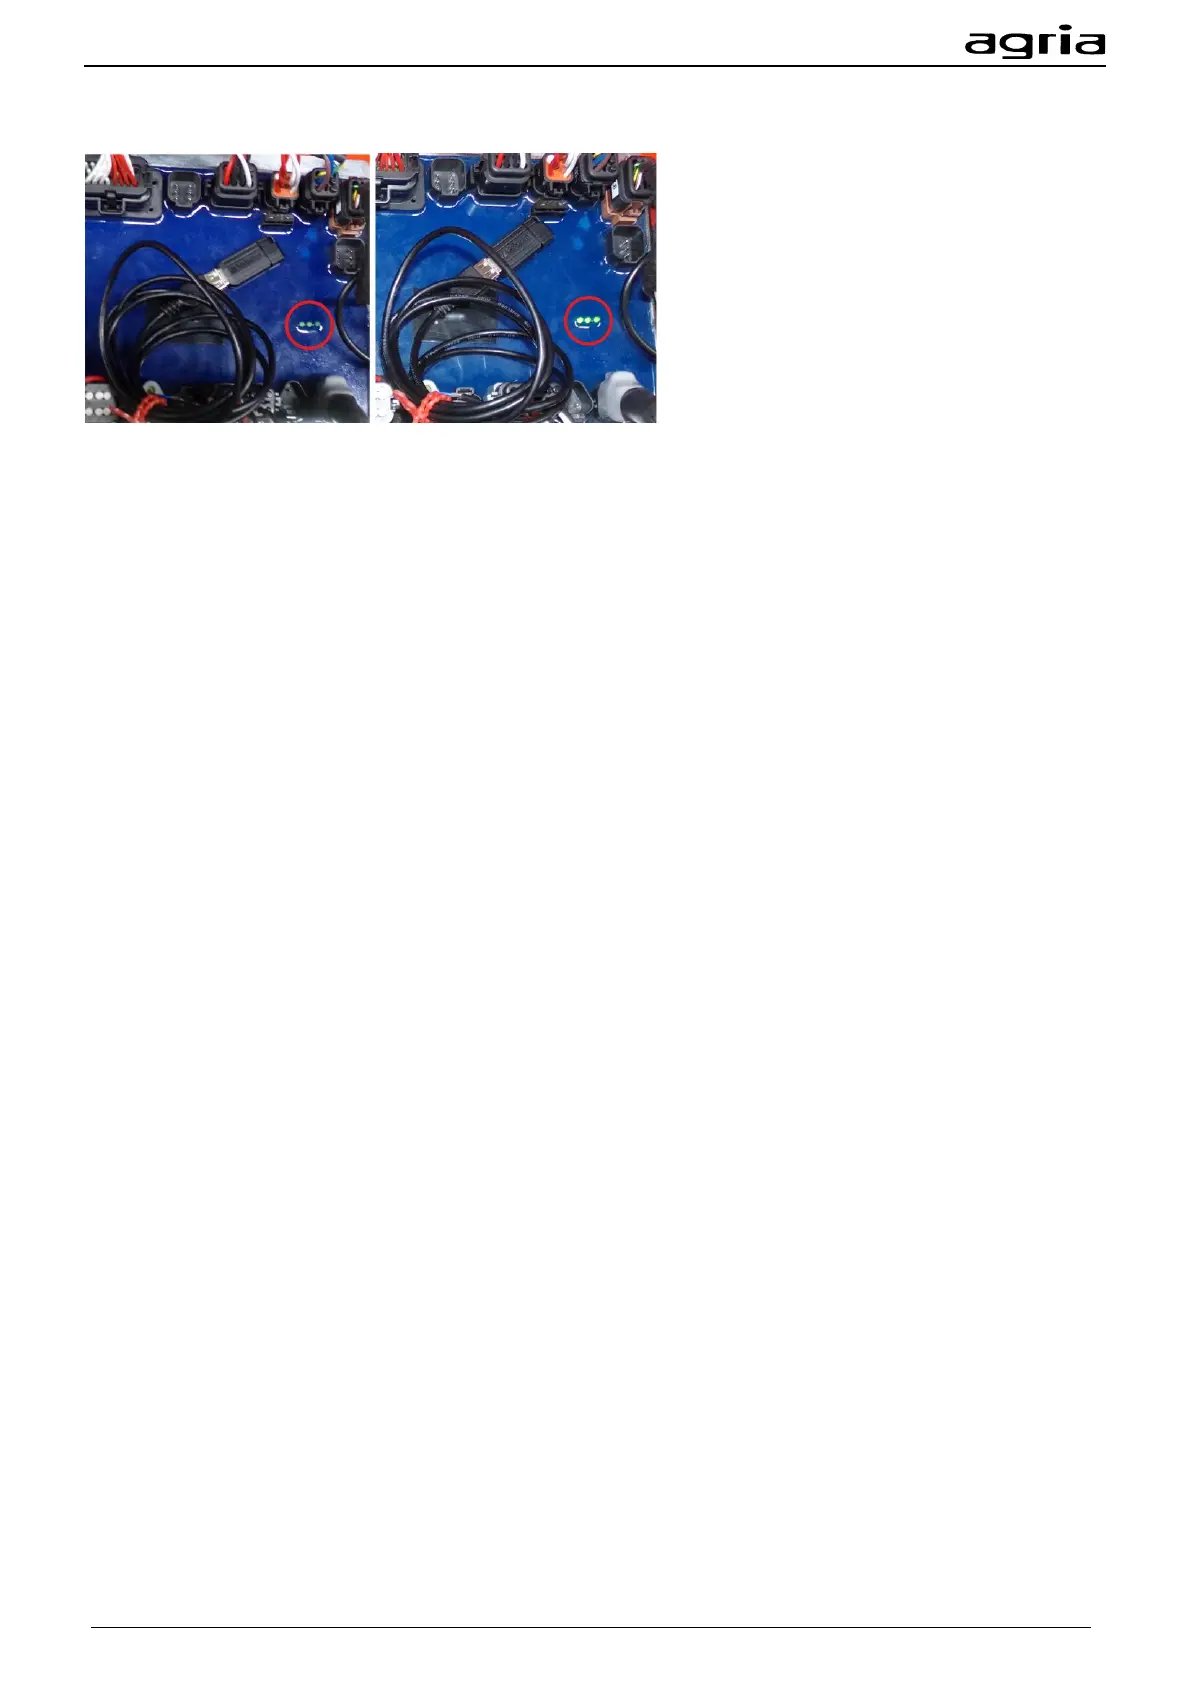
• Connect the USB flash drive (111562) to the USB interface X17 cable (110430).
• Connect the USB interface X17 cable to the central controller at slot X17 as shown in the figure above.
• Note the LEDs of the central controller, they are marked with the red circle in the figure above. At first
they glow briefly. Then they flash at short intervals, after which they light up permanently again.
• You can now reactivate the emergency stop switch of the machine and disconnect the USB interface
X17 cable and the USB flash drive from the controller.
• The data is now stored on the USB flash drive; the file name is: "Logfile.txt".
• Attach the hood of the electric box with the six hexagon socket screws.
• Connect the USB flash drive to your PC and send the "Logfile.txt" file to your agria dealer.