GS910 Series Gigabit Ehternet Unmanaged Switch Installation and User’s Guide
42
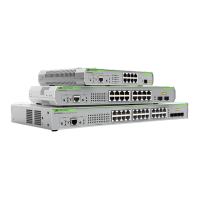
4. Orient the brackets against the sides of the switch and secure them to
the switch with the four screws as shown in Figure 21.
Figure 21. Attaching the Brackets to the AT-GS910/24 Switch
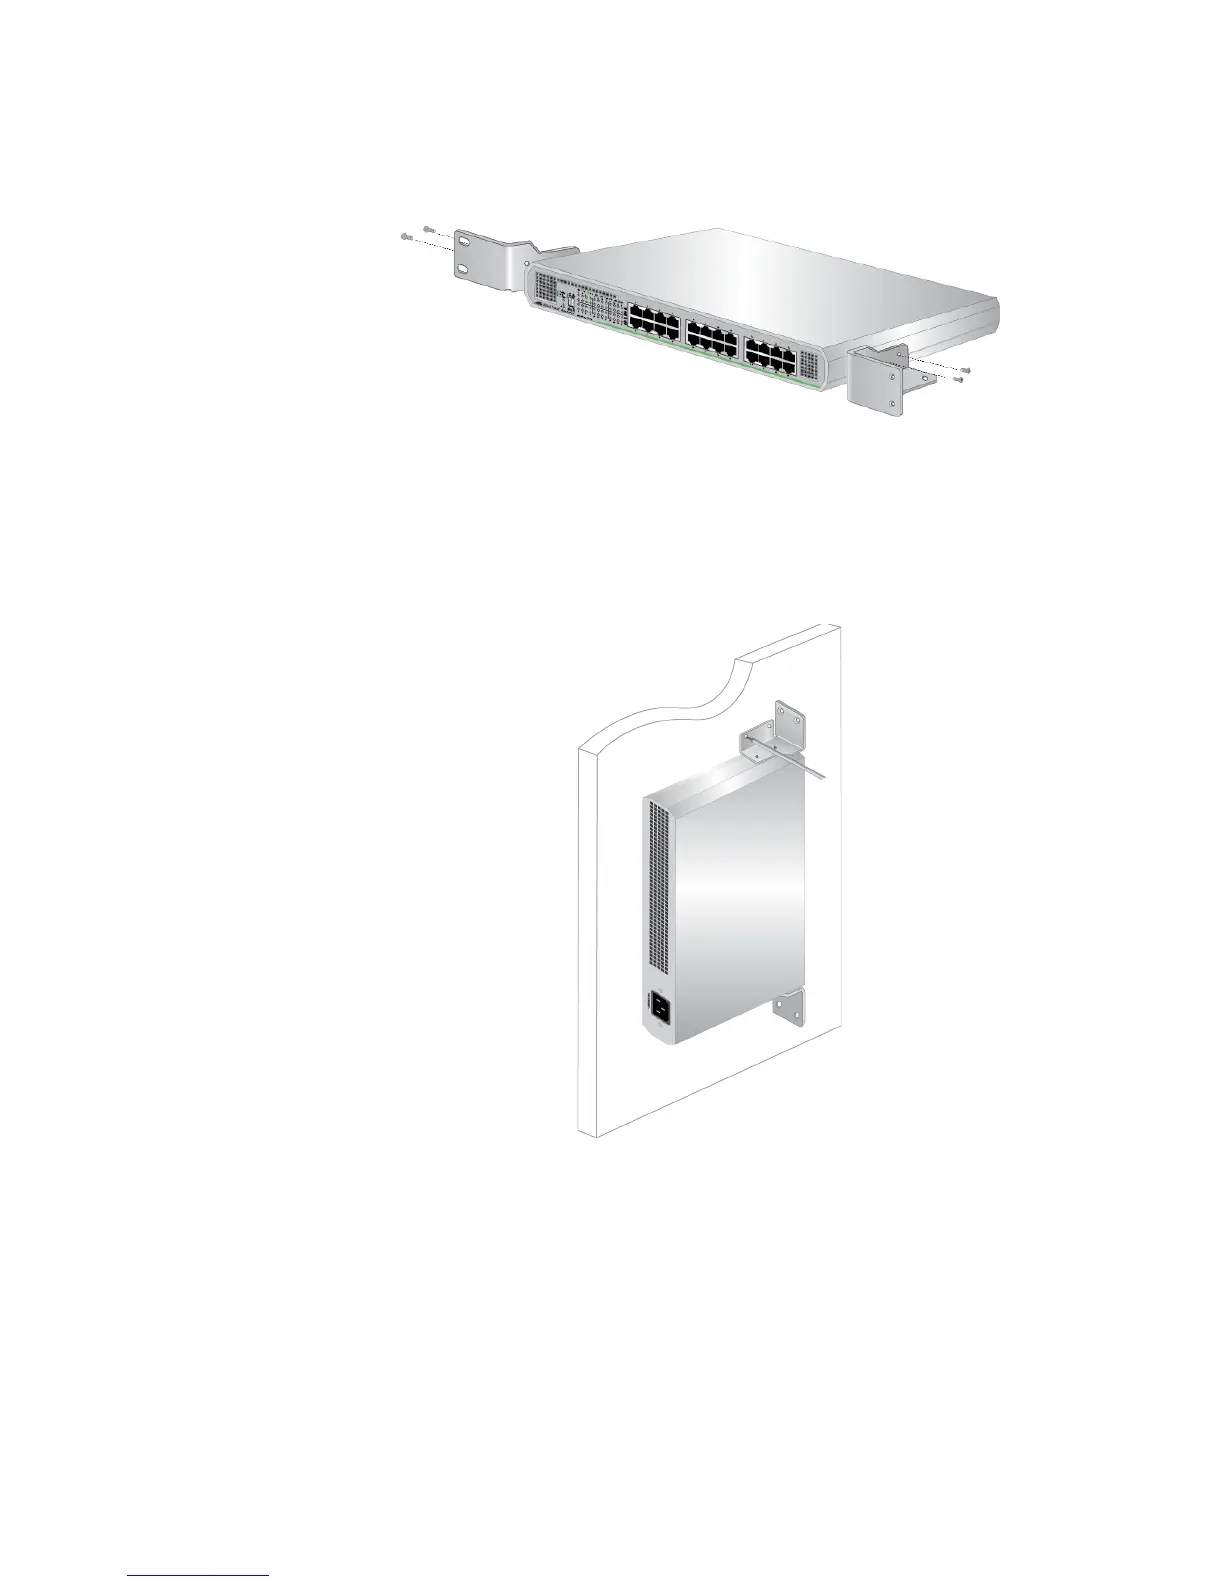
5. Have another person hold the switch with the brackets at the wall
location where the switch is to be installed, while you use a pencil to
mark the wall with the locations of the four holes in the brackets. See
Figure 22 as an example.
x
Figure 22. Marking the Screw Hole Locations
6. Pre-drill the marked locations on the wall.
7. Install the four plastic anchors into the wall in the holes drilled in Step
6.

 Loading...