GS910 Series Gigabit Ehternet Switch Installation and User’s Guide
54
Installing a Switch Using the AT-BRKT-J23 Wall Mount Kit
This section shows you steps to install a switch on a wall using the
AT-BRKT-J23 kit.
What to Prepare Before installing a switch on a wall, make sure that the following items are
ready.
An AT-BRKT-J23 wall mount kit
Four screws to attach the brackets to a wall
Four plastic anchors for the screws
Phillips-head screwdriver
Pencil
Screws and plastic anchors are not included in the shipping box.
You must provide screws that hold the switch securely to the wall.
Installing a
Switch Using the
Wall Mount Kit
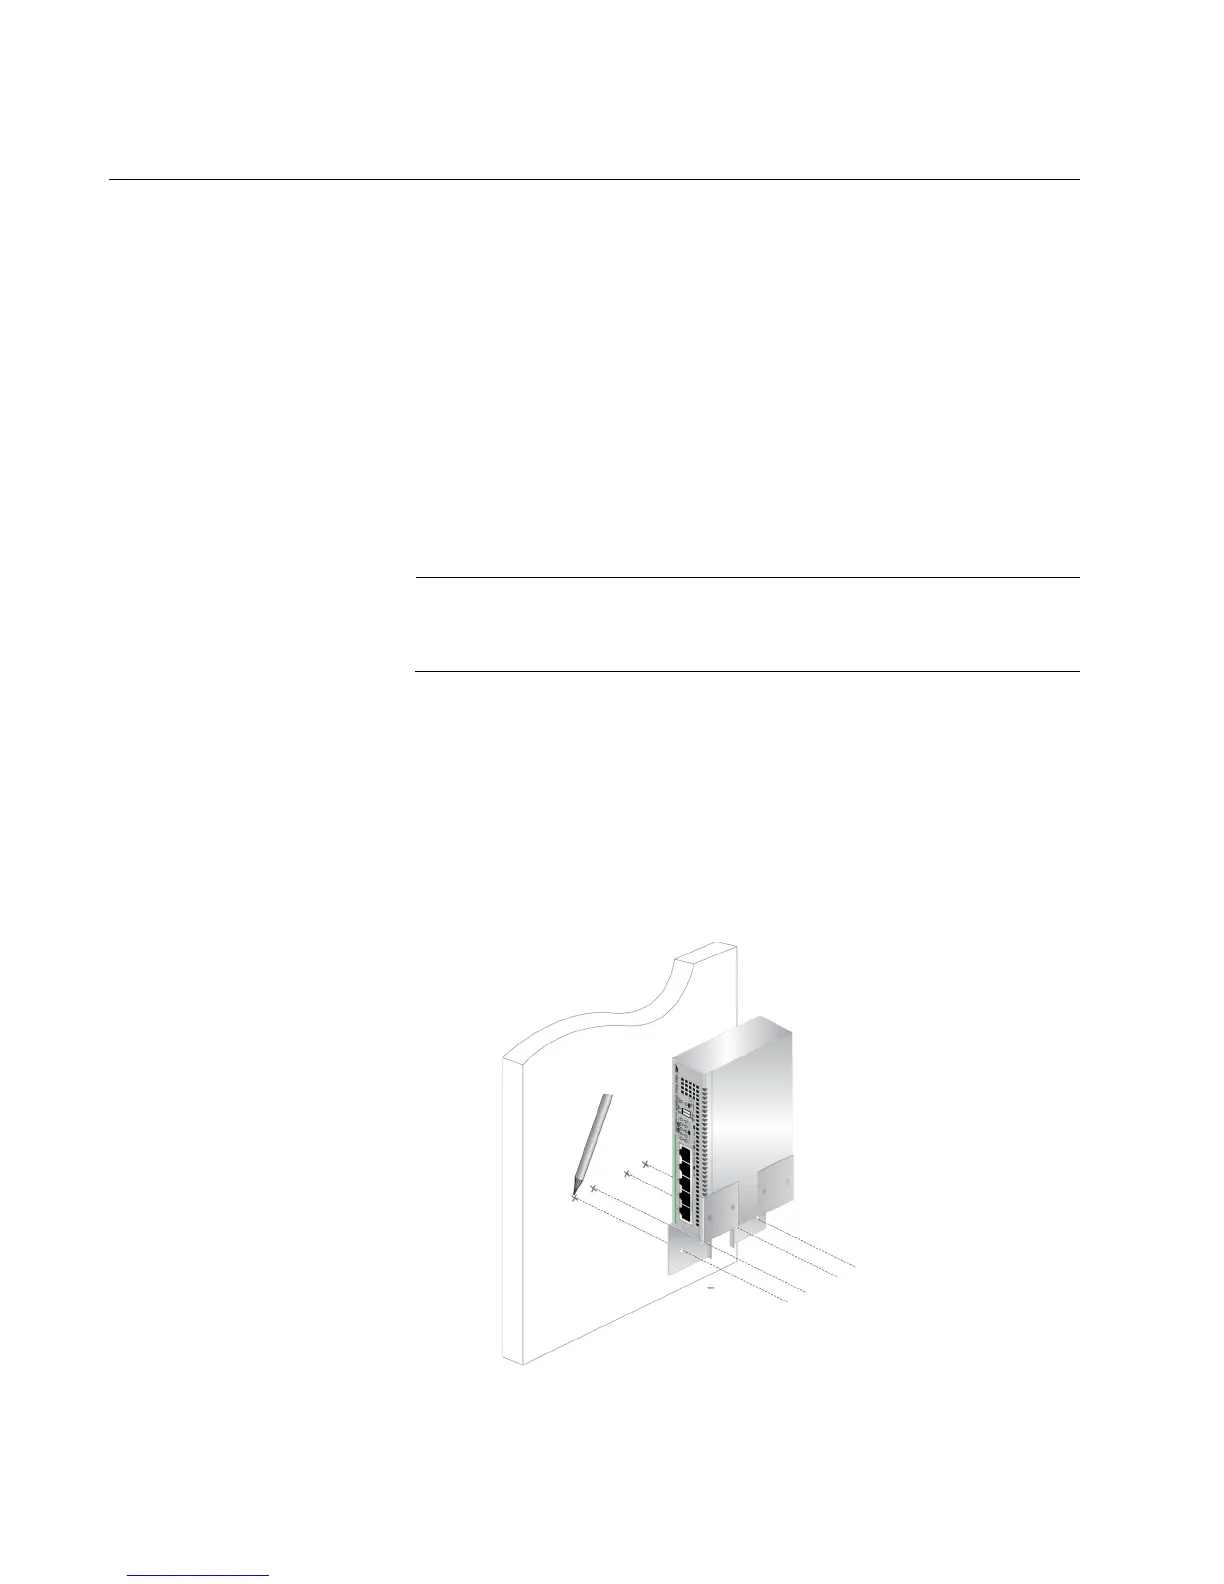
To install the switch on a wall, perform the following procedure:
1. Orient the brackets against the sides of the switch.
2. Have another person hold the switch with the brackets at the wall
location where the switch is to be installed, while you use a pencil to
mark the wall with the locations of the four holes in the brackets. See
Figure 31 as an example.
x
Figure 31. Marking the Screw Hole Locations

 Loading...