Chapter 2: Installation
37
Installing the Switch on a Wall
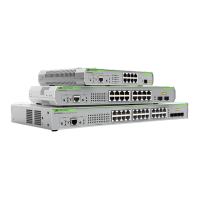
The AT-GS910/5, AT-GS910/8, AT-GS910/8E, AT-GS910/16, and
AT-GS910/24 switches can be mounted on a wall.
Guidelines for
Installing the
Switch on a Wall
Before planning to install the switch on a wall, review the following
guidelines:
To install the AT-GS910/16 or AT-GS910/24 switch, use the
brackets included in the shipping box.
To install the AT-GS910/5, AT-GS910/8, or AT-GS910/8E switch,
you must purchase the AT-BRKT-J23 wall mount brackets
separately.
The AT-GS910/5, AT-GS910/8, AT-GS910/8E, and AT-GS910/16
switches can be mounted on the wall with the front panel facing left
or right. The AT-GS910/24 switch must be mounted on the wall
with the rear panel facing left. See Table 8.
Table 8. Correct and Incorrect Orientations
Front Panel
Facing-Left
Rear Panel
Facing-Left
AT-GS910/5
AT-GS910/8
AT-GS910/8E
AT-GS910/16
AT-GS910/24

 Loading...