AMDV960H4 User Manual
www.amcrest.com 25
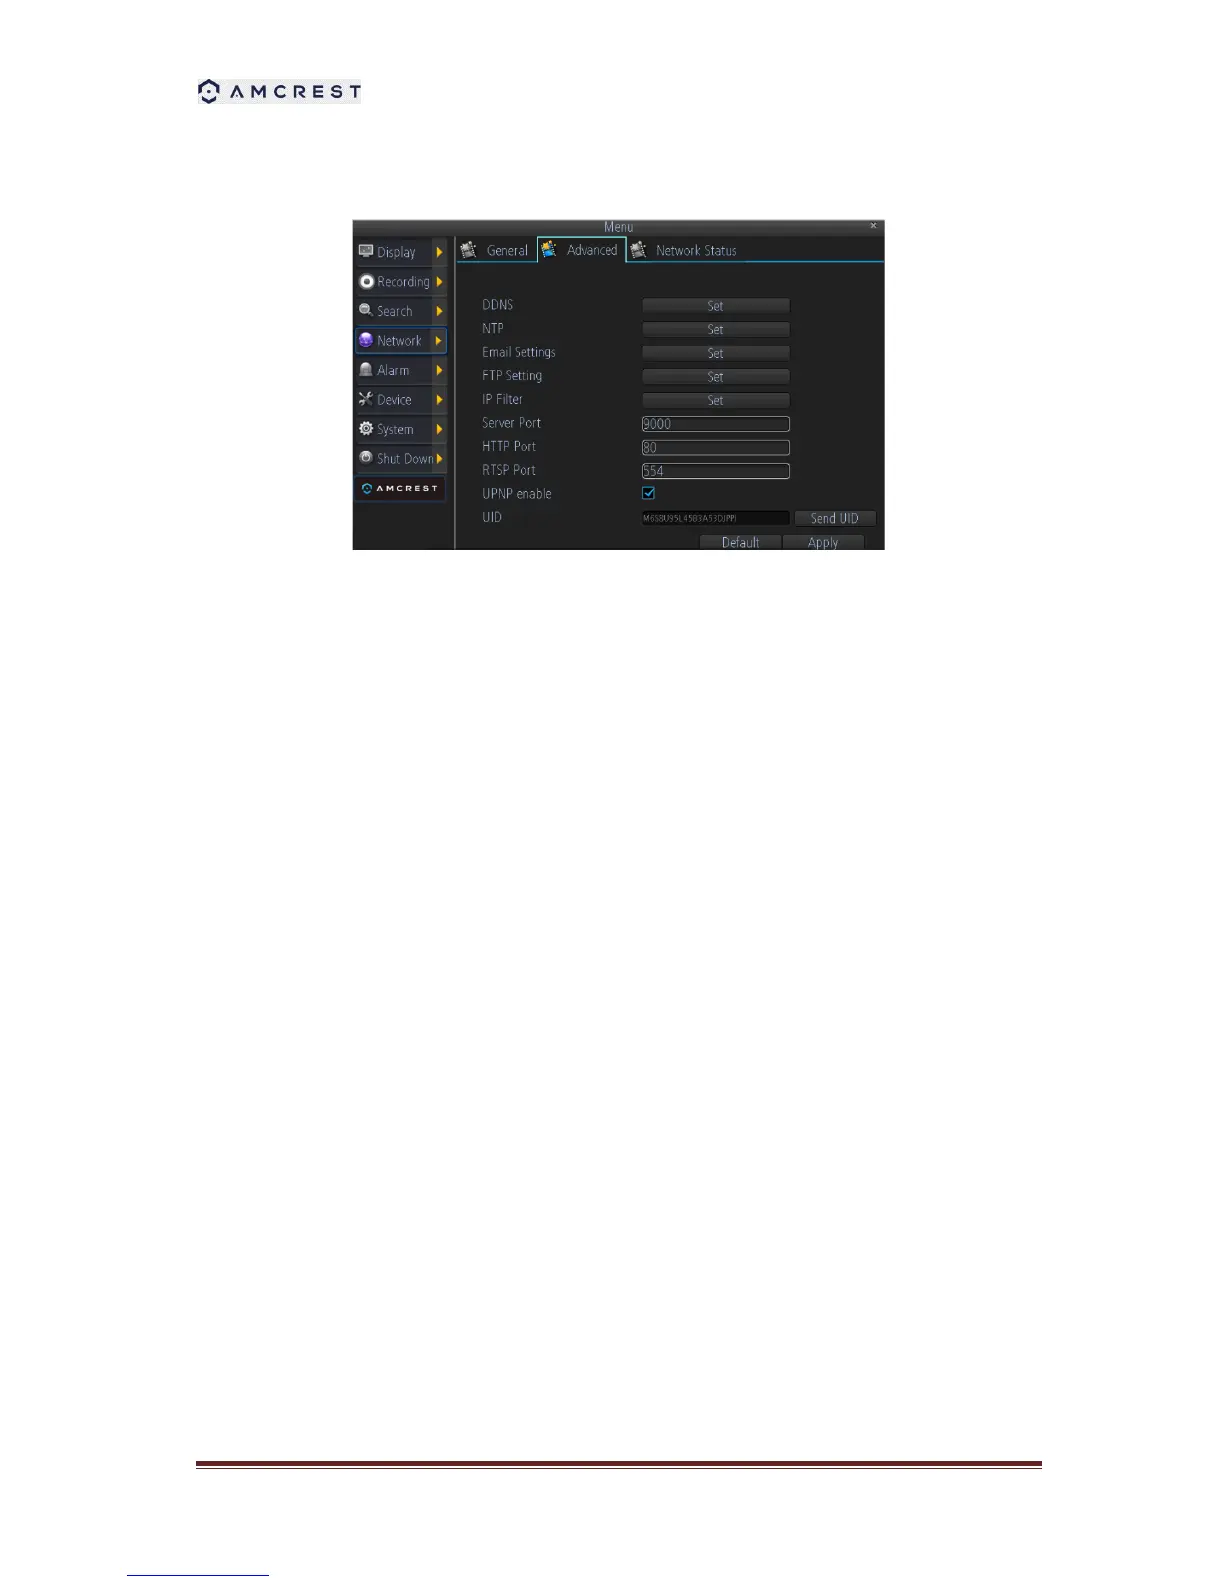
8.2 Configuring Advanced Settings
1. DDNS: The place to configure the DVR to automatically update a dynamic DNS service. If
you want to remotely access the DVR via the Internet, you’ll probably need to configure a
DDNS account.
2. NTP: Network Time Protocol. If you’ve got the DVR connected to the Internet, you can have
it automatically sync time with an online server.
3. Email Settings: Where you can configure the DVR to work with an email account of your
choice. This must be correctly configured for the DVR’s auto-email feature to work.
4. FTP Settings: The DVR supports uploading live-view streaming or recording file to a FTP
server. Here you can configure the FTP server information and the schedule for uploading.
5. IP Filter: An advanced feature which allows you to exercise precise control over what
devices/IP address(es) are allowed to communicate with the DVR and which are not.
Recommended for advanced users only.
6. Server Port: This is the port that the DVR will use to send information through. When you
access your DVR from web browser or client software, you need to input the server port.
7. HTTP Port: This is the port through which you will be able to log in to the DVR via web
browser.
8. RTSP Port: This is the port through which you will be able to live-view the DVR via RTSP
client software.
9. UPNP: UPnP makes configuring your network easier and faster. To use the UPnP setting on
the DVR, you’ll need a router which supports this feature, with UPnP enabled.
10. UID: The DVR’s Unique Identifier code for P2P. For convenience, you can have this code
sent to your email account by clicking the Send UID button (provided that you’ve already set
up your email account).