TPI Configuration Pages
61
TPI-PRO-DVI - Instruction Manual
When using a touch monitor, the TOUCH DRIVER selected should compensate for the visible area. If not, continue with these steps.
1. Open the tab (Slot 1 - Slot 4) that corresponds to the Input that you want to adjust.
2. Press Input to cycle through the available Input Type options:
Composite 1, Composite 2, Composite 3
S-Video
Computer (VGA)
Component (YPrPb)
DVI
NOTE: When using a DVI source, set the input to DVI before attaching the DVI cable to the TPI. If a DVI source is attached before
setting the input to DVI, you may need to reboot the source for it to recognize the DVI input description information required by
the DVI standard.
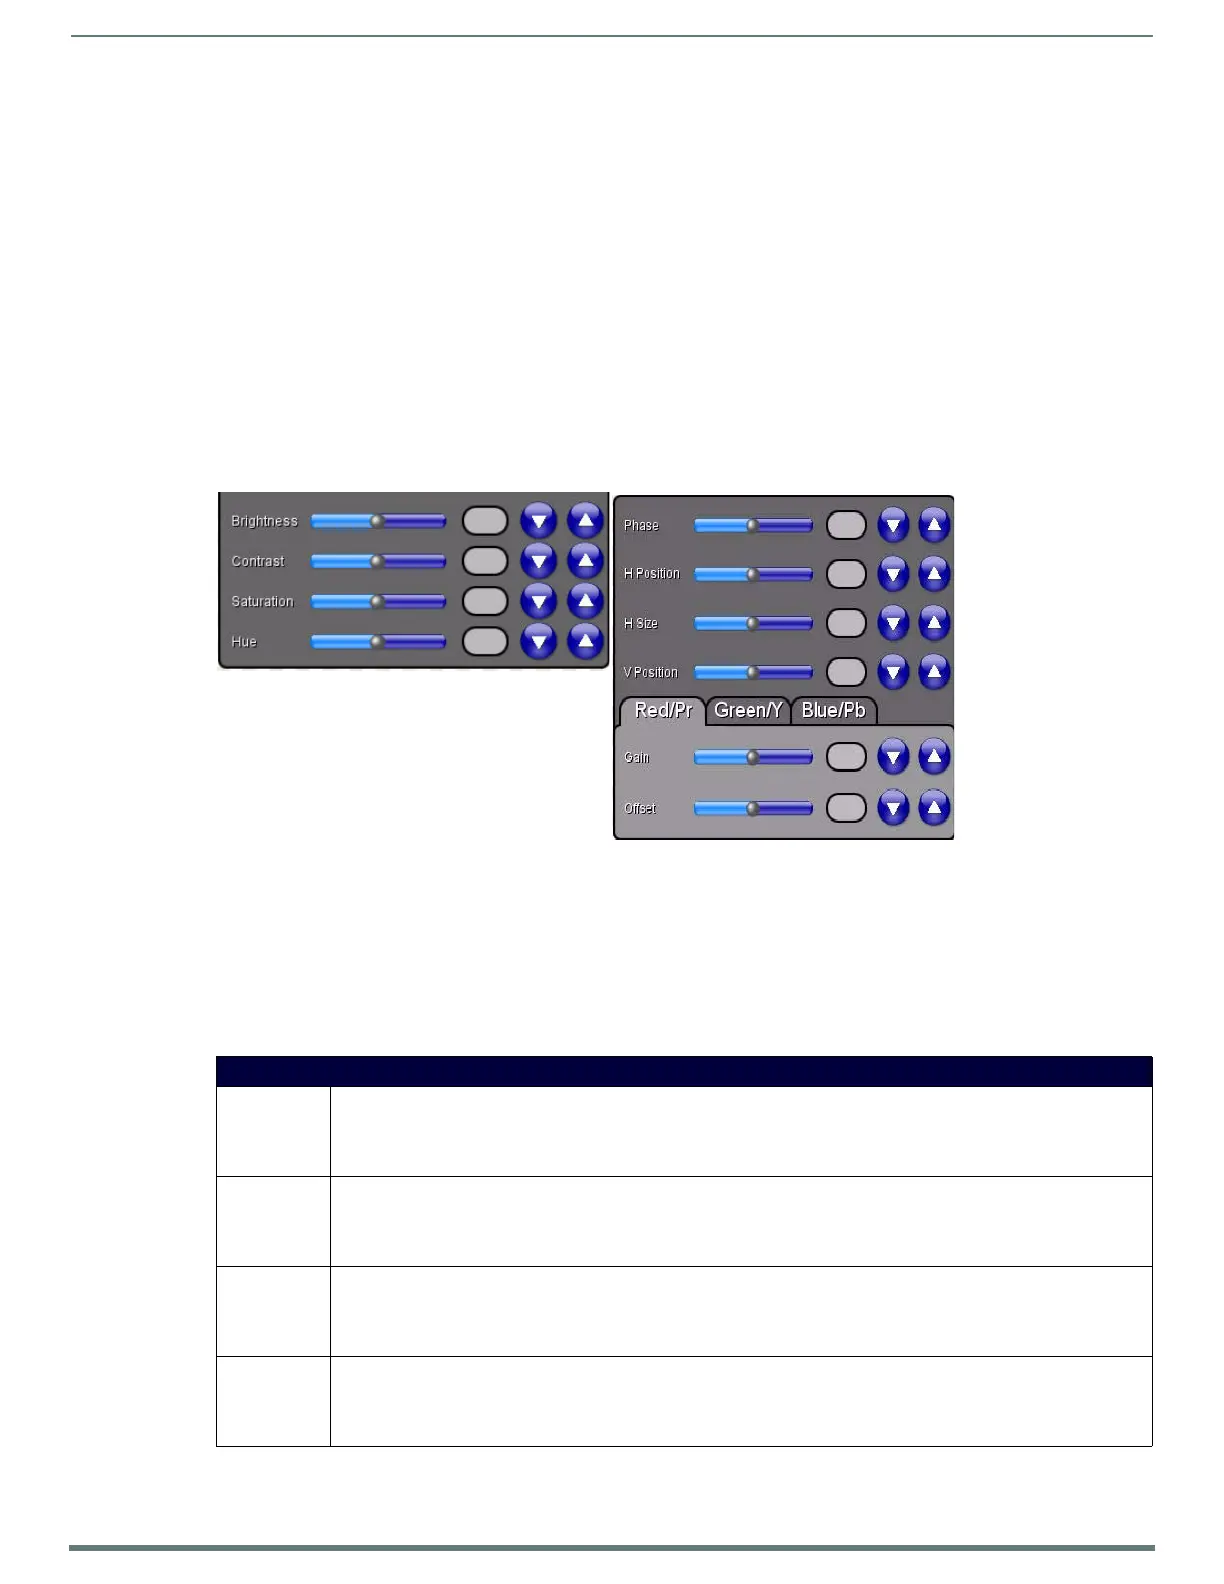
3. Depending on the Input Type assigned to the selected Input, some or all of the video settings below are provided (FIG. 64):
4. Use the H Size and V Position options to compensate for the visible area.
5. Press the Save Settings button to save your changes.
6. Press the Back button to return to the Setup page.
Video Parameters
Depending on the Input Type assigned to the selected Input, some or all of the following Video Parameters are available via the
Video Settings Page:.
Composite 1 Corresponds to a signal connected to the Red connector on the DVI-to-3RCA Male adapter cable.
Composite 2 Corresponds to a signal connected to the Green connector on the DVI-to-3RCA Male adapter cable.
Composite 3 Corresponds to a signal connected to the Blue connector on the DVI-to-3RCA Male adapter cable.
FIG. 64 Video Settings page - Video Settings
Video Parameters
• Brightness: Use the UP/DN buttons to adjust the brightness level of the incoming signal.
• This option does not appear if you select Computer (VGA), Component (YPrPb), or DVI as the input type.
•Range = 0 - 255
•Default = 128
• Contrast: Use the UP/DN buttons to adjust the contrast level of the incoming signal.
• This option does not appear if you select Computer (VGA), Component (YPrPb), or DVI as the input type.
•Range = 0 - 255
•Default = 128
• Saturation: Use the UP/DN buttons to adjust the color saturation level of the incoming signal.
• This option does not appear if you select Computer (VGA), Component (YPrPb), or DVI as the input type.
•Range = 0 - 255
•Default = 128
• Hue: Use the UP/DN buttons to adjust the hue level of the incoming signal.
• This option does not appear if you select Computer (VGA), Component (YPrPb), or DVI as the input type.
•Range = 0 - 255
•Default = 128
Composite / S-Video settings
VGA / Component Settings

 Loading...


