Protected Setup Page
64
TPI-PRO-DVI - Instruction Manual
Protected Setup Page
Overview
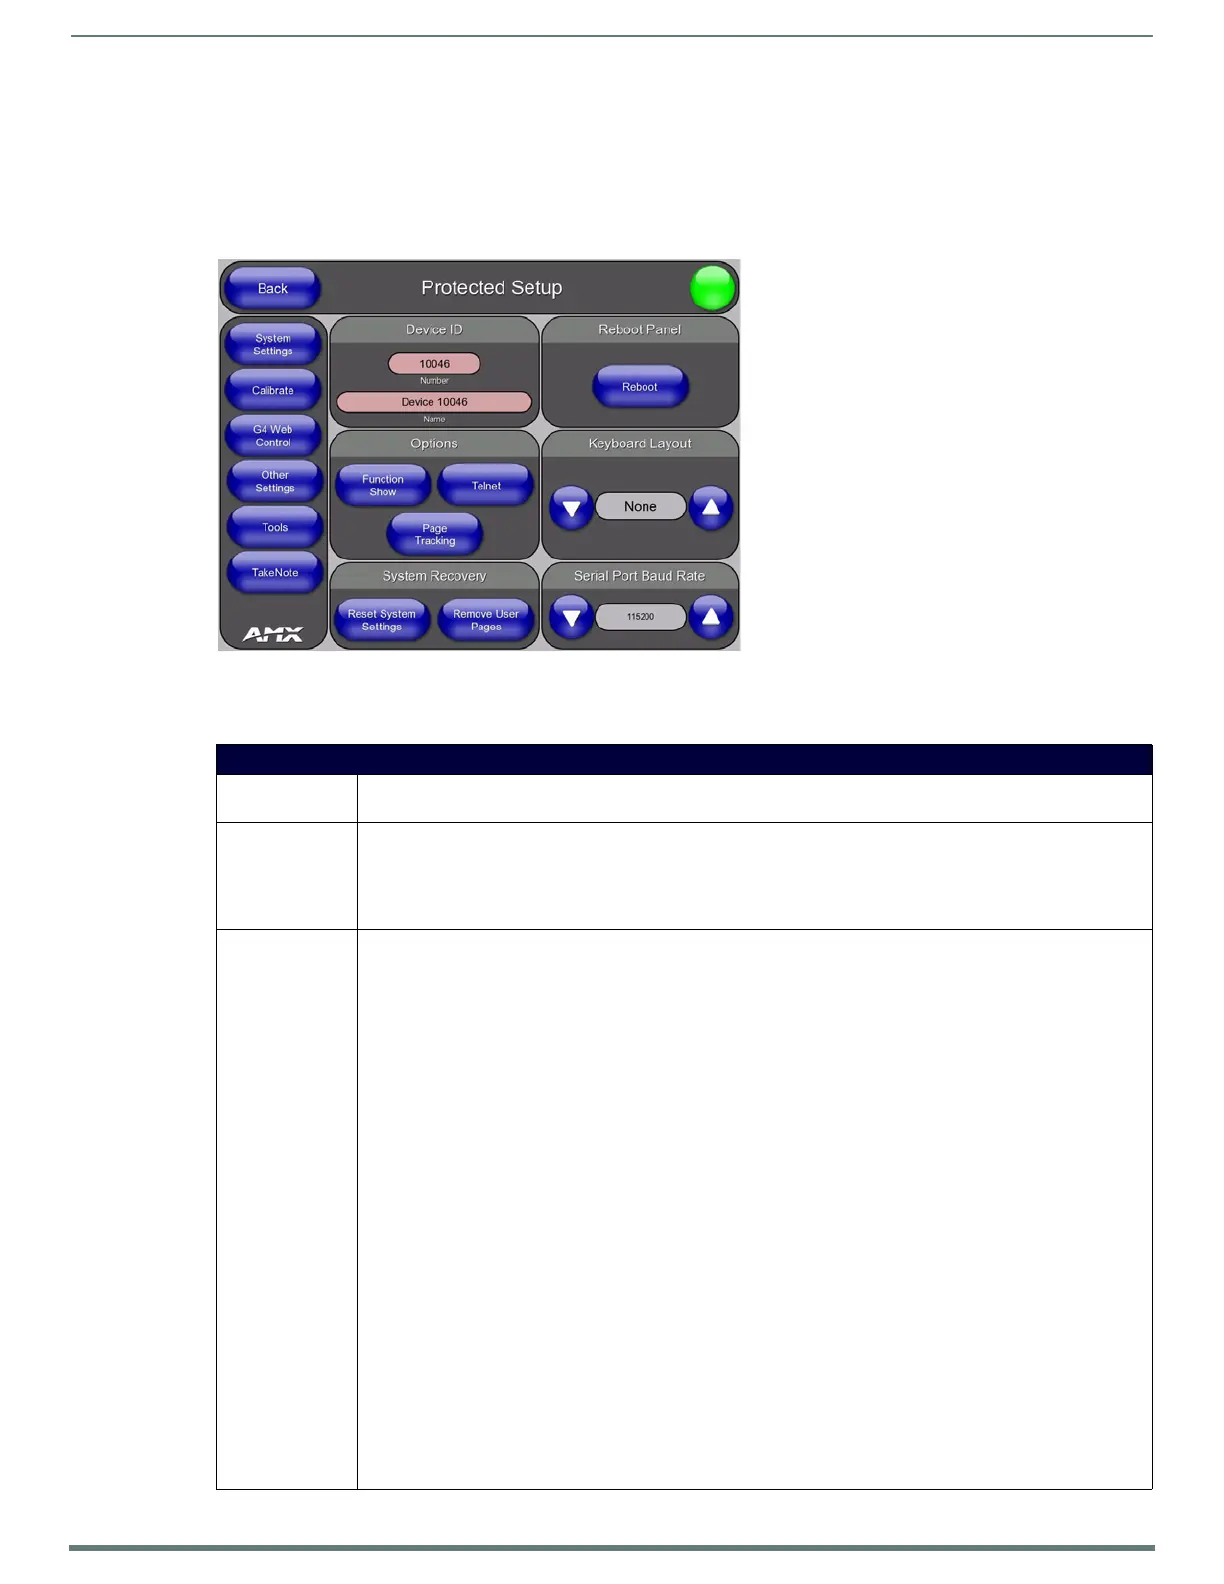
Select Protected Setup on the Setup page to access the Protected Setup page (FIG. 67).
NOTE: This page is password-protected.
Enter the factory default password (1988) into the on-screen keypad to access this page.
FIG. 67
Protected Setup page
Protected Setup Page
Back: Saves the changes and returns to the previously active touch panel page.
Note: This option is included on all Protected Setup pages for convenience.
Connection
Status icon:
This visual display of the connection status allows the user to have a current update of the TPI’s connection status
regardless of what page is currently active.
• A Lock only appears on the icon if the TPI has established a connection with a currently secured target Master
(requiring a username and password).
Note: This option is included on all Protected Setup pages for convenience.
Protected Setup
Page Navigation
Buttons:
The navigation buttons displayed along the left of the Protected Setup Page provide access to several additional
protected configuration pages:
• System Settings - Press to access the System Settings page, where you can configure communication settings for
both the NetLinx Master and the TPI.
Refer to the Protected Setup - System Settings Page section on page 66.
• Calibrate - Press to access the Calibrate page, where you can calibrate a touch monitor.
Refer to the Calibrating the TPI section on page 39.
• G4 Web Control - Press to access the G4 Web Control page, where you can enable or disable display and control of
your panel (via the web) using a PC running a VNC client.
Refer to the Protected Setup - G4 Web Control Page section on page 68.
• Other Settings - Press to open a slide bar with the following options:
Cache - press to access the Cache page, where you can adjust your Flash Cache settings. Refer to the Protected
Setup (Other Settings) - Cache Page section on page 69.
Passwords - press to access the Password Setup page, where you can specify up to five security passwords. Refer
to the Protected Setup (Other Settings) - Password Settings Page section on page 71.
Note: The default password is 1988.
• To ols - Press to open a slide bar with the following options:
Panel Logs - press to access the Panel Logs page, where you can view your panel’s connection history. Refer to the
Protected Setup (Tools) - Panel Connection Logs Page section on page 72.
Panel Statistics - press to access the Panel Statistics page, where you can view the connection statistics for your
panel. Refer to the Protected Setup (Tools) - Panel Statistics Page section on page 73.
Connection Utility - press to open the Connection Utility page, where you can view connection statistics and
information for your panel. Refer to the Protected Setup (Tools) - Connection Utility Page section on page 74 for
details.
• Ta ke No t e - Press to access the Take N ote Control page, where you can enable or disable the TakeNote Annotation
Application. Refer to the Using Takenote™ section on page 139 for details.