Instrument Overview 2-4 Interface Screen
MS2712E/13E User Guide PN: 10580-00251 Rev. T 2-7
Different operation or measurement modes may display different main menu keys. To switch
to another mode, press the Menu key, or press Shift followed by the Mode (9) key.
Submenu Touch Screen Keys
Most of the instrument setup, control, and measurement functions are performed through the
use of the submenu keys along the right side of the display. The key labels change as
measurement settings and instrument setup parameters change. The current submenu title
is displayed at the top of the submenu key block, which consists of up to eight touch screen
keys. See Figure 2-6 on page 2-6.
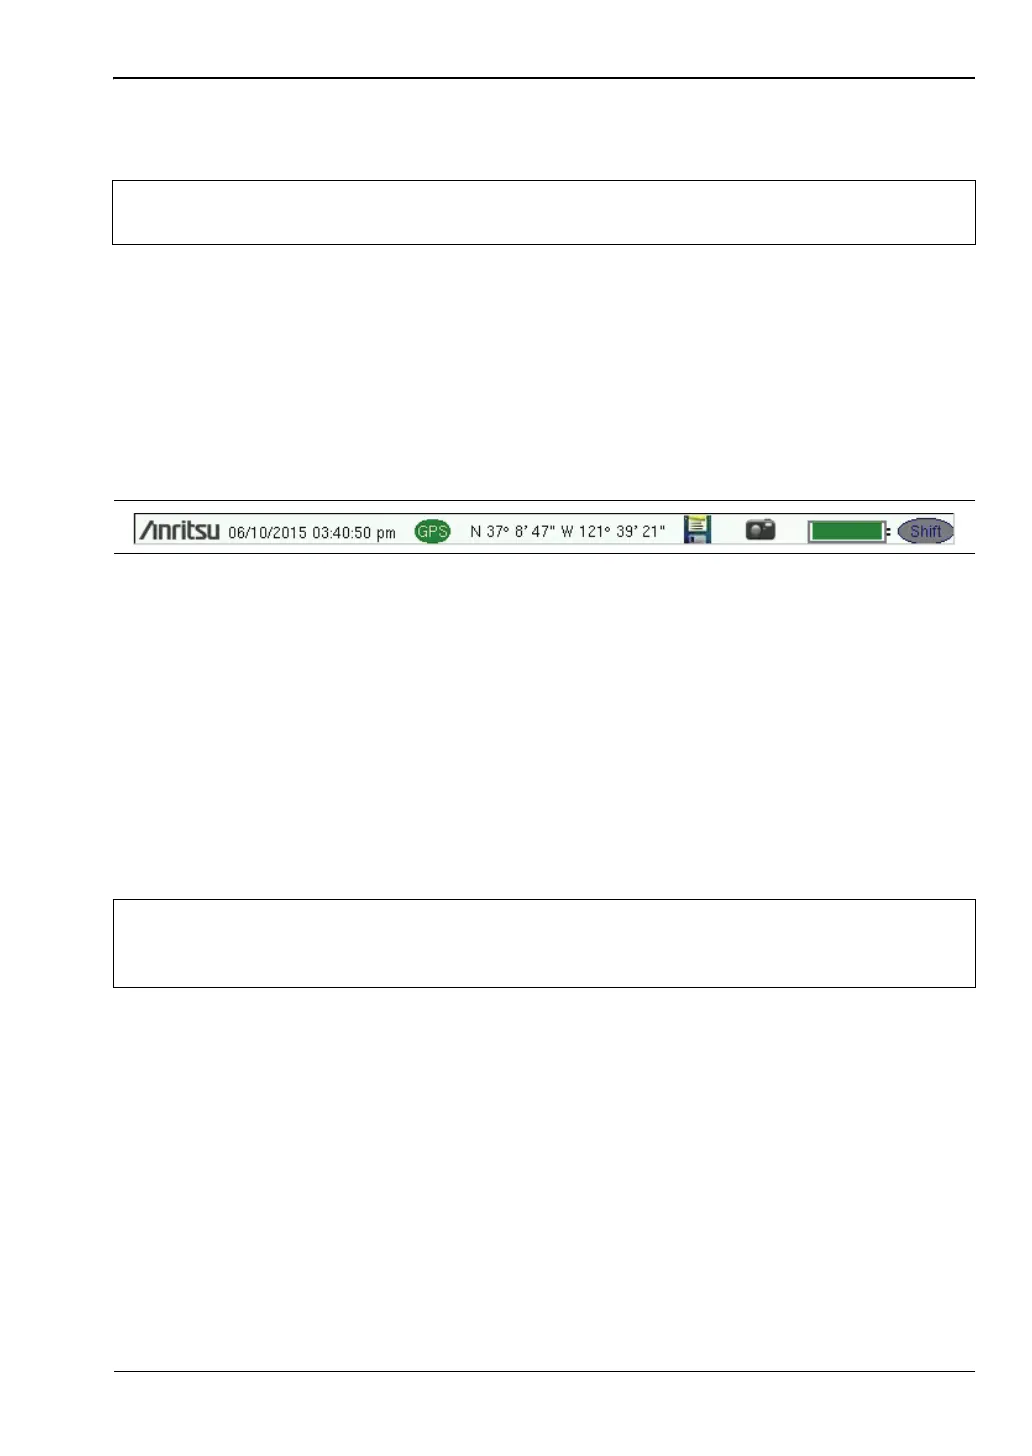
Symbols and Icons on the Title Bar
The instrument title bar displays the system date and time. When GPS is on and is tracking
satellites, its icon is followed by latitude and longitude coordinates.
Press the storage icon to open the touch screen keyboard for saving measurements, setups,
limit lines, or screen display JPEG files. This shortcut to the “Save Menu” on page 4-10 is
equivalent to pressing Shift and File (7), then Save. Refer to “Save Dialog Box” on page 4-3.
Press the camera icon to save a JPEG image of the current screen display.
The battery symbol indicates the charge remaining in the battery. The colored section inside
the symbol changes size and color with the charge level. See Table 2-1 on page 2-8. The
Battery Charge LED (adjacent to the On/Off button) flashes when the battery is charging,
and remains on steady when the battery is fully charged.
The Shift icon is displayed after the Shift key is pressed, and it remains displayed until
another button is pressed.
Note
The instrument model and installed options determine what measurement modes
are available. Refer to Tab l e 1-1 and Table 1-2 on page 1-4.
Figure 2-7. Title Bar with Icons
Caution
Use only Anritsu-approved batteries, adapters, and chargers with this instrument.
Anritsu Company recommends removing the battery for long-term storage of the
instrument.