GT3000 Spare Parts
IMGT30017EN 79
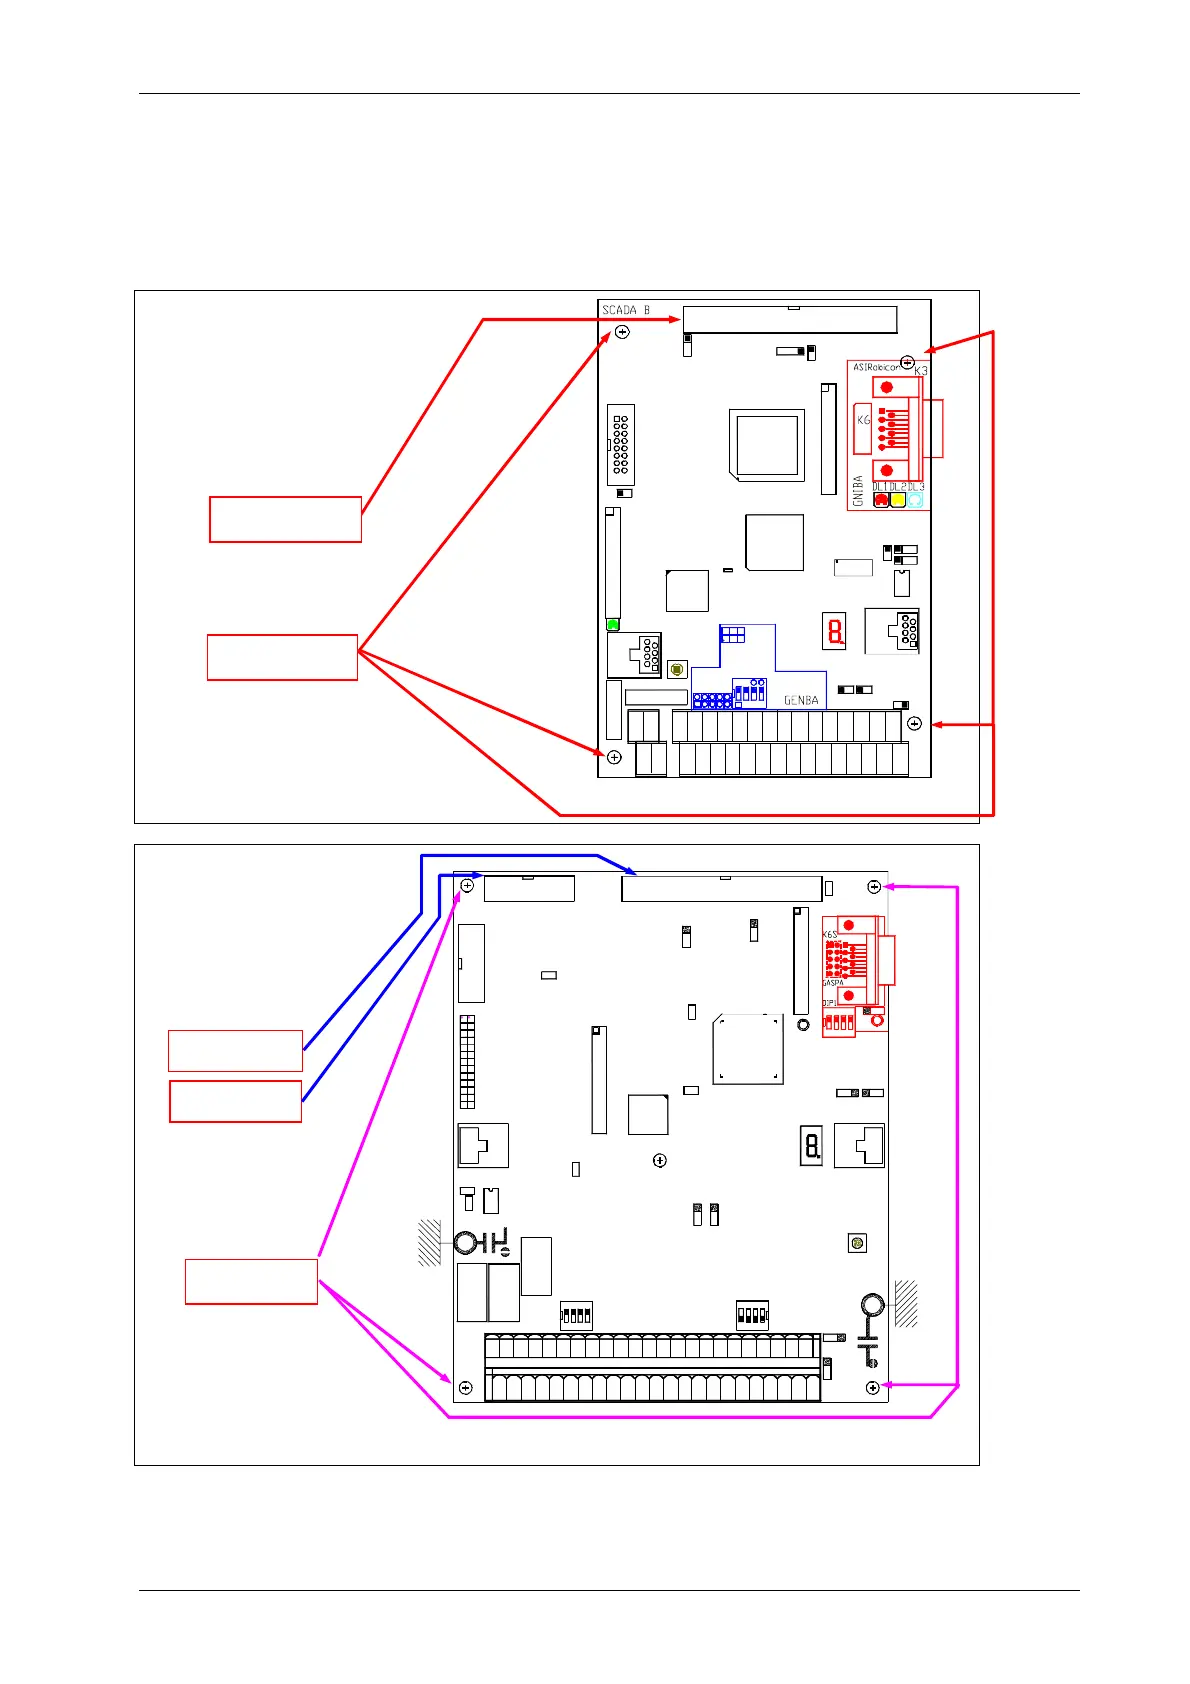
7A.1 Control board replace
Check the spare board is the same type of the broken board.
Before to replace the board, if it is possible, do a back-up file of the user parameters. (if the version Firmware is the same for both board only).
Disconnect the drive from the power source.
Board disassemble
Scada Basic board
Free the connector K1 and disconnect
the flat cable pulling out it carefully from
both sides in order to avoid damaging
the pins.
Pull out the terminal board XM1A/B.
Unscrew the fixing screws.
Scada Plus board
Disconnect the two flat cable from
connectors K1 and K2 pulling out its
carefully from both side in order to
avoid to damage the pins.
Pull out the terminal board XM1.
Unscrew the fixing screws.
Connector K1
Connector K2
Fixing screws
DISP4
U35
1 2 3 4 5 6 7 8 9 10 11 12 13 14 15 16 17
20 21 22 23 24 25 26 27 28
29 30 31 32 33 34
XM1A
XM1B
TP1
SW1
K5
A B
ON
C D
K5
KE1
18 19
JP18
JP19
JP17
K4
PS4
JP14
DL1
KE2
U1
X7
X3
U37
U7
JP15
JP8
JP16
JP3
U56
JP13
K1
JP2
RL2
RL1
Fixing screws
Connector K1
K3
SW
1
SW1
1
JP16
K2
K1
JP18
JP3
JP2
JP13
JP14
JP15
JP5
JP7
JP4
JP6
JP8
JP22
JP1
JP23
JP19
KUA1
KUB1
X7
U7
1
SW3
RL3
RL1
RL2
XM1
X3
K4
U1
U56
X5
123
4
6 8 10 12 1416 18 202224 2628 30 323436 38 40
3937
3533312927252321191715131197546454443
42
41
JP17
DL2
DL3
PS4
DISP2