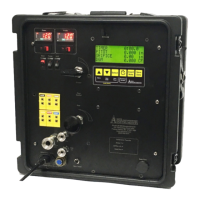
XD-502 Digital Console
Apex Instruments, Inc.
23
3.3 Field Test Operations
3.3.1 Performing a Method 5 sampling test
This operation guide is written based on US EPA Method 5 sampling. Ensure that you follow the
appropriate procedures outlined in the applicable isokinetic method to be performed. EPA Methods 1,
2, and 4 should already be performed and an approximation of Method 3 should be made or measured.
1. Use pre-test conditions to calculate a K-Factor that will be used to determine the operational ΔH for
each traverse point.
- The K-Factor should not change unless source conditions change drastically from pre-test
conditions when the initial calculation was made.
- Input the K-Factor into the console using the Change K-Factor submenu found in the main
menu.
2. The sample impingers should be charged and the volume or weight should be measured before use.
Record these values on the field data sheet or laboratory recovery log.
- Set up the impinger train in the sample case and add ice and water.
- Connect all of the equipment, including the nozzle, probe, filter, impinger train, umbilical,
console, and any other applicable sample lines or connections.
3. Ensure probe and heated oven or filter, as applicable, have reached the set point.
If either has not reached the suggested temperature, turn the heaters on using the appropriate -
switch in the upper-left corner of the console and/or allow time to reach the set point.
4. Ensure that the timer and sensors are zeroed/reset.
If it is not, press and hold the Select, or Zero Timer, button for 3 seconds. -
Zero the and P pressure sensors by opening the user menu using by holding the Up - ΔH Δ
button for 3 seconds and navigating to Zero Sensors; ensure that no pressure is being applied
to the sensors and conditions are ambient.
With the coarse valve closed, start the pump using the switch in the upper-left corner of the -
console.
5. Record all applicable site data such as plant name, location, date, personnel, etc.
Record the initial DGM reading displayed on the console LCD screen and barometric pressure, -
which is found on the third home screen of the LCD display (use the Up and Down buttons to
change screens). The DGM reading can begin at the current value or can be zeroed before the
run by pressing and holding the Down, or Zero DGM, button on the membrane switch pad for
3 seconds.
6. To begin sampling, position the tip of the probe and nozzle at the first traverse point.
Note the clock time and then open the coarse valve and turn on the timer by pressing the -
Timer button.
7. Adjust the sample flow as closely to the target as possible. Maintain this flow rate for the ΔH
duration of the first traverse point.
8. Take readings (clock time, DGM volume, flow rate, P reading, vacuum, all applicable ΔH Δ
equipment temperatures) at least every 5 minutes or at the change of a traverse point.
Recalculate the target , or follow the calculation provided by the console, at each traverse - ΔH
point; adjust the flow rate appropriately using the fine valve.
Add more ice or a fresh ice pack to the impinger train during the run to keep the temperature of -
the gases leaving the last impinger between 0°C (32°F) and 20°C (68°F).
 Loading...