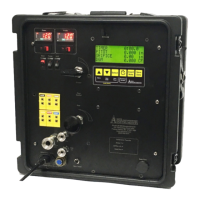
XD-502 Digital Console
Apex Instruments, Inc.
43
3.6.15 Outline of Sampling Test Operations Using the Software
1. Plug in and power on the console.
2. Attach USB cable to PC and to console. The console screen will flicker on and off indicating it has
recognized the USB cable connection.
3. Double-click on the software icon to initiate the program.
- A window may pop up with the following message: “Microsoft Defender SmartScreen prevented
an unrecognized app from starting. Running this app might put your PC at risk.” Click the More
Info text, confirm the software app and then click the Run anyway button.
4. Select USB to connect to the console. Sensor data is displayed and the Navigation menu is
unlocked after connection is made with the console.
5. Select the Job Information tab.
- Fill in fields as necessary. When finished, navigate to the Utility tab.
6. The Utilities screen provides entry for sample run setup.
- Input values and select settings as necessary and click the appropriate Accept button. When
finished, navigate to the Storage tab.
7. Select the New Run button and name the run. When finished, navigate to the Monitor tab.
8. Verify operation of the following components and/or perform the following actions:
- Sample pump
- Pressure sensors
- Thermocouples
- Vacuum sensor
- Barometer
- DGM flow and volume
- Reset the Marker number, if necessary
- Make any Optional Notes and save
9. Perform all pre-sampling procedures per the EPA or regulatory method. When finished, navigate to
the Main tab.
- Consult APTD-0576 or other EPA literature
10. Select the Do Leak Test button
- Perform the leak check (refer to Section 3.2.6 Sample train leak check procedure on page 22)
11. Record all necessary initial data on a sample data sheet
- Open the Monitor screen and record the DGM reading and observe other sample values
12. Starting the sample run
- Ensure the timer is set to zero
- Remove the cover from the nozzle tip, place the pitot tube and nozzle at the first sampling
point, and add ice to the impinger train
- Record the clock time
- Turn on the pump and set the ΔH by opening the coarse flow valve first and then fine tuning
with the fine flow valve
 Loading...