E
elizabeth94Jul 26, 2025
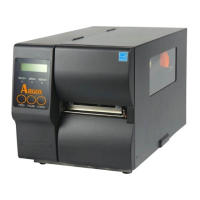
How to fix missing gap issue on Argox X2000?
- HHeather AdamsJul 26, 2025
To address a missing gap issue on your Argox Printer: - Check the media path. - Check the position of the label sensor.
How to fix missing gap issue on Argox X2000?
To address a missing gap issue on your Argox Printer: - Check the media path. - Check the position of the label sensor.
What to do if my Argox X2000 shows 'Media out'?
If your Argox Printer displays a 'Media out' message, the solution is to supply the media roll.
What to do if my Argox X2000 says 'Media not installed'?
If your Argox Printer indicates that the media is not installed, you should install the media roll.
| Print Method | Thermal Transfer / Direct Thermal |
|---|---|
| Print Resolution | 203 dpi |
| Maximum Print Width | 104 mm |
| Media Width | 25.4 mm |
| Media Thickness | 0.06 mm |
| Memory | 4 MB |
| Interface | RS-232 |
| Operating System Compatibility | Windows |
| Processor | 32-bit RISC |
| Power Supply | AC 100-240V |
Provides step-by-step instructions for connecting the power cord to the printer and the AC source.
Details the process of opening doors, releasing latches, inserting ribbon rolls, and winding.
Provides step-by-step instructions for loading media in standard mode.
Details the steps for setting up the printer in peel-off mode, following standard mode procedures.
Outlines the steps for loading media and activating cutter mode.
Explains the normal and alternate functions of the FEED, PAUSE, and CANCEL buttons.
Details the adjustable parameters like CUT/PEEL POS, PRINT OFFSET, TPH VER OFFS, etc., and their ranges.
Guides on how to perform label sensor calibration by holding buttons and turning on the printer.
Guides on how to reset the printer to factory default settings and lists parameters that are reset.
Explains how to connect the printer via parallel (Centronics) or serial (RS232C) ports.
Provides step-by-step instructions for installing the printer driver via the Windows operating system.
Addresses issues like missing gap, media out, and media jam, providing solutions and remarks.
Covers ribbon run out, ribbon jam, and ribbon sensor errors with their respective solutions.
Provides instructions for cleaning the print head with alcohol-moistened cotton.
Guides on setting up the printer for standalone keyboard operation, including form creation and data download.
Guides on preparing the printer for barcode reader input, including form creation and DIP switch settings.
Provides step-by-step instructions for mounting the cutter and its bracket, including screw placement.
Provides step-by-step instructions for installing dispenser and rewinder components.
Outlines the steps for calibrating the dispenser sensor using specific commands for label detection.