Home
Arjo
Medical Equipment
2000
Page 17
Arjo 2000 - Page 17
44 pages
Manual
Save Page as PDF
To Next Page
To Next Page
To Previous Page
To Previous Page
Loading...
17
6
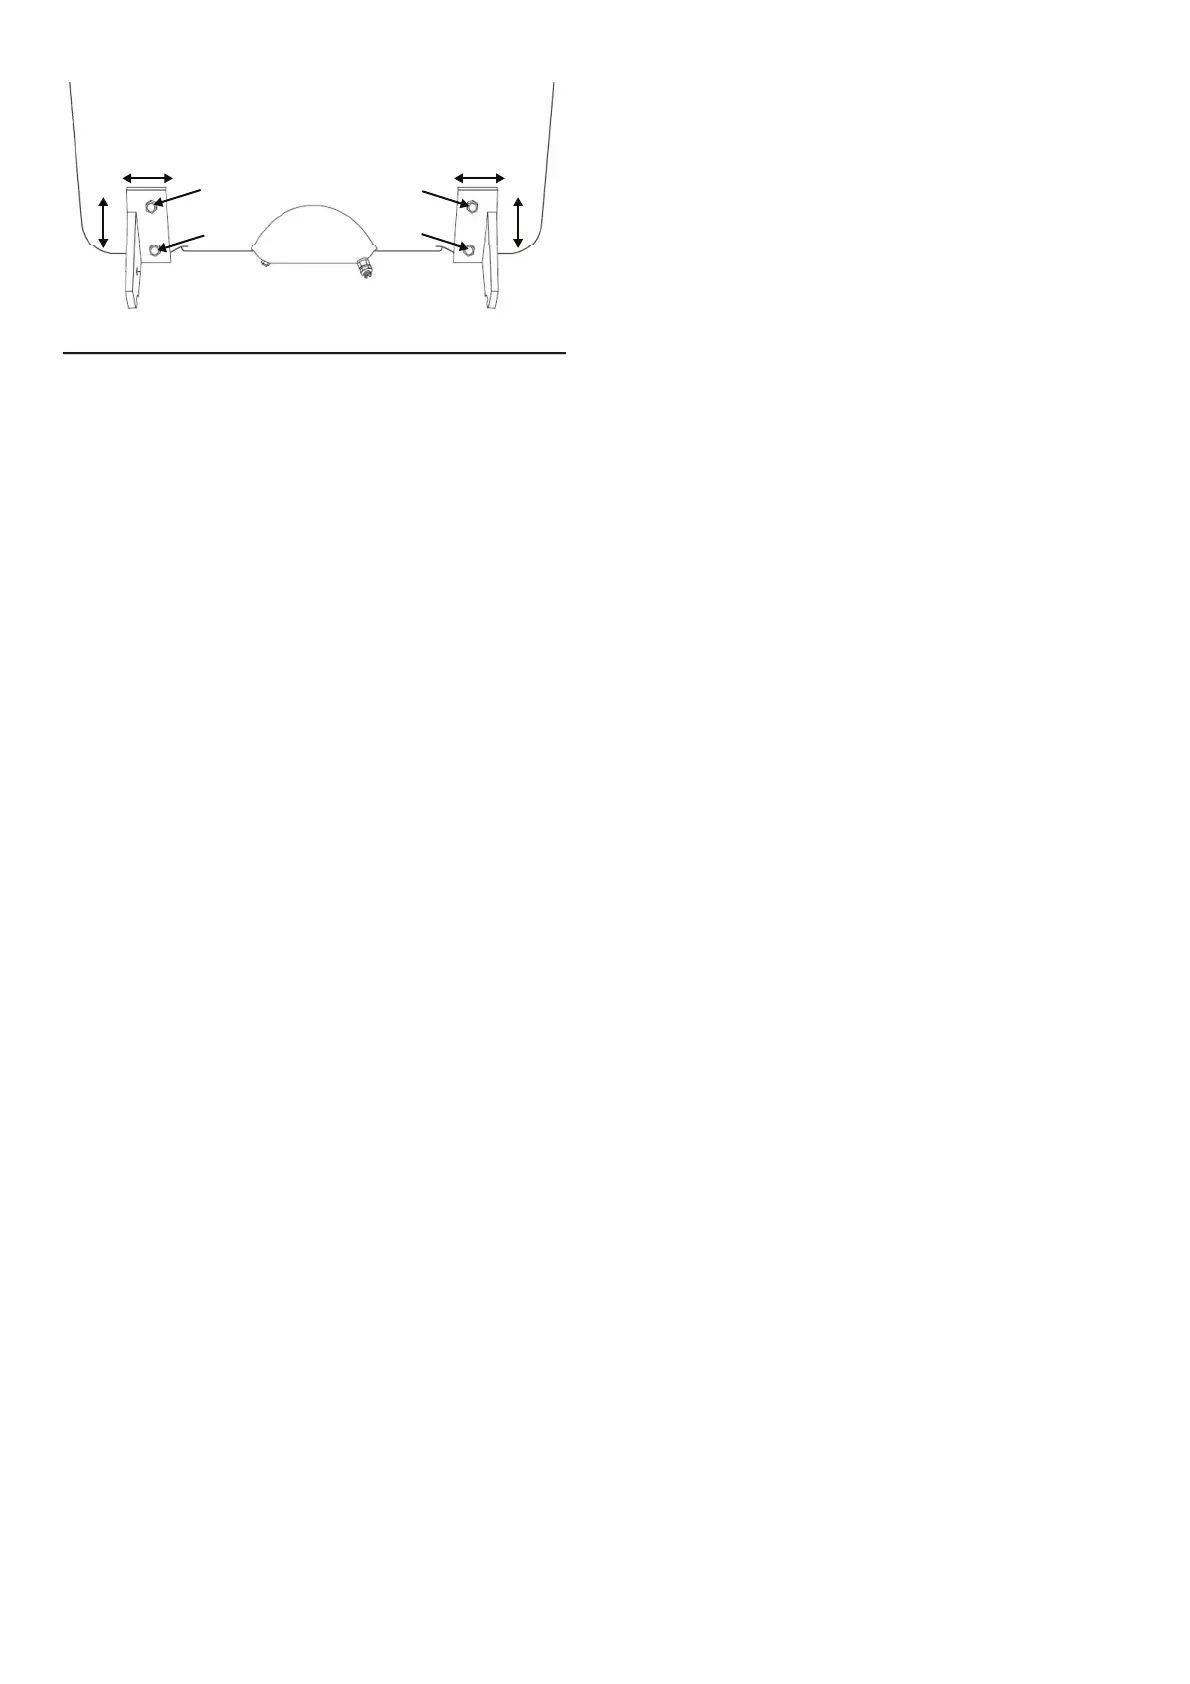
If distance between bottom hooks and top fixing
holes is too short or too long, adjust the position of
hooks. Loosen two nuts on the hook plate and repo-
sition the hook up or down. T
ighten both nuts
firmly
, before mounting the tub again.
16
18
Table of Contents
Main Page
Table of Contents
3
Safety Precautions
4
Introduction
5
Accessories
6
Unpacking and Assembly
7
Preparations for Mounting of Bathtub
10
Sound & Vision - Additional Installation
14
Mounting of Bathtub
16
Connecting Sensor Cables
18
Assembly of Drainage
21
After Mounting the Bathtub
22
Electrical Installation
24
Site Requirement
25
Drain Installation
26
Level Adjustment
26
Water Installation
27
Calibration of the Thermostat Mixer P220
31
Calibration of the Thermostat Mixer P300
33
Space Requirements
35
Technical Specifications
37
Overall Dimensions - Rhapsody
39
Overall Dimensions - Primo
40
Overall Dimensions - Primo Ferro
41
Overall Dimensions - Harmonie
42
Related product manuals
Arjo System 2000 Rhapsody
2 pages
Arjo Maxi Sky 2
72 pages
Arjo Maxi Sky 2 PLUS
56 pages
Arjo 2000 Rhapsody
72 pages
Arjo System 2000 Series
72 pages
Arjo System 2000 Harmonie
72 pages
Arjo System 2000 Primo Ferro
72 pages
Arjo Tempo
32 pages
Arjo Citadel
76 pages
Arjo MAXI MOVE
50 pages
Arjo Sara 3000
28 pages
Arjo Enterprise 9000X
68 pages