10
Preparations for mounting of bathtub
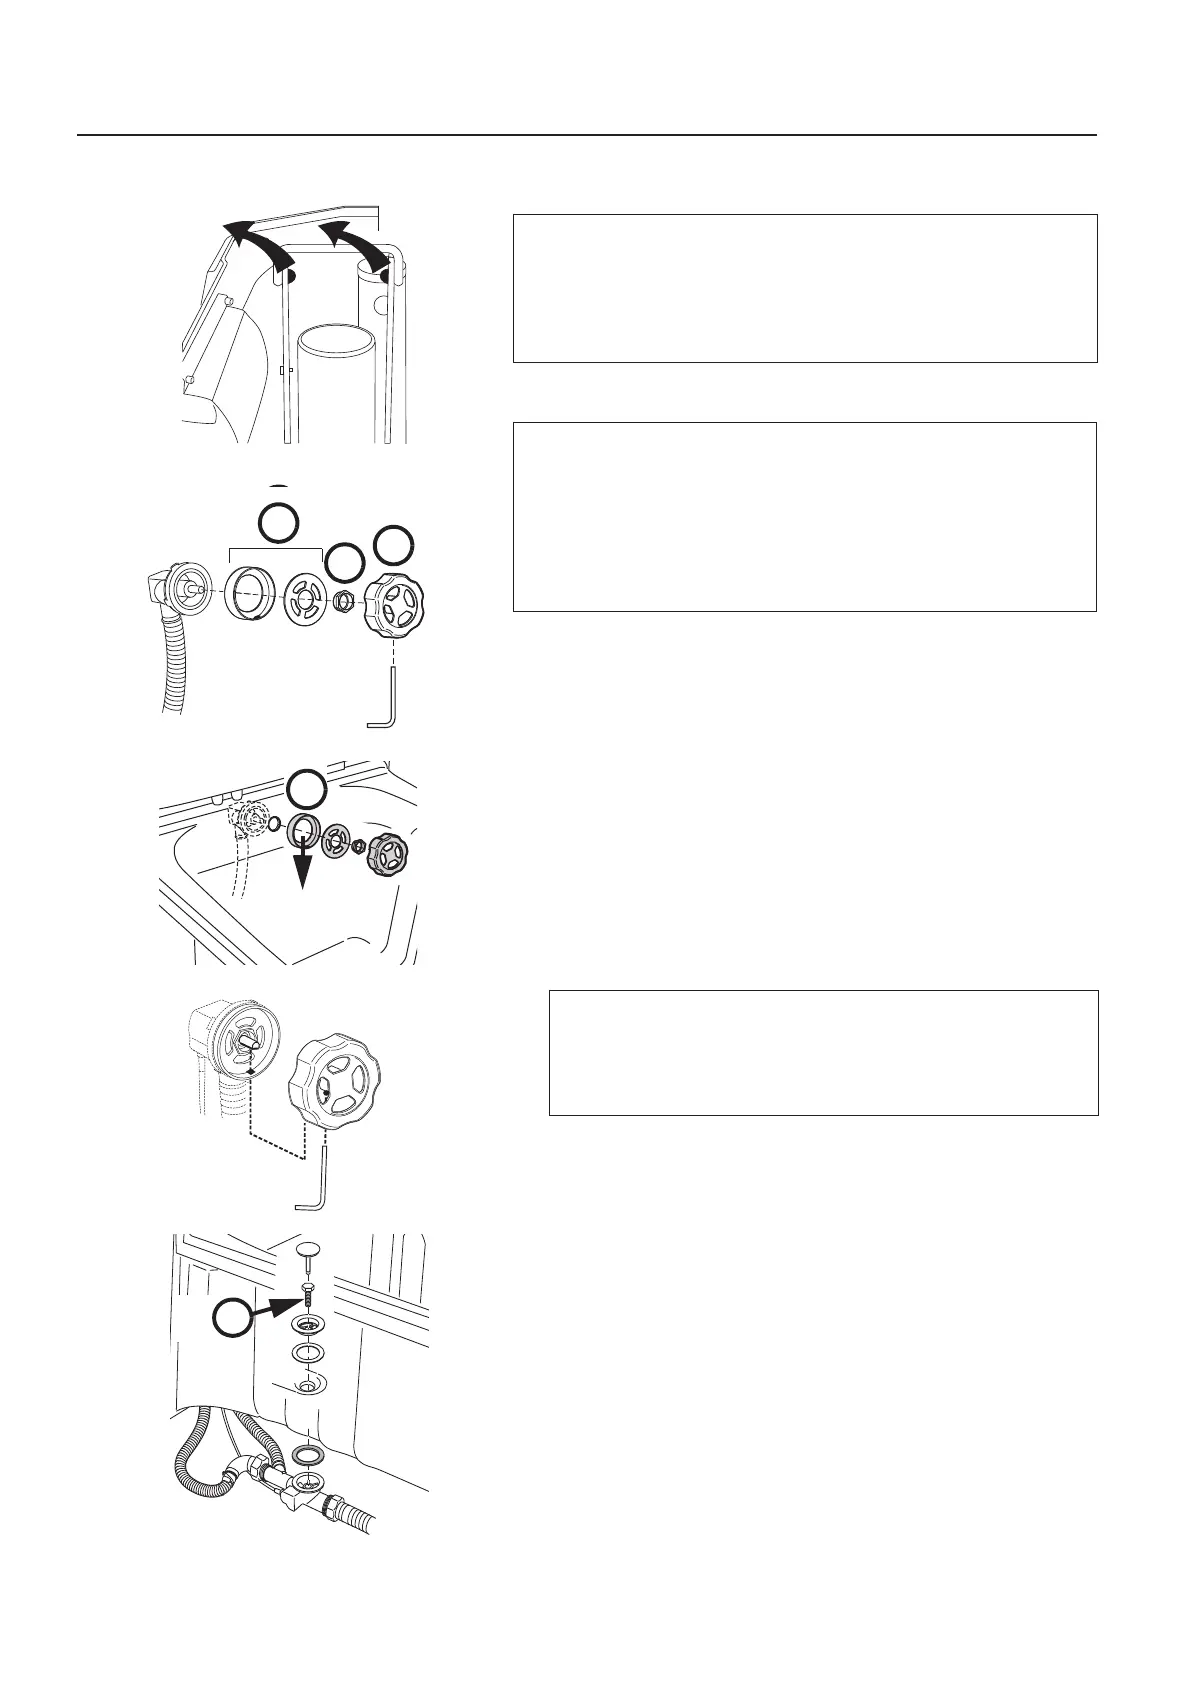
Assembly of drainage on bathtub
1 Dismantle the overflow drain: (See fig. 2)
• Put 2 mm allen key in the hole in the lower part of the
cap (A) and loosen the screw. Remove the cap.
• Loosen the nut (B) and remove the parts (C).
2 Mount the overflow drain on the tub.
Position the washer (A) so that the small hole is in the
lowest position. (See fig. 3 & 4)
3 Mount the bottom drain section according to illustration.
(See fig. 5) Always ensure the thicker seal is used on the
tubs underside as illustrated.
CAUTION
During the unpacking of this product, always make
sure that ALL staples are fully removed when remov-
ing the outer cover. This will prevent damage to the
laminate surface.
NOTE
To unpack the bathtub, remove the wooden lid first and
then the box covering the product.
Make sure that the panel is in its top position.
Remove the rubber stoppers on the clamps.
(See fig. 1)
CAUTION
Only use hand tools to tighten screw (A)
(see fig. 5). Over-tightening will cause stress
cracks in the tubs gel coat and drain connection.
A
A