Chapter 2: Hardware Information
2-36
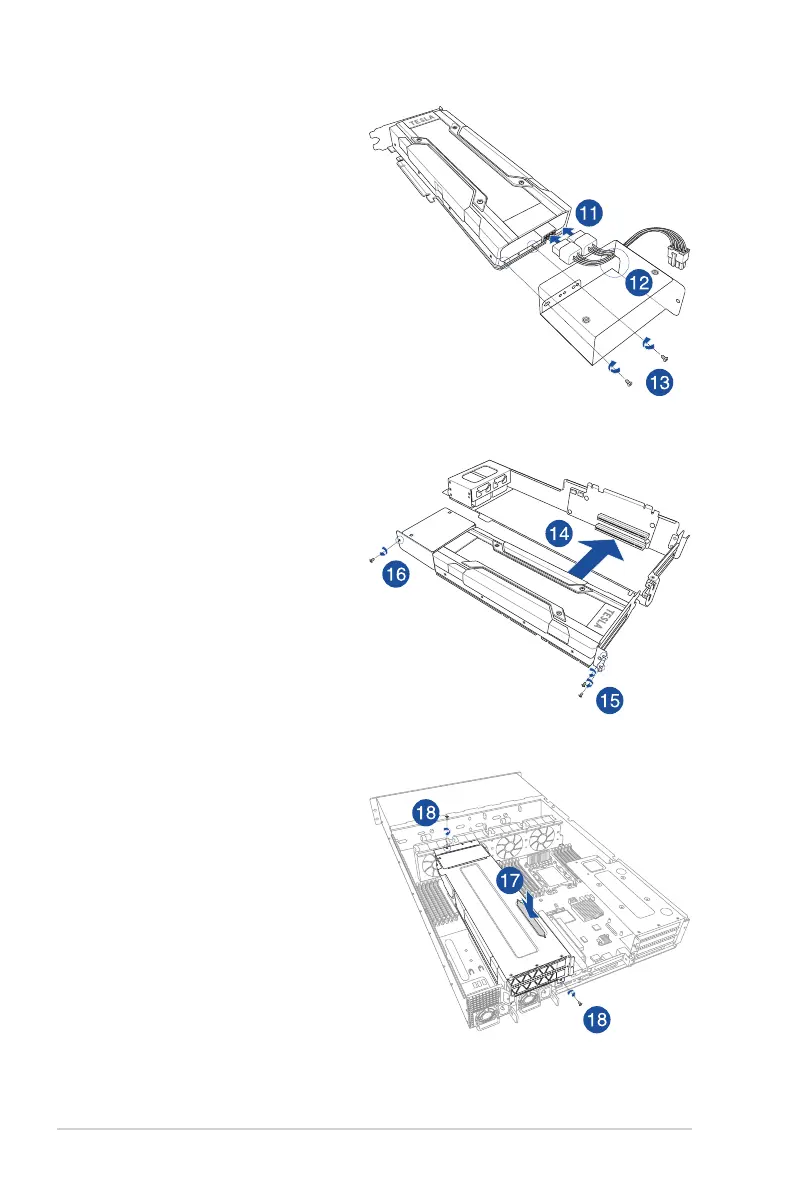
11. Reconnect the GPU power
cable or GPU card dongle to the
connector on the replacement
GPU card.
12. Align the GPU air duct to the
replacement GPU card and pass
the GPU power cable (or power
cable and dongle) through the
notched area on the GPU air
duct.
13. From inside the GPU air duct,
secure the GPU air duct to the
replacement GPU card with the
two screws removed in step 7.
14. Install the replacement GPU card
into the riser card bracket 3.
15. Secure the replacement GPU
card to the riser card bracket 3
with the screws removed in step
4.
16. Secure the GPU air duct to the
riser card bracket 3 with the
screw removed in step 5.
17. Install the riser card bracket 3
and the replacement GPU card
assembly into the PCIE4 slot on
the motherboard. Ensure that the
golden connectors of the riser
cardbracket3isrmlyseatedin
place.
18. Secure the riser card bracket 3
to the chassis with the screws
removed in step 1.
 Loading...