2-33
ASUS RS720-E9-RS8/RS8-G
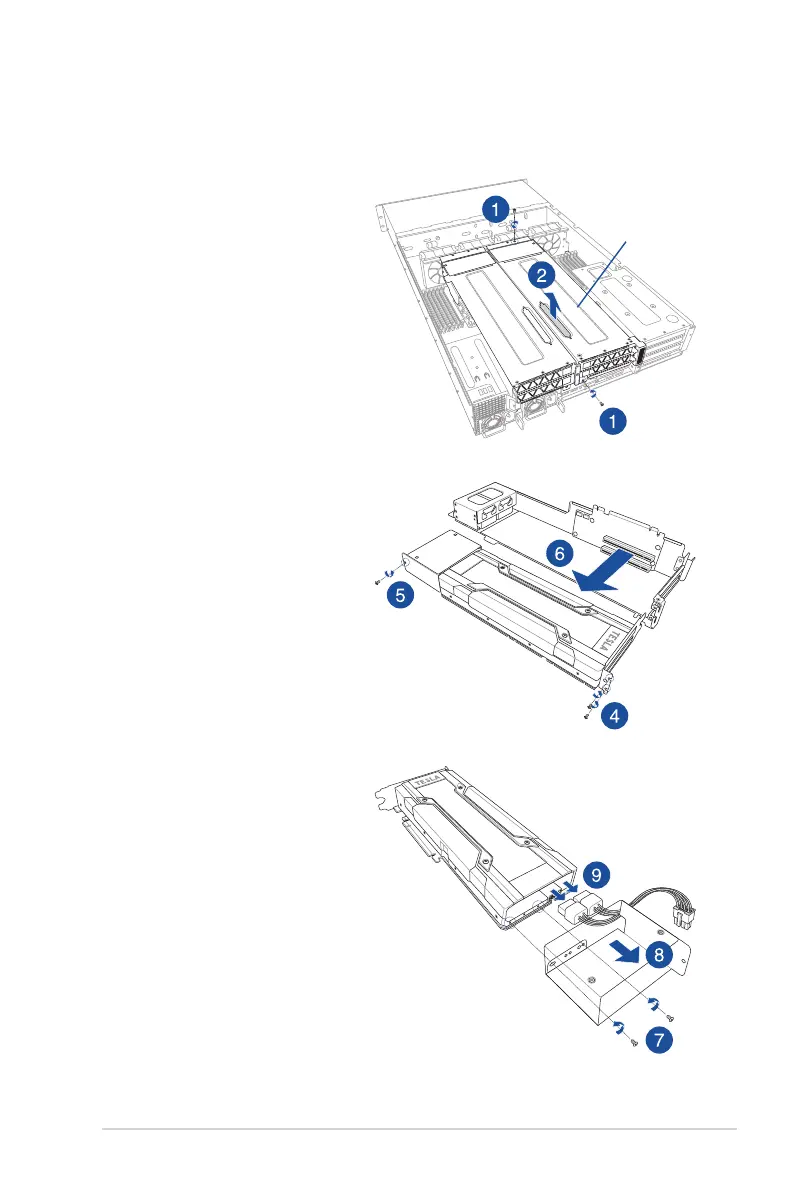
2.5.6 Replacing GPU cards (for RS720-E9-RS8-G only)
To replace the pre-installed passive GPU (FH/FL) card on the riser card bracket 2:
1. Remove the two screws that
secure the riser card bracket 2 to
the chassis.
2. Lift the strap and then pull it up
to detach the riser card bracket
2 from the PCIE3 slot on the
motherboard.
Riser card bracket 2
7. From inside the GPU air duct,
remove the two screws that
secure the GPU air duct to the
GPU card.
8. Remove the GPU air duct.
9. Remove the GPU power cable
or GPU card dongle from the
connector on the GPU card.
10. Prepare the replacement GPU
card.
3. Place the riser card bracket 2 on
aatandstablesurfaceinthe
orientation as shown.
4. Remove the screws that secure
the GPU card to the riser card
bracket 2.
5. Remove the screw that secures
the GPU air duct to the riser card
bracket 2.
6. Remove the GPU card from the
riser card bracket 2.