13
Getting started
Installation options
Your telephone base is ready for tabletop use. If you want to mount your
telephone on a wall, follow the steps, as mentioned below, to connect the
telephone base with a standard dual-stud telephone wall-mounting plate. You
may need a professional to install the mounting plate.
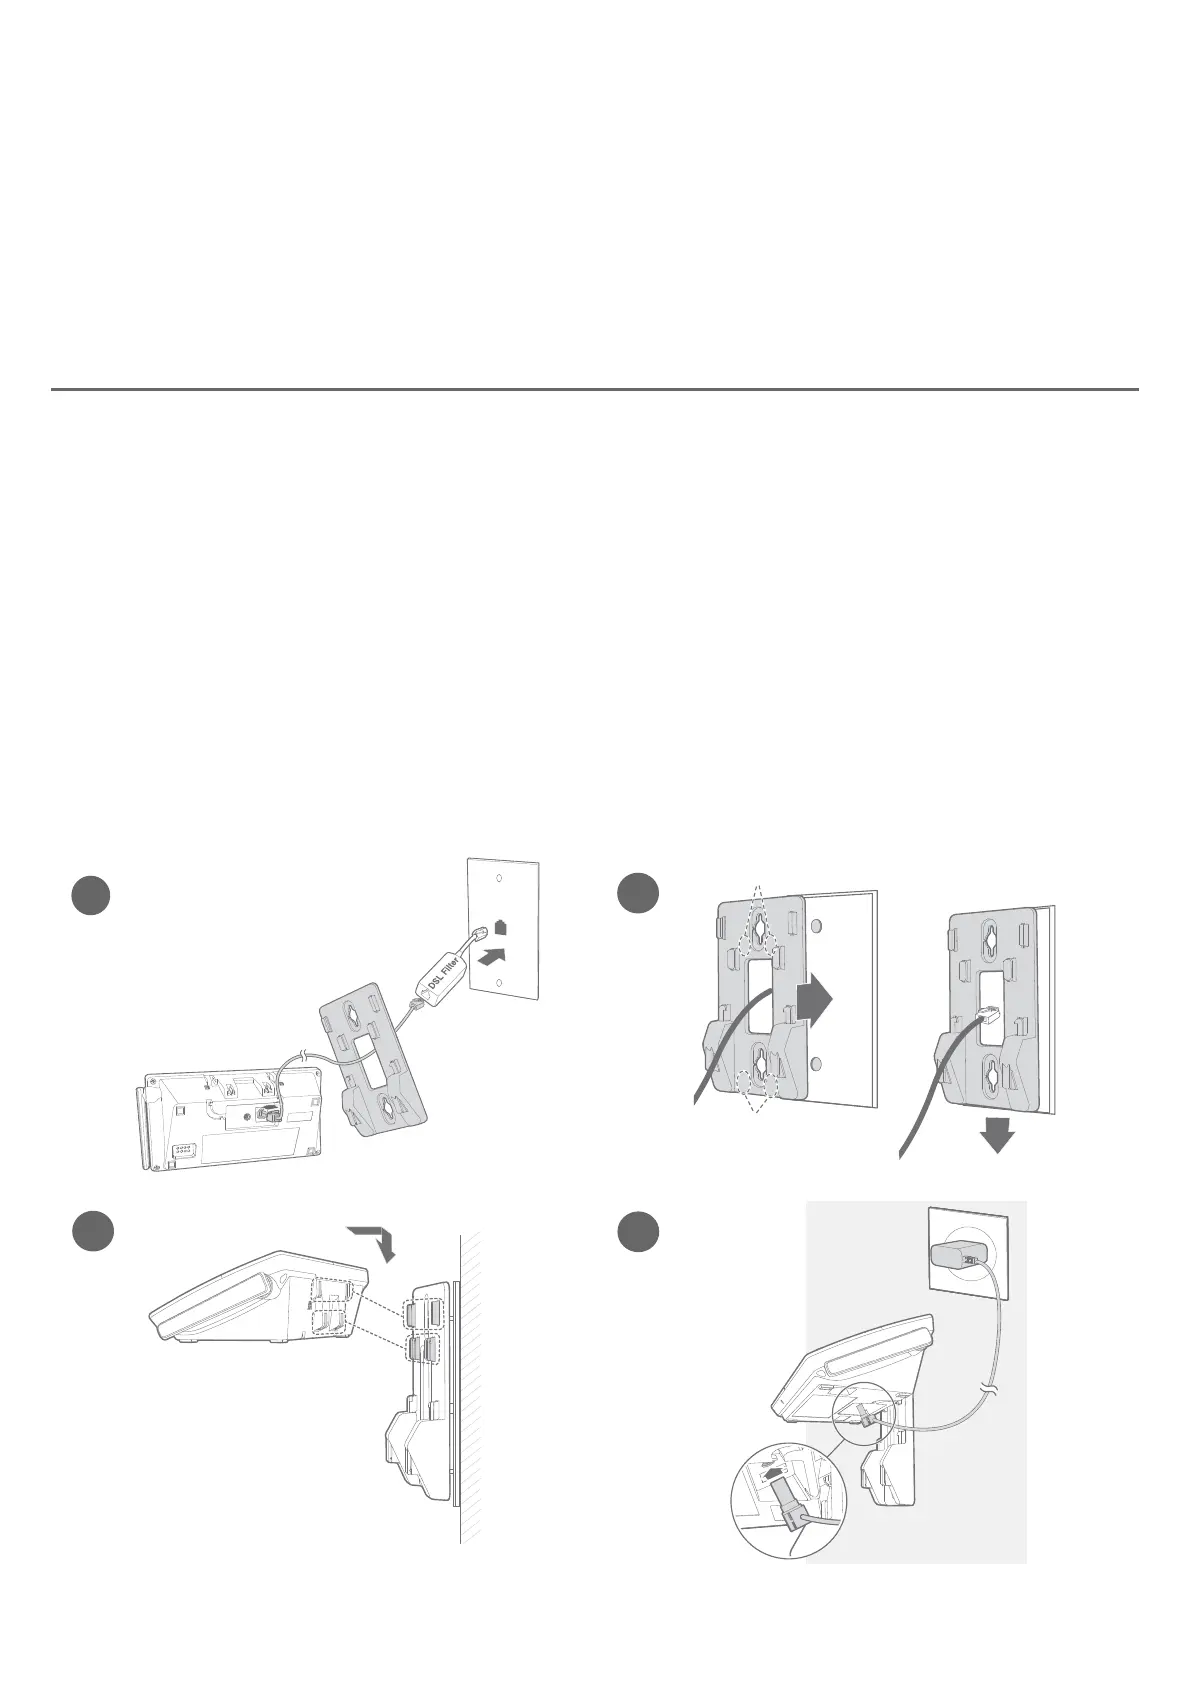
Tabletop to wall-mount installation
1. ©¿ÈºÇ»¸Ç¸¿¸Ã»ÂÁ¸¿¼Á¸¼ÁÇÂÇ»¸Ç¸¿¸Ã»ÂÁ¸µ´Æ¸¢¹ÌÂȴŸÈƼÁº´¬¥è¿Ç¸Å
ÿȺǻ¸ÂÇ»¸Å¸Á·Â¹Ç»¸Ç¸¿¸Ã»ÂÁ¸¿¼Á¸¼ÁÇÂÇ»¸è¿Ç¸Å«ÂÈǸǻ¸Ç¸¿¸Ã»ÂÁ¸
¿¼Á¸¶ÂÅ·ÂŬ¥è¿Ç¸ÅÇ»ÅÂȺ»Ç»¸Ê´¿¿ÀÂÈÁǵŴ¶¾¸Ç»Â¿¸
2. Align the holes on the wall-mount bracket with the standard wall plate and
slide the wall-mount bracket down until it locks securely.
3. Position the telephone base, as shown below. Insert the extended tabs
(marked B) of the wall-mount bracket into the slots on the back of the
telephone base. Push the telephone base down until it is securely in place.
4. Plug the power adapter into a power outlet not controlled by a wall switch.
Plug the other end of the power adapter into the telephone base. Bundle the
telephone line cord and power adapter cord neatly with twist ties.
B
A
1
2
3
4

 Loading...