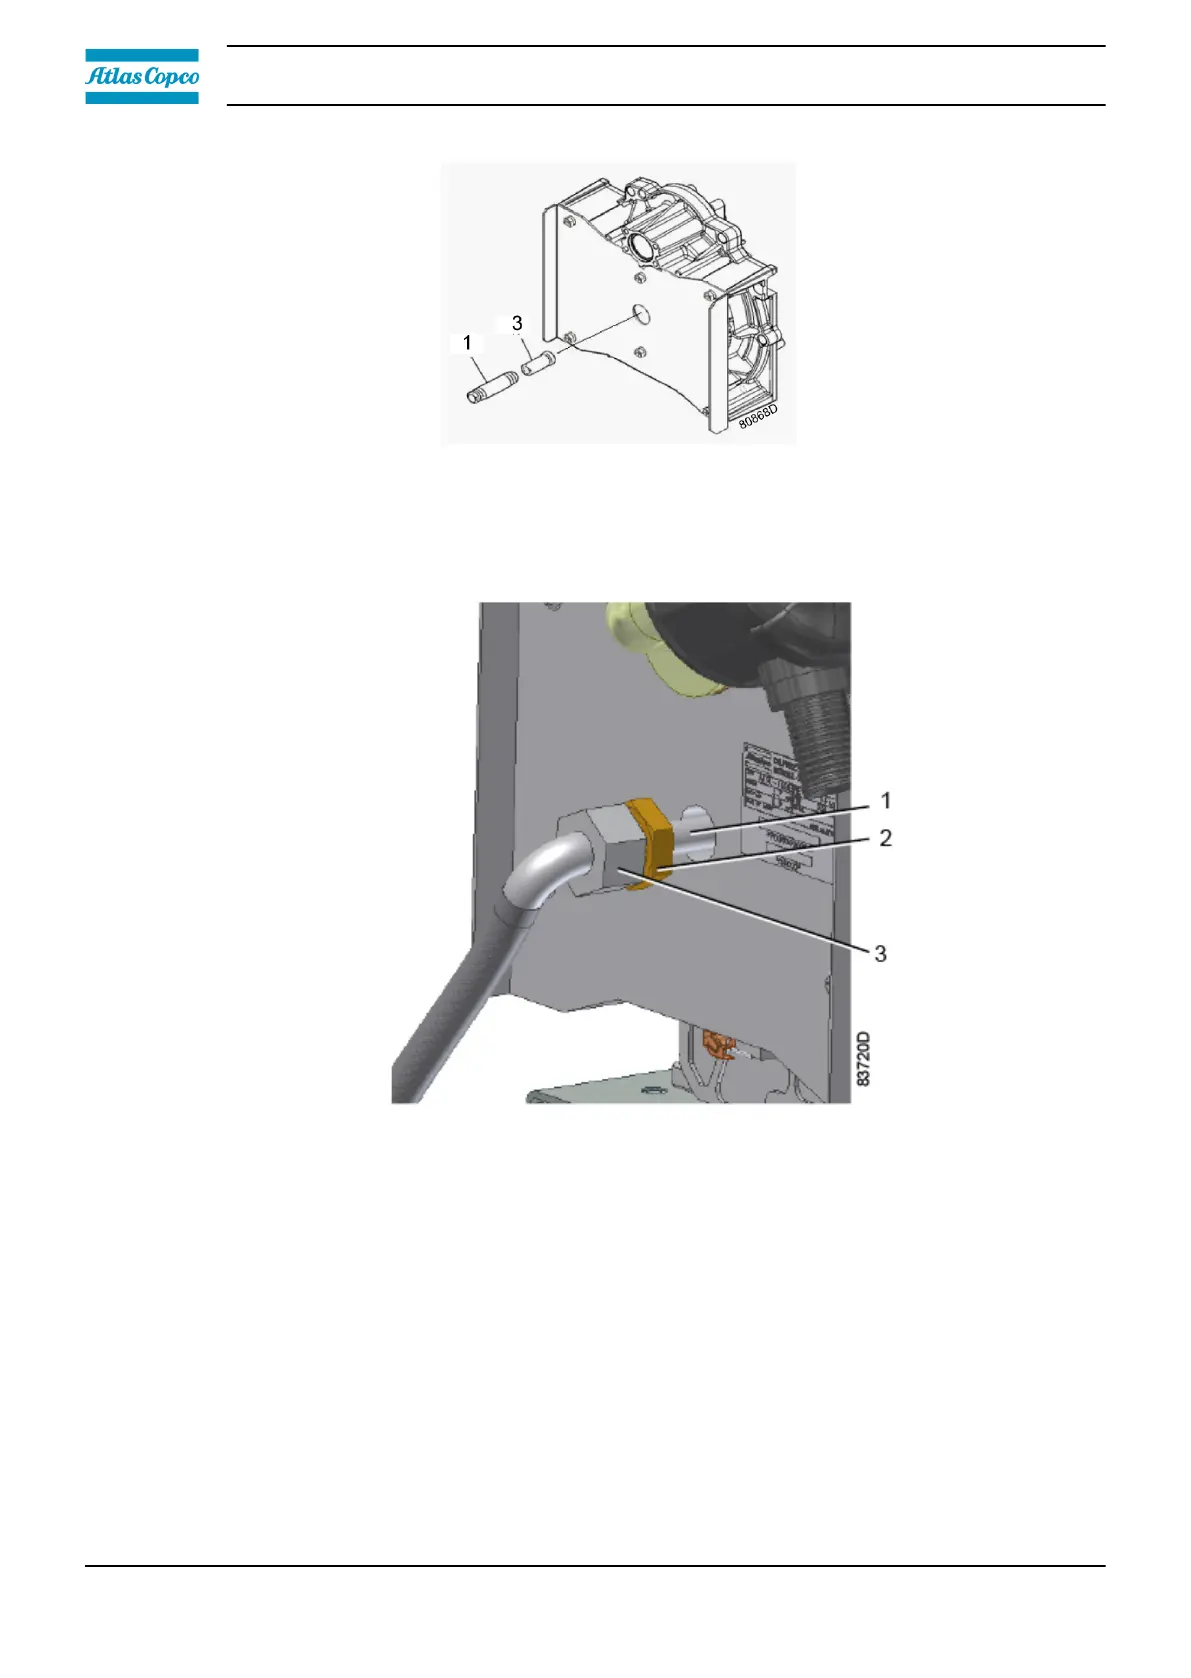
Replacement procedure
1. Stop the compressor, depressurize and switch off the voltage.
2. Loosen the coupling (3) while immobilizing the nipple (2) with a wrench.
3.
Remove the outlet pipe together with the nipple.
4. Fit the nipple to the new outlet pipe and tighten. Use only PTFE tape.
5. Fit the plastic insert in place as indicated on the drawing and assemble the outlet pipe with a
maximum torque of 5 Nm (3.7 lbf.ft). No more than one extra turn (360 °) is allowed for
positioning of the elbow. Make sure you end up turning clockwise to avoid leaks. Use only
PTFE tape.
Warning: If the outlet pipe is tightened too hard, the thread of the element can get damaged or
the insert can break, resulting in overheating of the compressor element! The maximum torque
is 40 Nm (29.5 lbf.ft).
6. Fasten the coupling (3) while holding the nipple (2) with a wrench.
Remark:
The outlet pipes of the new version of the 3.7 kW element (used on SF 4
+
from S/N API 744 000
onwards) and of the 5.5 kW element (used on SF 6
+
) do not contain an insert. In case of
Instruction book
70 2920 7219 10