31
For a stand-alone Room Controller, you can use one of the 12 built-in control programs or
download a custom control program.
See Appendix B (page 42) for a full description of each control program.
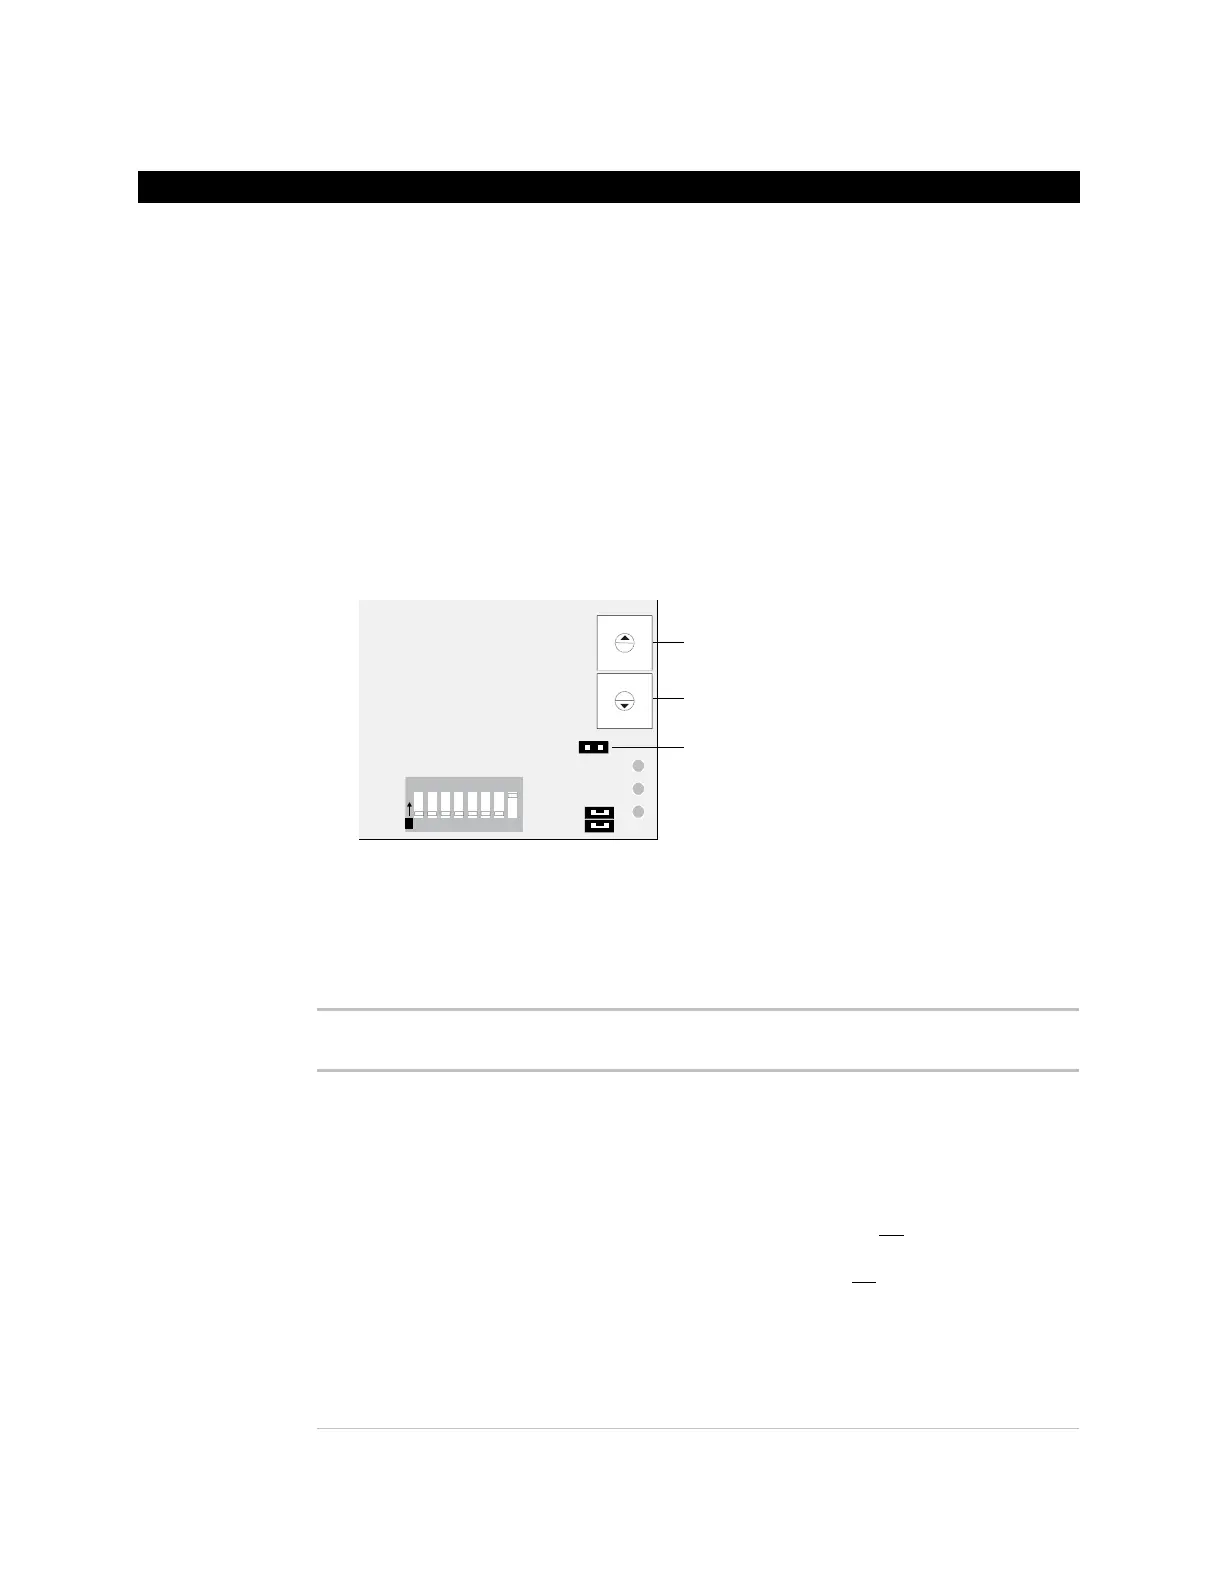
1 Remove power from the Room Controller.
2 Set DIP switch 8 to On to have the Room Controller operate as a stand-alone unit.
3 Set the rotary switches to the desired control program. See table below.
WARNING Do not set the switches to 0,0.
4 Put the Format jumper on.
Format
jumper
9
8
7
6
5
4
3
2
1
0
9
8
7
6
5
4
3
2
1
0
1 2 3 4 5 6 7 8
O
N
10’s
1’s
5 Apply power to the Room Controller.
6 Verify that the Room Controller displays the zone temperature.
7 Remove the Format jumper.
Set the rotary
switches to...
100% outside air
unit
Scheduled operation
• Freeze protection (optional) – Requires
sensor
• Smoke detection (optional) – Requires
sensor
• Single speed fan
• Modulating chilled water valve (analog)
OR
• Modulating hot water valve (analog)
2-stage cooling
OR
• 2-position outdoor air damper
2-stage heating
• Fan status monitor (optional) – Requires
sensor
• Discharge temperature limit control
(optional) – Requires sensor
01
Selecting or downloading a control program
To select a built-
in control
program