VENUE System Restore 17
Creating an E6L Engine System Restore USB Drive
To create an E6L Engine System Restore USB Drive:
1 In the extracted Engine Restore folder, locate the file called
rufus-x.x.x.exe and make sure it is located on the same computer
as the VENUE Engine Restore ISO file.
2 Double-click the file to launch it.
3 Insert a USB drive into an available USB port on your computer.
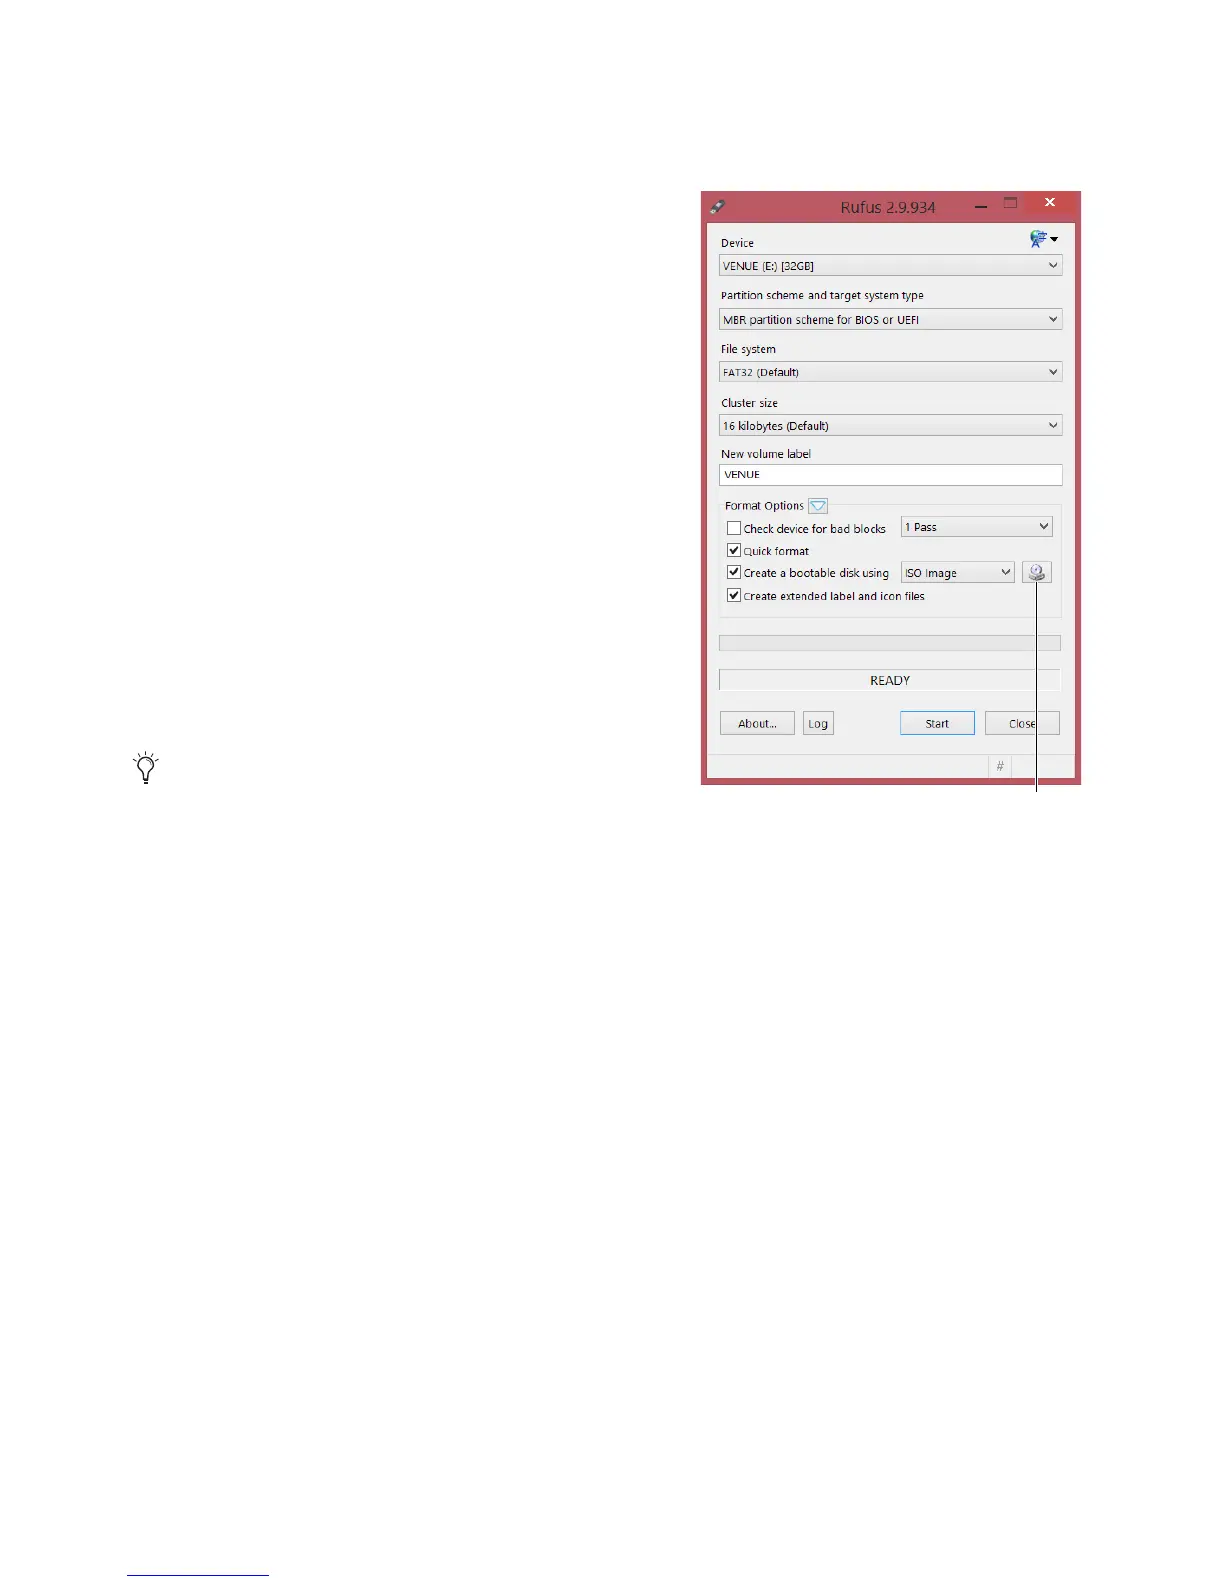
4 In Rufus, do the following:
• Choose the USB drive from the Device pop-up menu.
• Choose
FAT32 from the File System pop-up menu.
• (Optional) Enter a name for the USB drive in the
Volume label
field.
5 Under Format options, do the following:
• Choose
Quick Format.
• Choose Create a bootable disk using, and then from the
pop-up choose
ISO Image.
• Click the disk icon, browse to the VENUE 6.X.X.xxx
E6L_Engine_Restore
.iso file, and click Open.
VENUE 6.X.X.xxx E6L_Engine_Restore should appear at the
bottom of the Rufus window.
6 Click Start, then click OK. Rufus begins to format the USB drive
and progress is indicated on-screen.
7 When formatting is completed, remove the USB drive from the
computer, and then label the drive “E6L Engine Restore.”
Creating an S6L Control Surface System Restore USB Drive
To create an S6L Control Surface System Restore USB Drive:
1 Insert the other USB drive into the USB port of your computer.
2 Relaunch Rufus, if necessary, and do the following in Rufus:
• Choose the USB drive from the
Device pop-up menu.
• Choose
FAT32 from the File System pop-up menu.
• (Optional) Enter a name for the USB drive in the
Volume label field.
3 Under Format options, do the following:
• Choose
Quick Format.
• Choose Create a bootable disk using, and then from the pop-up choose ISO Image.
• Click the disk icon, browse to the VENUE 6.X.X.xxx_S6L_Console_Restore and click Open.
VENUE 6.X.X.xxx_S6L_Console_Restore should appear at the bottom of the Rufus window.
4 Click Start, then click OK. Rufus begins to format the USB drive and progress is indicated on-screen.
5 When formatting is completed, click Close, remove the USB drive from the computer, and then label the drive “S6L Console
Restore.”
6 Proceed to Installing and Activating VENUE Software on the E6L Engine.
If the Autoplay window appears during formatting, close it.
Usi...:VENUE_6.1.0.192_E6L_Engine_Restore.iso