5
AvMap G7 Farmnavigator – User Manual
1. Introduction
1.1 Ways of using G7 Farmnavigator
Thank you for choosing AvMap G7 Farmnavigator!
Now you have the opportunity to:
- Map your elds
- Set up and save your implements
- Create guidelines for your activities
- Save all the activities done in the eld
- Congure the spray boom and have section control directly on the display during your
treatments
- Control sections automatically, when a compatible device is connected to G7 Farmnavigator
- Import and export you jobs and see them on Google Earth™
- Connect Auto-Steering Kit to take full advantage of driving capabilities
- Save the position of obstacles on the work area
- Connect a camera and control it from G7 Farmnavigator display
- Use Terrestrial Navigator (only for G7 Plus Farmnavigator, hereinafter referred to as G7 Plus)
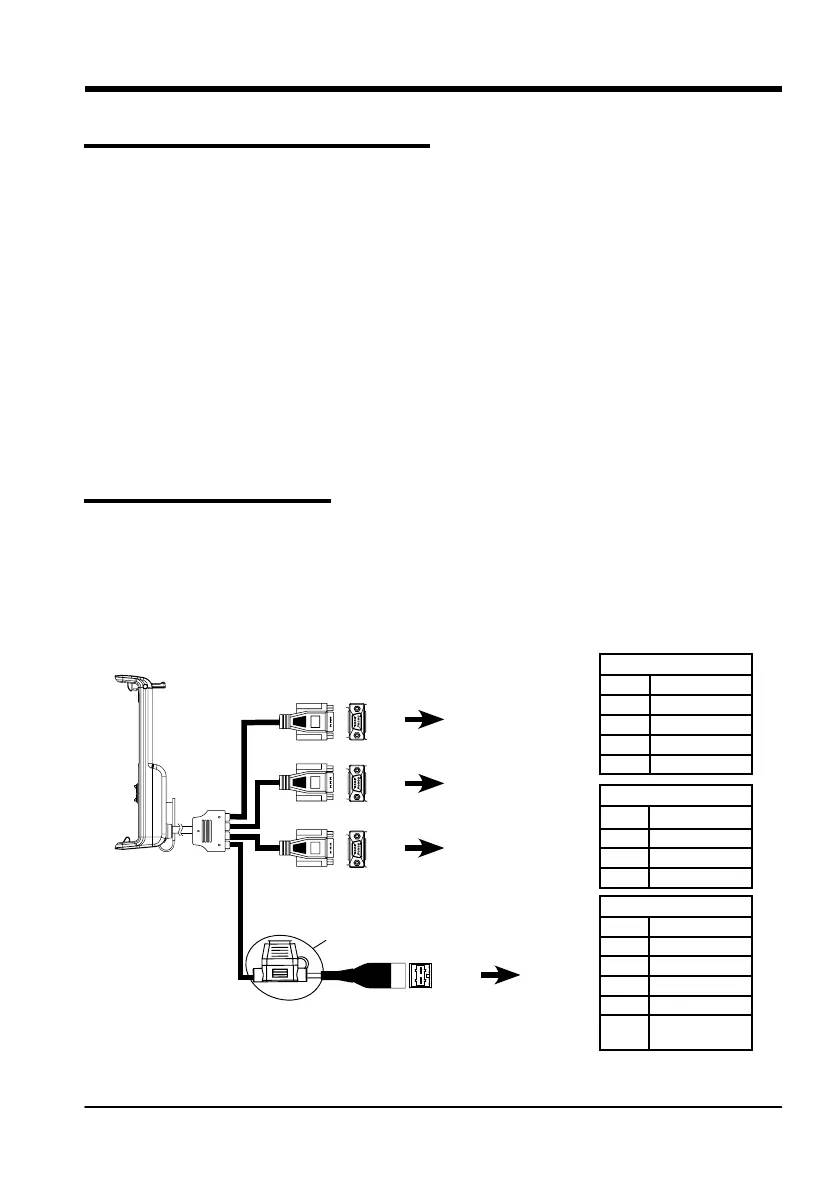
1.2 Electrical connections
G7 Farmnavigator is provided with a bracket and a wiring with connectors to ensure an easy and
safe installation on your tractor.
Wiring harness consists of a 2A protection fuse.
The supply voltage must be within the range 10-35 Vdc
Follow the instructions included in the package.
P5 PIN-OUT
PIN n° Function
2 GPS TX
3 GPS RX
4 GPS VCC
5 GPS GND
P2
P4 PIN-OUT
PIN n° Function
2 DEVICE 2 TX
3 DEVICE 2 RX
5 DEVICE 2 GND
P3 PIN-OUT
PIN n° Function
2 DEVICE 1 TX
3 DEVICE 1 RX
4 DEVICE 1 VCC
5 DEVICE 1 GND
9
EXTERNAL
ALARM
P5
P4
P3
PWR +
PWR -
2A Fuse
6
1
9
5
6
1
9
5
6
1
9
5
GPS antenna
Controller
Generic device
Power
supply
Figure 1.2.a - Electrical connections