0024-9551 Revision 1
50
PCA
®
400 User Manual
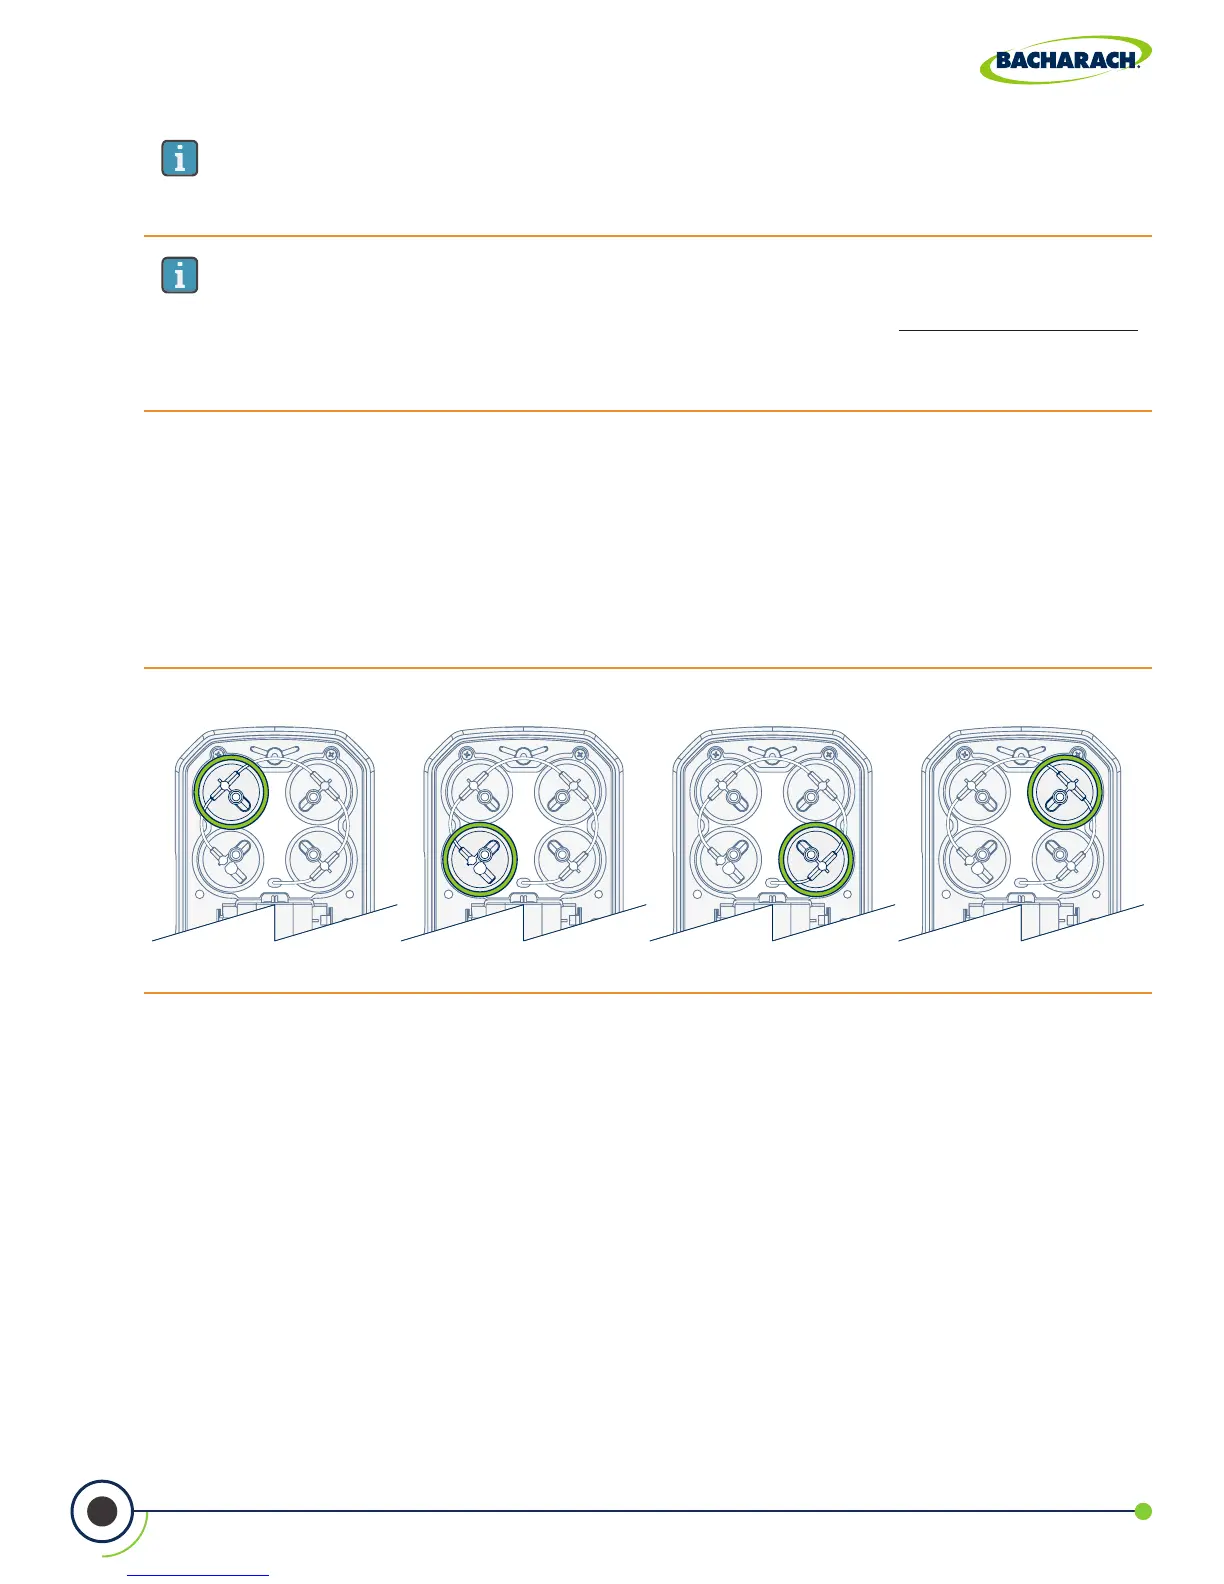
Fig. 5-5: Gas Sensor Positions
Position 1 Position 2 Position 3 Position 4
IMPORTANT: If the correct code was entered, a conrmation message will display
the calibration code, the sensor type and the position of the sensor being replaced.
If an incorrect code was entered, the screen will display SENSOR: UNKNOWN.
Check to make sure the correct code has been entered. If the problem persist,
contact your nearest Bacharach Service Center (Section 7.2).
IMPORTANT: There are two B-Smart
®
Sensor code lengths:
• 10-digits for CO
HIGH
, NO, NO
2
and SO
2
,
• 14-digits for CO
LOW
.
5. Disconnect Sensor from Board
Take care not to bend the connector pins on the base of the sensor when removing from the
analyzer. Disconnect sample tubing from the cap assembly and pull sensor from the board.
6. Remove Cap Assembly (Gas Cup)
While holding the base of the sensor, rmly twist the cap assembly in a counterclockwise
fashion to remove. (Set the old sensor aside if it is to be returned to Bacharach for recalibration.)
3. Turn OFF the Analyzer
Press and hold the Power Key and allow the analyzer to complete its shutdown procedure
4. Remove Cover & Locate Sensor Position
After the calibration code has been accepted, a conrmation message will display the
position of the sensor being replaced. Remove the analyzer’s rear cover and located the
sensor which is to be replaced. (Sensor positions are denoted by a 1, 2, 3 or 4.)