0.001, 0.01, 0.1, 1, 10, 100, 1000, 10000
0.001, 0.01, 0.1, 1, 10, 100, 1000, 10000
Before beginning the calibration, ensure that the ionic valency option
in the setup menu matches connected electrode. All of the standards
and samples should be at the same temperature and calibration
points cover the anticipated range of the samples.
For the low concentration or sample contains the interference ions,
we recommend to add the ionic strength adjuster (ISA) to all of the
standards and samples. A typical addition would be 2 ml ISA to 100 ml
of standard and sample.
For the low level sodium determination (< 1 ppm), make sure to use the
laboratory plastic beaker as a container.
Stir the standards and samples at a uniform rate that will help you get
most accurate readings.
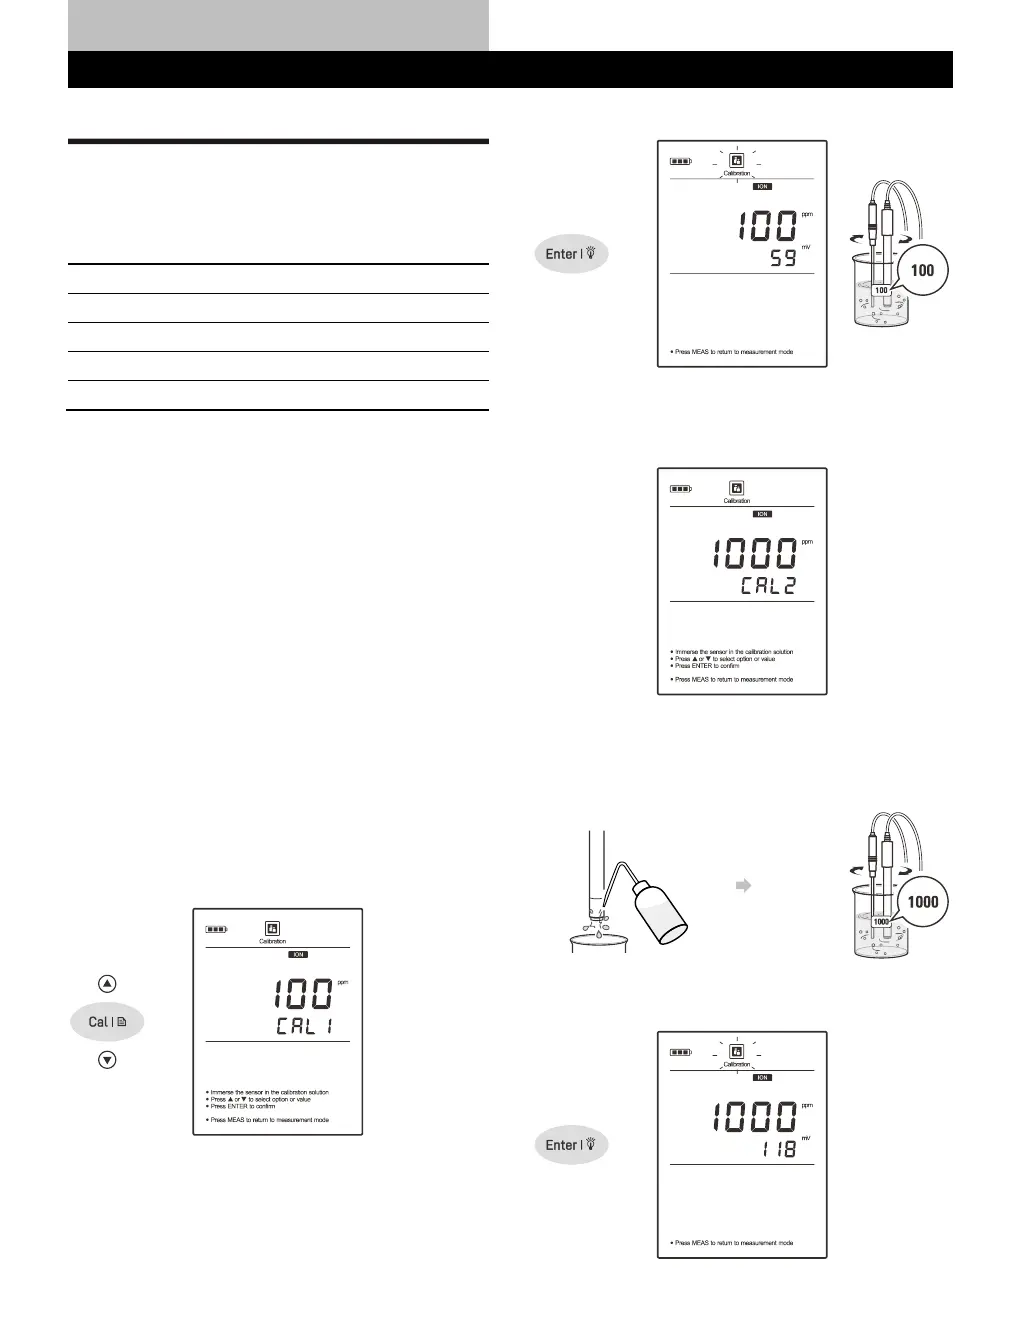
Calibrating the Meter
1.1 Press the Cal key, the meter shows 0.001 ppm/CAL1 or mg/L,
mol/L, mmol/L, depending on the selected concentration unit.
1.2 Press the key to select first calibration point (e.g., 100 ppm),
the meter will automatically perform the calibration from the
low to high concentrations.
1.3 Rinse the ion selective electrode with distilled water, then rinse
with a small amount of standard solution. Place the electrode
(and temperature probe) into the standard solution, stir gently to
create a homogeneous solution.
1.4 Press the Enter key, the Calibration icon begins flashing.
1.5 When the reading has stabilized, the display will show 1000 ppm
/ CAL2. The meter prompts you to continue with second point
calibration.
1.6 Rinse the ion selective electrode with distilled water, then rinse
with a small amount of standard solution. Place the electrode
(and temperature probe) into the next standard solution and stir
gently.
1.7 Press the Enter key, the Calibration icon begins flashing.
 Loading...
