2. General
90°
4
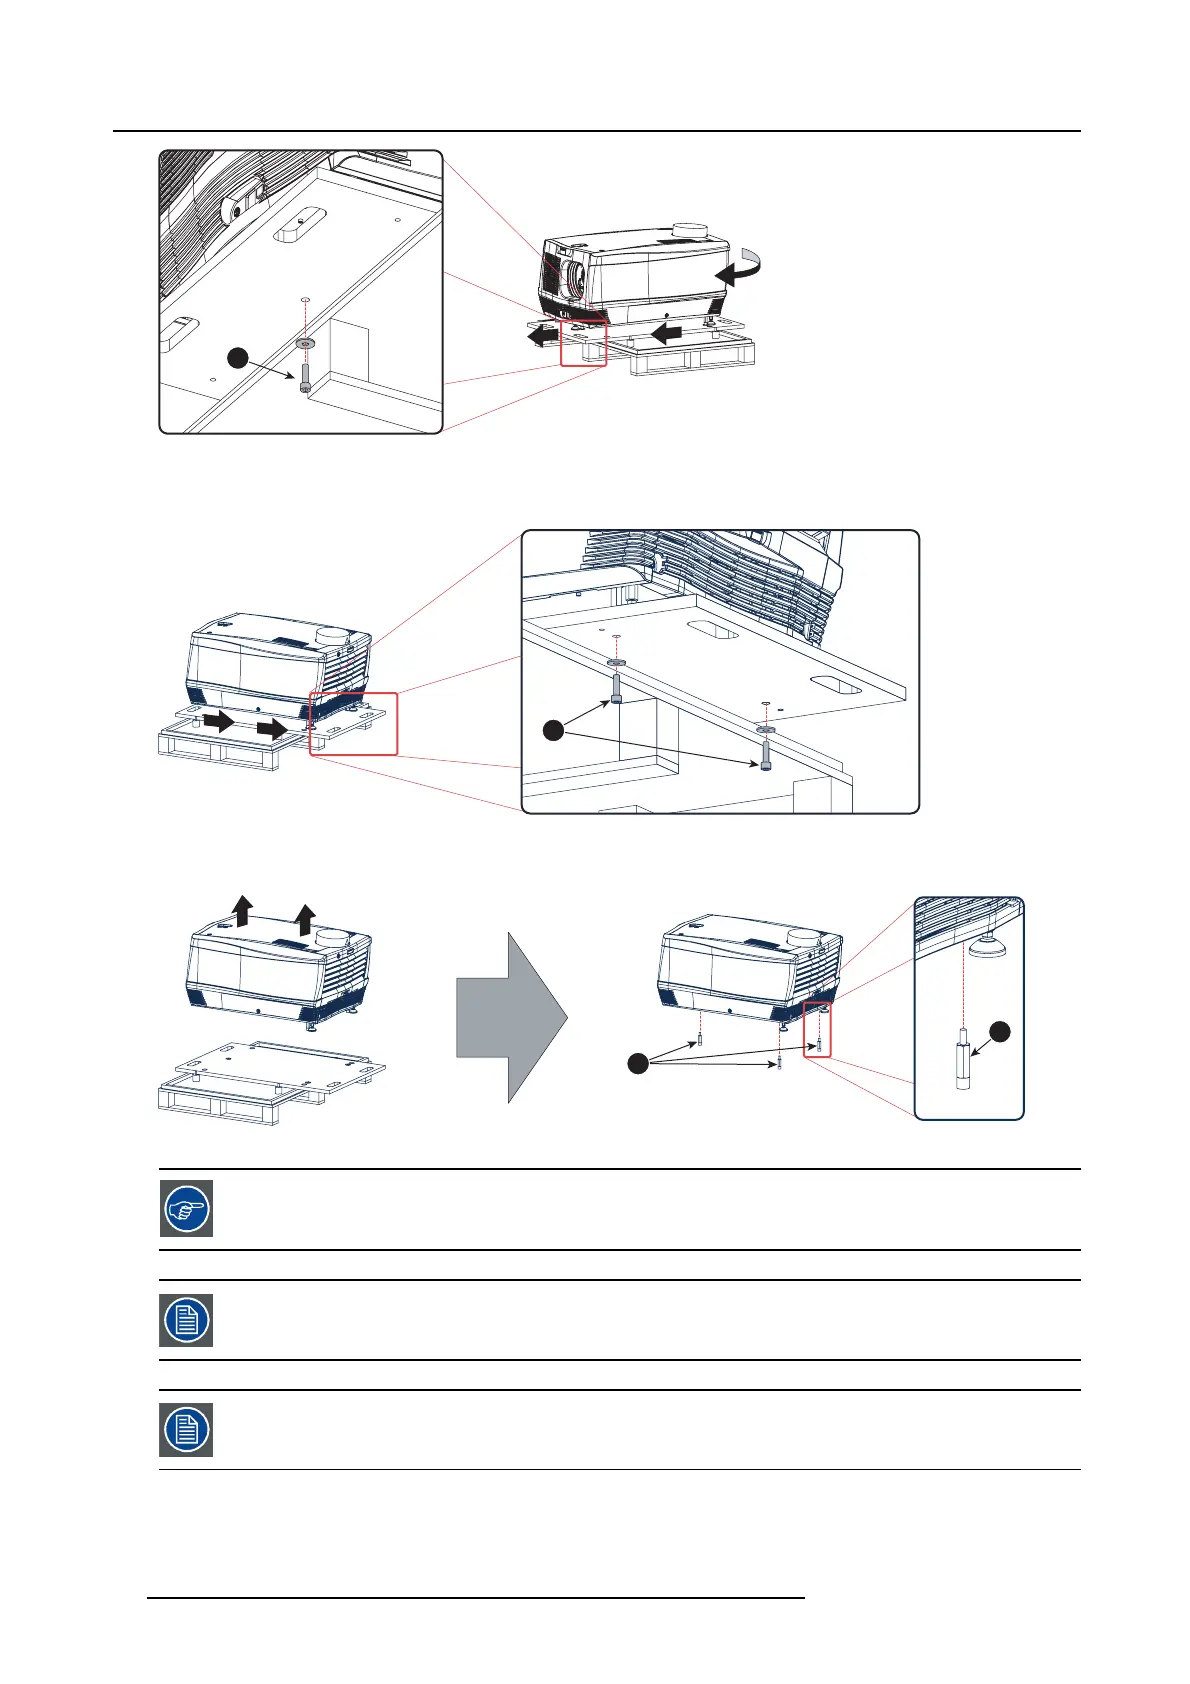
Image 2-3
7. Slide the rear side over the edge of the pallet unit the two fixation screws (reference 5) at the rear are visible.
8. Remov e the two hexagon socket head cap screw (reference 5). Use an 8 mm Allen wrench.
5
Image 2-4
9. Remov e the projector from the wooden support plate and finally remove the 3 extension tubes (reference 6). Use a 17 mm
wrench.
6
6
Image 2-5
Save the original shipping carton a
nd packing material, they w ill be necessary if yo u ever have to ship your
projector. Fo r maximum protection, rep ack your projector as it was originally packed at the fac tory.
A rubber foam inside a plastic bag is p laced into the lens opening of the projector. It’s recommended to reuse
this foam and plastic back each time you transport the projector. This to prevent intrusion of dust and foreign
particles.
The lens is delivered in a sep arate box. For lens installation, see section “Lens & lens ho lder”.
12 R59770351 DP2K-20C 02/02/2010

 Loading...


