Page 11
9487 Dielman Rock Island Ind Dr, St. Louis, MO 63132 www.becs.com
Installation and Technical Manual Rev: H10
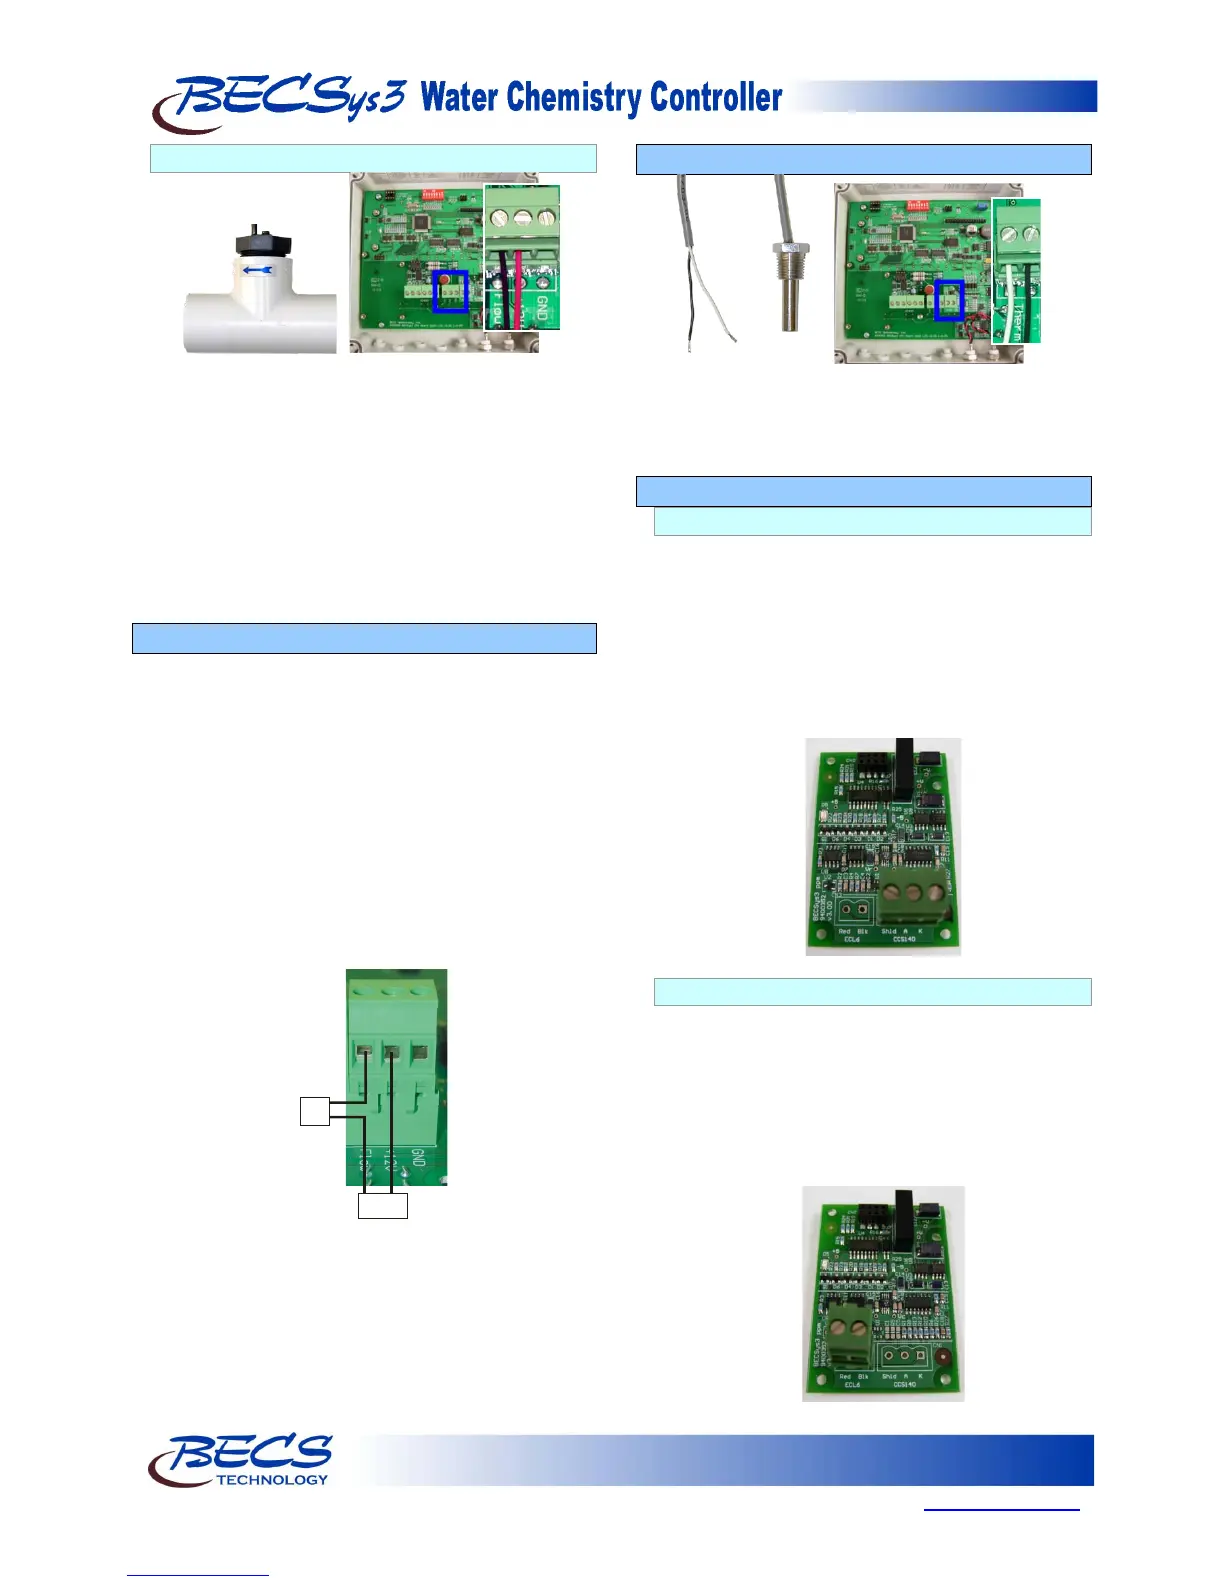
B – 11.2: Reed Flow Switch
The reed flow switch is a (2) two-wire switch.
Connect the wires to CN5 in the cover of the unit.
The black wire goes to the terminal labeled Flow,
and the red wire goes to the terminal labeled + 12.
NOTE: Unlike the paddlewheel flow switch, the
reed flow switch is a directional switch.
Make sure it is installed with the flow
arrow in the proper direction. No check
valve is required with the reed flow switch.
B – 12: Wiring a Timer
One advantage of the BECSys3 Controller is that the
unit can be used with a timer to control the feeder and
still not lose power to the sensor. Most controllers
work with a timer by cutting all power, which then
means that the sensor goes through an erratic period
(up to two minutes) every time power is restored.
With BECS units, the sensor continues to function
even when the timer cuts power to the feeder so there
is never a loss in accuracy.
If you have decided to use a timer to interrupt the
chemical feed, wire the timer in parallel with the flow
lead of the flow switch.
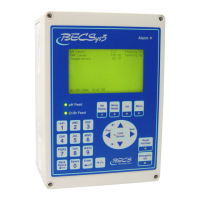
B – 13: Wiring the Temperature Sensor
The optional temperature sensor is wired to CN5 in
the cover of the unit. The white wire goes to the
terminal labeled "+", and the black wire goes to the
terminal labeled "-".
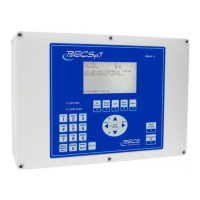
B – 14: Wiring a Free Chlorine Sensor
B – 14.1: CCS140
The CCS140 Free Chlorine Sensor is wired to the
option board inside the controller. If you ordered
your controller with the option board, it is located
on the lower left side of the lid. There is a three
position pluggable terminal block where the wires
will be connected. Connect the red "A" wire to
the A terminal, the "K" white tip with transparent
wire to the K terminal, and the thick unlabeled
wire to the ground terminal.
B – 14.2: ECL6
The ECL6 Free Chlorine Sensor is wired to the
option board inside the controller. If you ordered
your controller with the option board, it is located
on the lower left side of the lid. There is a two
position pluggable terminal block where the wires
will be connected. The red wire goes to the
position labeled “red” and the black wire goes to
the position labeled “black”.