Page 18
www.becs.com 9487 Dielman Rock Island Ind Dr, St. Louis, MO 63132
Installation and Technical Manual Rev: H10
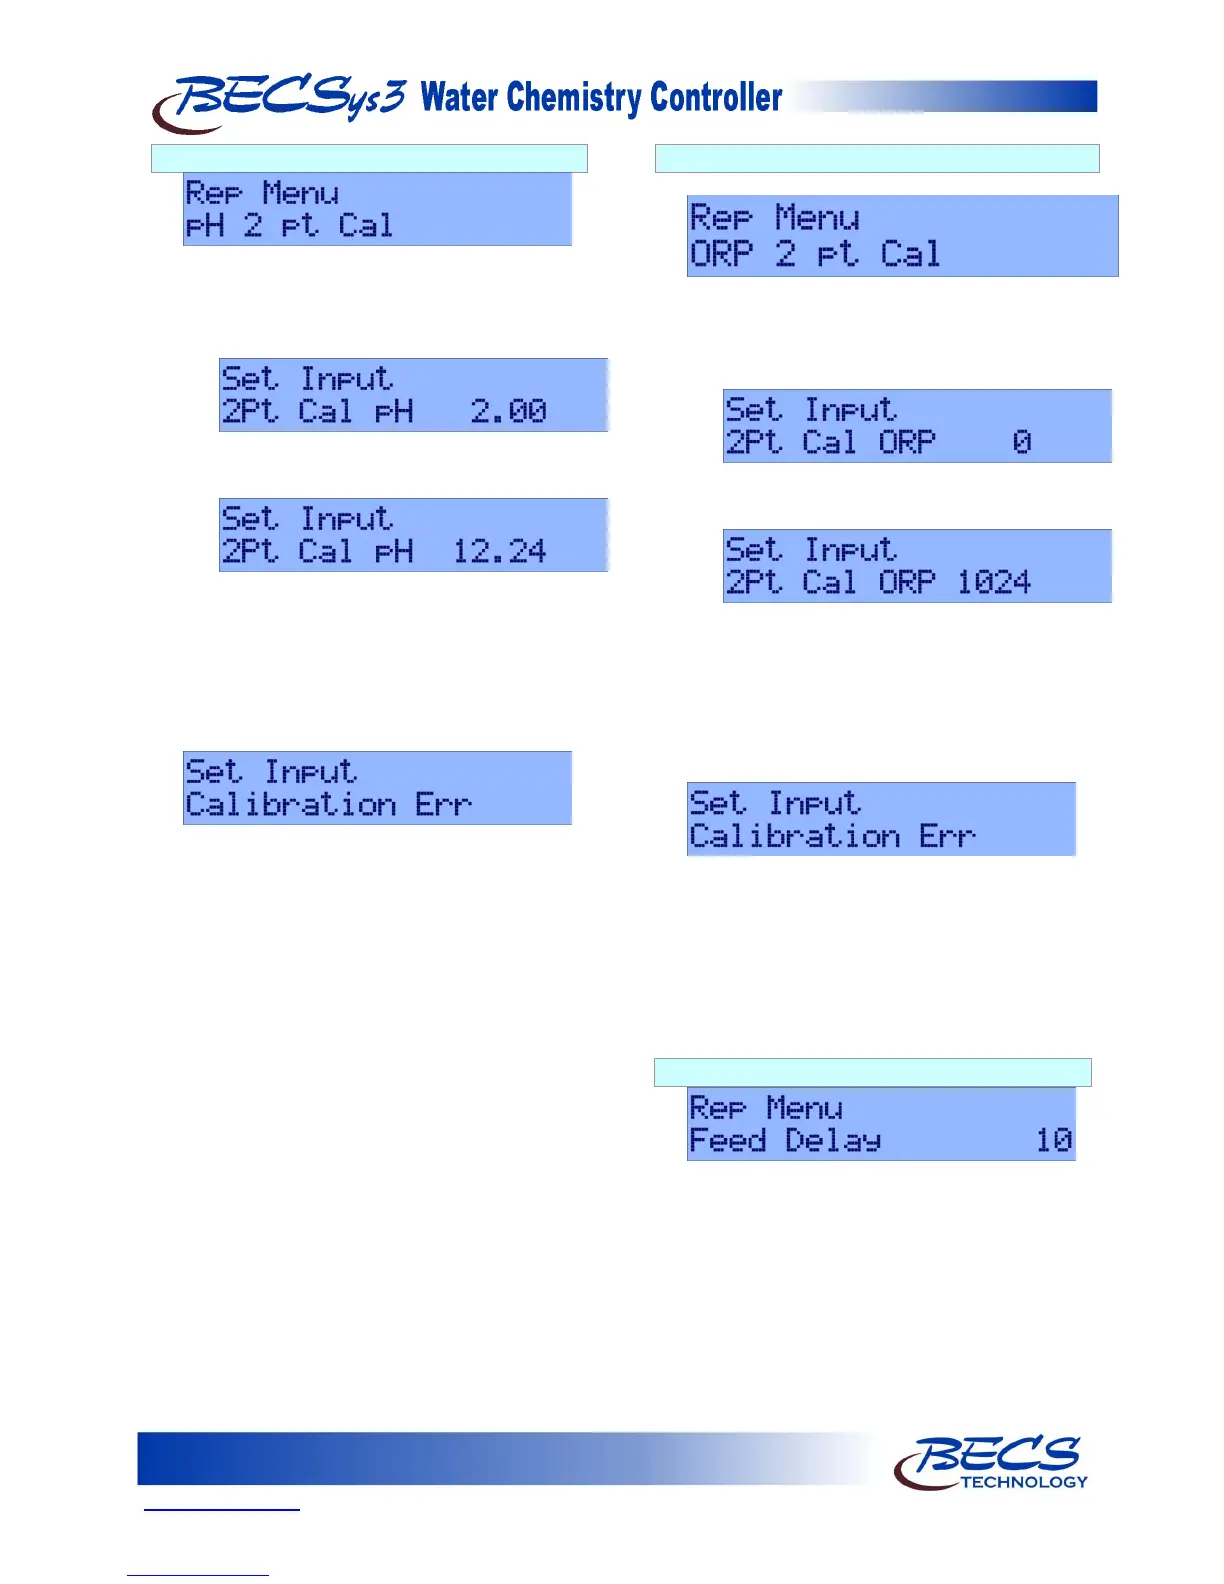
D – 2.5: pH Calibration (2 Point)
To perform a two-point calibration of the pH
input:
1) Connect a pH signal generator, for example
the BECSysHRC-1, to the pH input and press
the Enter key.
2)
will now be displayed. Set the signal
generator to 2.00 and after several seconds,
press the Enter key.
3)
will now be displayed. Set the signal
generator to 12.24 and after several seconds,
press the Enter key.
4) Calibration is complete.
If during calibration the following screen is
displayed:
This indicates the calibration was not successful.
See the troubleshooting section at the end of this
manual for more information.
NOTE: It is recommended to do the 2 Point pH
Calibration only when instructed to do so
by a Factory Representative.
D – 2.6: ORP Calibration (2 Point)
Pressing the down arrow displays:
To perform a two-point calibration of the ORP
input:
1) Connect an ORP signal generator, for
example the BECSysHRC-1, to the ORP
input and press the Enter key.
2)
will now be displayed. Set the signal
generator to 0 and after several seconds, press
the Enter key.
3)
will now be displayed. Set the signal
generator to 1024 and after several seconds,
press the Enter key.
4) Calibration is complete.
If during calibration the following screen is
displayed:
This indicates the calibration was not successful.
See the troubleshooting section at the end of this
manual for more information.
NOTE: It is recommended to do the 2 Point ORP
Calibration only when instructed to do so
by a Factory Representative.
D – 2.7: Feed Delay
Pressing the down arrow displays Feed Delay 10.
When flow is disrupted and then restored,
activation of feeds will be delayed for the specified
time (in minutes). The valid range is 0 (disabled)
to 60 minutes. Press the Enter key and the value
will start to flash. Use the up and down keys to
reach the desired number, and then press the
Enter key again to set the value.