Using HyperDeck
19
You can also use the Jog/Shuttle Wheel to shuttle to a particular section at variable speeds. The more
you turn it forwards or backwards, the faster your HyperDeck Studio will play through your video. Once
you’ve found the section you want to review, press play to resume normal playback.
If you want to slowly jog through your video frame by frame, press the JOG button once to enable
jog operation. Turning the jog/shuttle wheel in the desired direction will then jog through your video.
Pressing the JOG button again will return the wheel to shuttle operation.
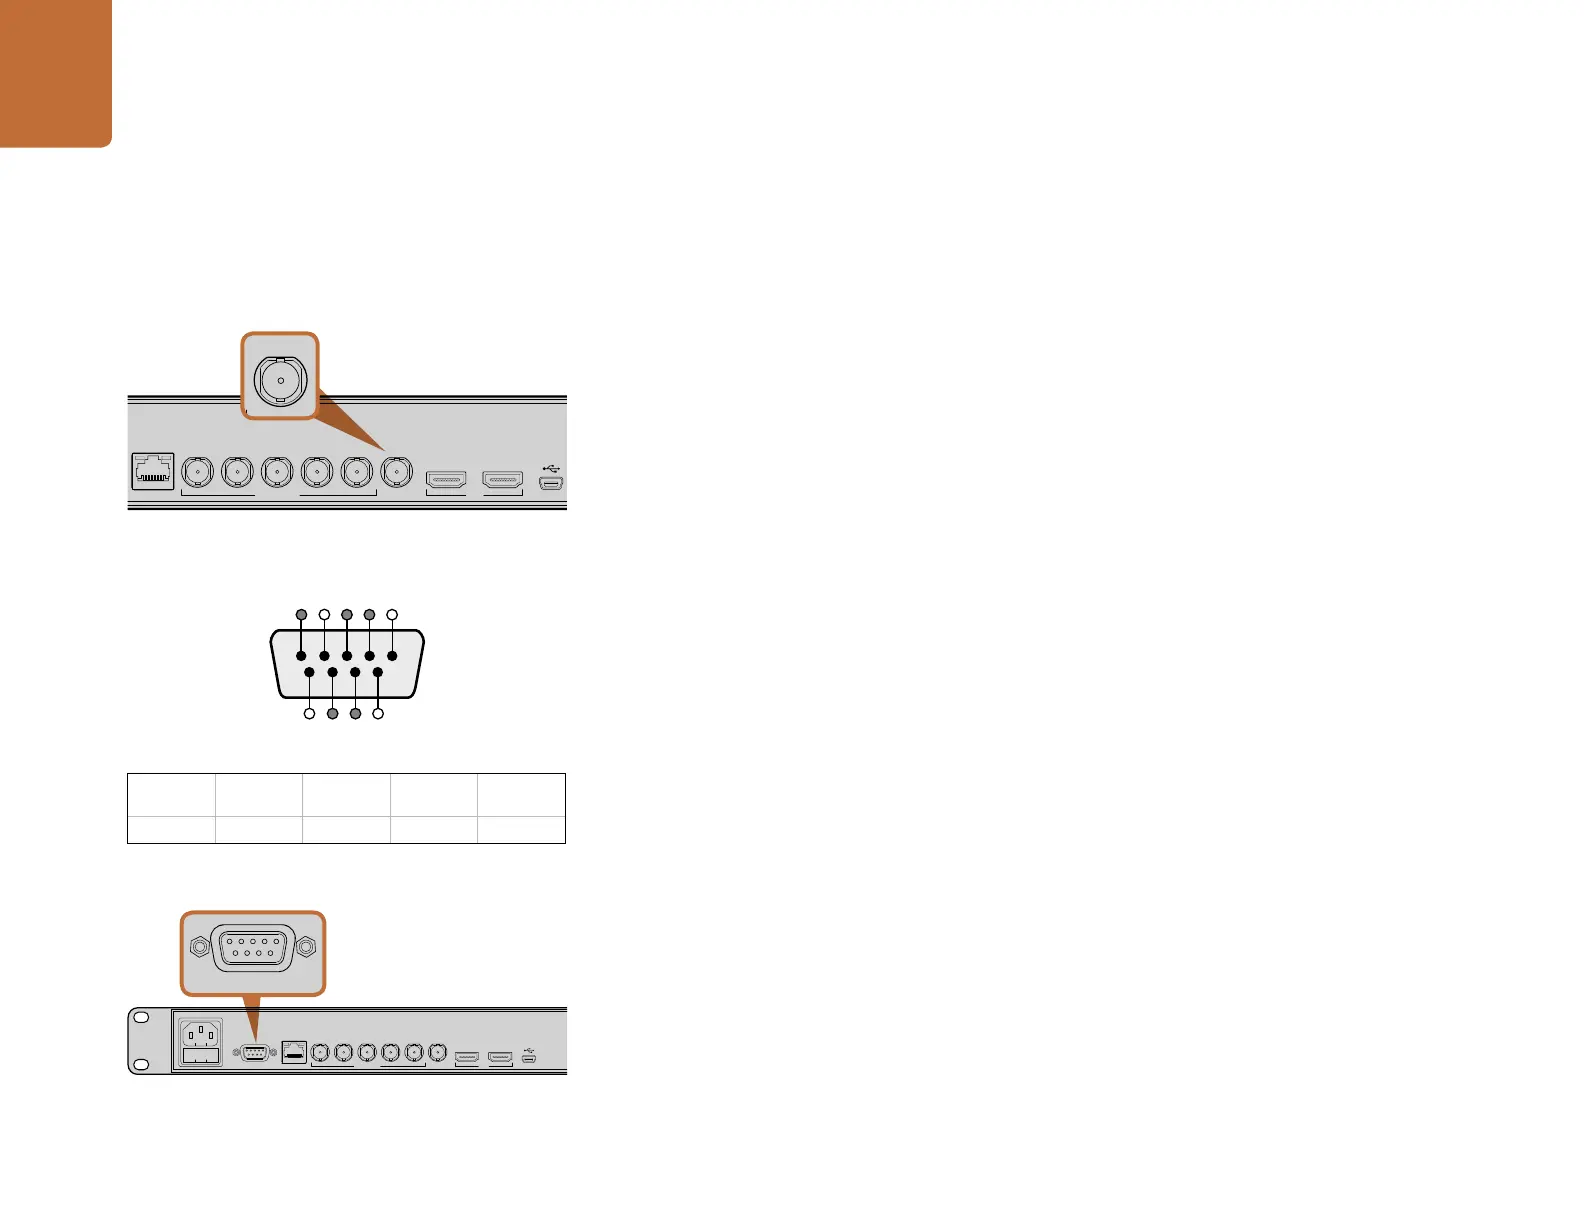
Ref Input
HyperDeck Studio and HyperDeck Studio Pro feature a Reference input, which accepts blackburst and
tri-level sync signals from a sync generator. Connect a reference source to this input if you want to
synchronize HyperDeck with other video equipment, such as a production switcher.
RS-422 Control
What is RS-422 Control?
The RS-422 standard is commonly supported by NLE hardware and software and allows video players
and recorders to be remotely controlled by an external RS-422 controller or capture device. You can
remotely control HyperDeck Studio models using your favorite NLE software and video capture hardware
to remotely capture, batch capture and play back video with your HyperDeck Studio. All you need to do
is connect an RS-422 cable from your capture device to HyperDeck Studio and press the REM button
to enable remote deck control.
Using an External RS-422 Controller
Both HyperDeck Studio models feature an industry standard Sony™ compatible RS-422 deck control
port, which has the correct pin connections for a direct connection to any remote controller with RS-422.
You can use pre-manufactured 9 pin cables as long as each end of the cable is wired “pin for pin” where
the same pin numbers on each end of the cable are connected together. If you would like to make custom
cables, please refer to the accompanying wiring diagram.
You can remotely control your HyperDeck Studio from an RS-422 controller instead of locally pushing buttons.
Step 1. Connect a video signal to an SDI or HDMI video input of your HyperDeck Studio.
Step 2. Connect an RS-422 cable from your external controller to your HyperDeck Studio.
Step 3. Press the REM button to enable remote deck control.
Reference input on HyperDeck Studio.
ETHERNET SD/HD/3GHD-SDI HDMI
IN OUT
REF INMON OUTOUT 2OUT 1LOOP OUTIN
REMOTE ETHERNET SD/HD/3GHD-SDI HDMI
IN OUT
REF INMON OUTOUT 2OUT 1LOOP OUTIN
INPUT
DISP
SET
REM
JOG
Receive
(–)
Receive
(+)
Transmit
(–)
Transmit
(+)
Ground
Pins
2 7 8 3 1, 4, 6, 9
5 4 3 2 1
9 8 7 6
RS-422 remote pin connections.
Remote port on HyperDeck Studio.
REMOTE ETHERNET SD/HD/3GHD-SDI HDMI
IN OUT
REF INMON OUTOUT 2OUT 1LOOP OUTIN
REMOTE ETHERNET SD/HD/3GHD-SDI HDMI
IN OUT
REF INMON OUTOUT 2OUT 1LOOP OUTIN
INPUT
DISP
SET
REM
JOG