Using Your Favorite Editing Software
29
Capturing live via Thunderbolt
To capture video live via Thunderbolt from HyperDeck Studio Pro:
Step 1. Choose Tools > Capture to open the Capture Tool.
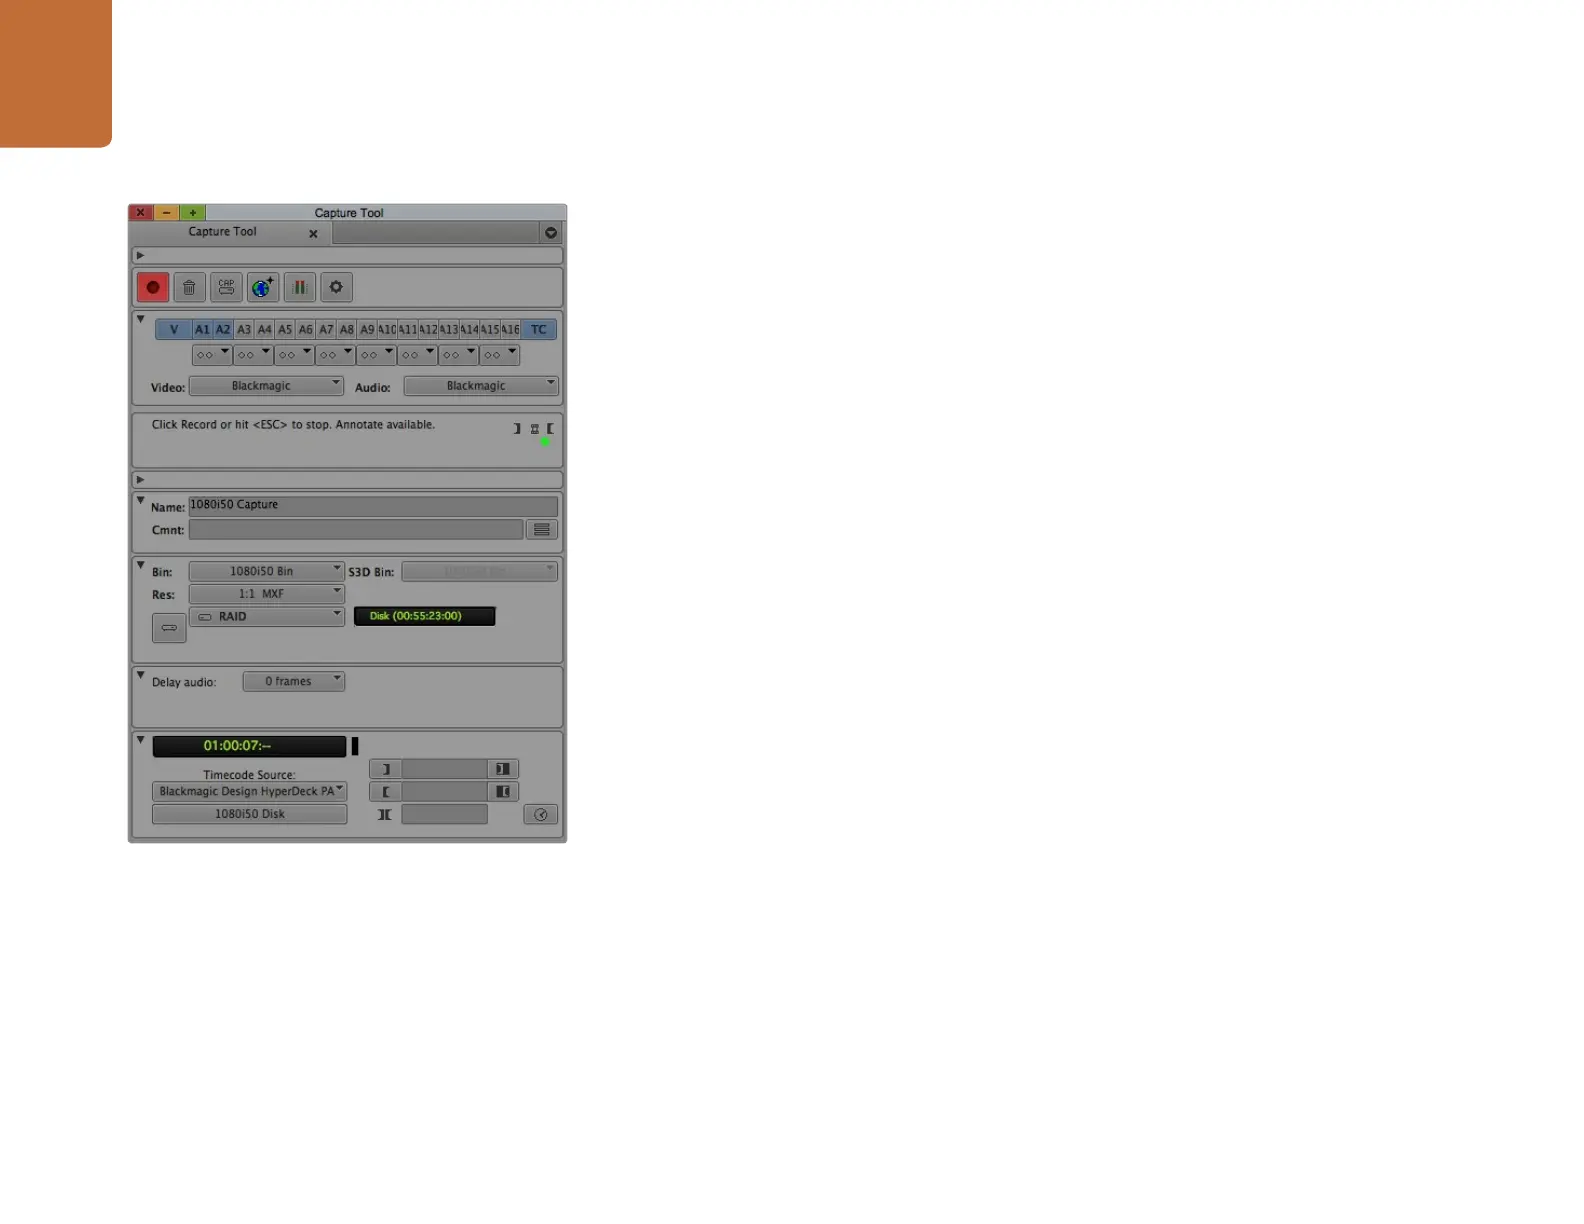
Step 2. Set up the Capture Tool to capture video by clicking the Toggle Source button.
Step 3. Set the Video and Audio input menus to "Blackmagic".
Step 4. Select the video source track (V) and the audio source tracks (A1, A2, ...) you wish to capture.
Step 5. Use the Bin menu to select a Target Bin from the list of open bins.
Step 6. From the Res (resolution) menu, choose which compressed or uncompressed codec you wish
to use for your captured clips. For maximum quality uncompressed video, choose "1:1" for
8-bit video capture or "1:1 10b" for 10 Bit video capture.
St ep 7. Select the disk storage for your captured video and audio. Use the Single/Dual Drive Mode
button to determine if video and audio will be stored together on a single drive or video on
one drive and audio on another drive. Select the target drive(s) for your captured media from
the Target Drives menu(s).
Step 8. Click the "Tape Name?" button at the bottom of the window to open the Select Tape dialog
box. Select the desired tape, or add a new one, and then click OK.
Step 9. Ensure your video and audio source is ready or playing and then click the Capture button or
press the F4 key. The Capture button will flash red while recording. Click the Capture button
again or press the Escape button on your keyboard to end the capture.
If you can't see an image in your video capture window:
Step 1. Quit Media Composer.
Step 2. Launch Blackmagic UltraScope. Note the output video standard that is displayed on the left
side of Ultrascope's Picture Display. Quit UltraScope.
Step 3. Launch Media Composer and set the project preferences to match the standard reported
by UltraScope.
Step 2. Set up the Capture Tool to capture video by clicking
the Toggle Source button.