Using HyperDeck
18
Timecode Run Recording
HyperDeck also supports timecode run recording, which is similar to start/stop recording, but is only
used if your HD-SDI camera does not support trigger recording via HD-SDI.
To set up timecode run recording:
Step 1. Go into your camera's timecode settings and change them from "free run timecode" to
"record run timecode".
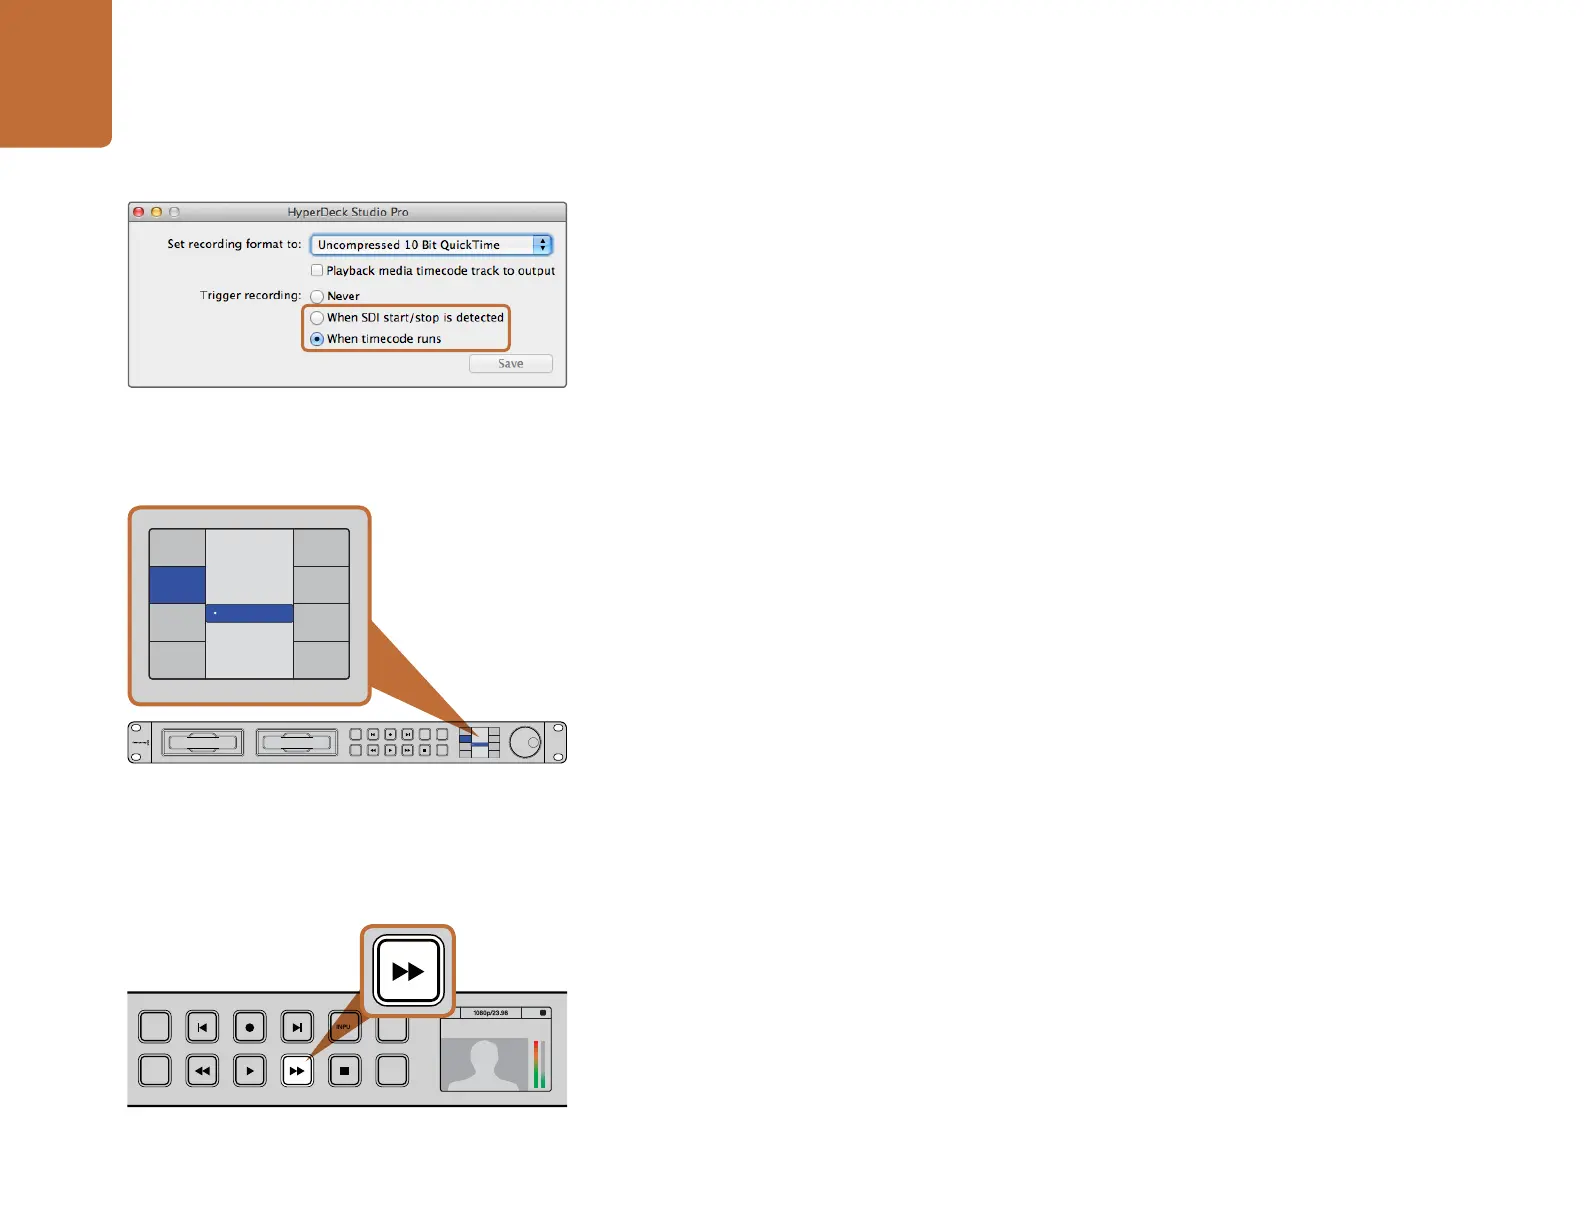
Step 2. In HyperDeck Utility, set Trigger recording to "When SDI timecode runs".
Step 3. If using HyperDeck Studio, press the REM button after setting Timecode Run Recording in
HyperDeck Utility. The REM button must be illuminated on the unit to allow trigger recording.
To set this on HyperDeck Studio models using the Display menu:
Step 1. Press the DISP button to bring up the main menu.
Step 2. Scroll to the Record menu and press SET.
Step 3. Scroll to the Record Trigger menu and press SET.
Step 4. Select Timecode Run and press SET to confirm your selection. Press DISP to exit.
Step 5. Press the REM button. The REM button must be illuminated on the unit to allow trigger recording.
Now whenever your HyperDeck detects the timecode running via HD-SDI it will start recording. Recording
will stop whenever the timecode stops.
Be careful if your HyperDeck is connected to the SDI output of a video router, as any change to the
video source might cause HyperDeck to start recording unexpectedly due to a change in timecode
being detected via HD-SDI.
Shuttling with HyperDeck Shuttle
During playback, press and hold the Previous Clip or Next Clip button to rewind or fast forward at 2x
speed. Press the Previous Clip or Next Clip button again and the speed will increase to 4x and then 8x.
Once you’ve found the section you want to review, press Play and playback will resume at normal speed.
Jog and Shuttle with HyperDeck Studio Models
During playback, press the reverse or fast forward button to play through the clip at 2x speed. Press the
reverse or fast forward button again and the speed will increase to 4x and then 8x. Once you’ve found
the section you want to review, press play to resume normal playback.
Use the HyperDeck Utility to enable Timecode Run recording.
Use the DISP menu on HyperDeck Studio models to set
Timecode Run recording.
INPUT
DISP
SET
REM
JOG
Record Trigger
SDI Start/Stop
Codec
Record
Trigger
None
Timecode Run
INPUT
DISP
SET
REM
JOG
Record Trigger
SDI Start/Stop
Codec
Record
Trigger
None
Timecode Run
INPUT
DISP
SET
REM
JOG
01:42:56:12
SSD
2
INPUT
DISP
SET
REM
JOG
01:42:56:12
SSD
2
The fast forward button on the front of HyperDeck Studio
models lights up when fast forwarding through clips.