Using Blackmagic Media Express
33
Capturing Video and Audio Files
Blackmagic Media Express 3 software is included with every HyperDeck Studio Pro to perform video and
audio capture to files. Blackmagic Media Express 3 is a great tool when you don’t need the complexity
of NLE software, but simply want to capture video from HyperDeck Studio Pro's Thunderbolt port.
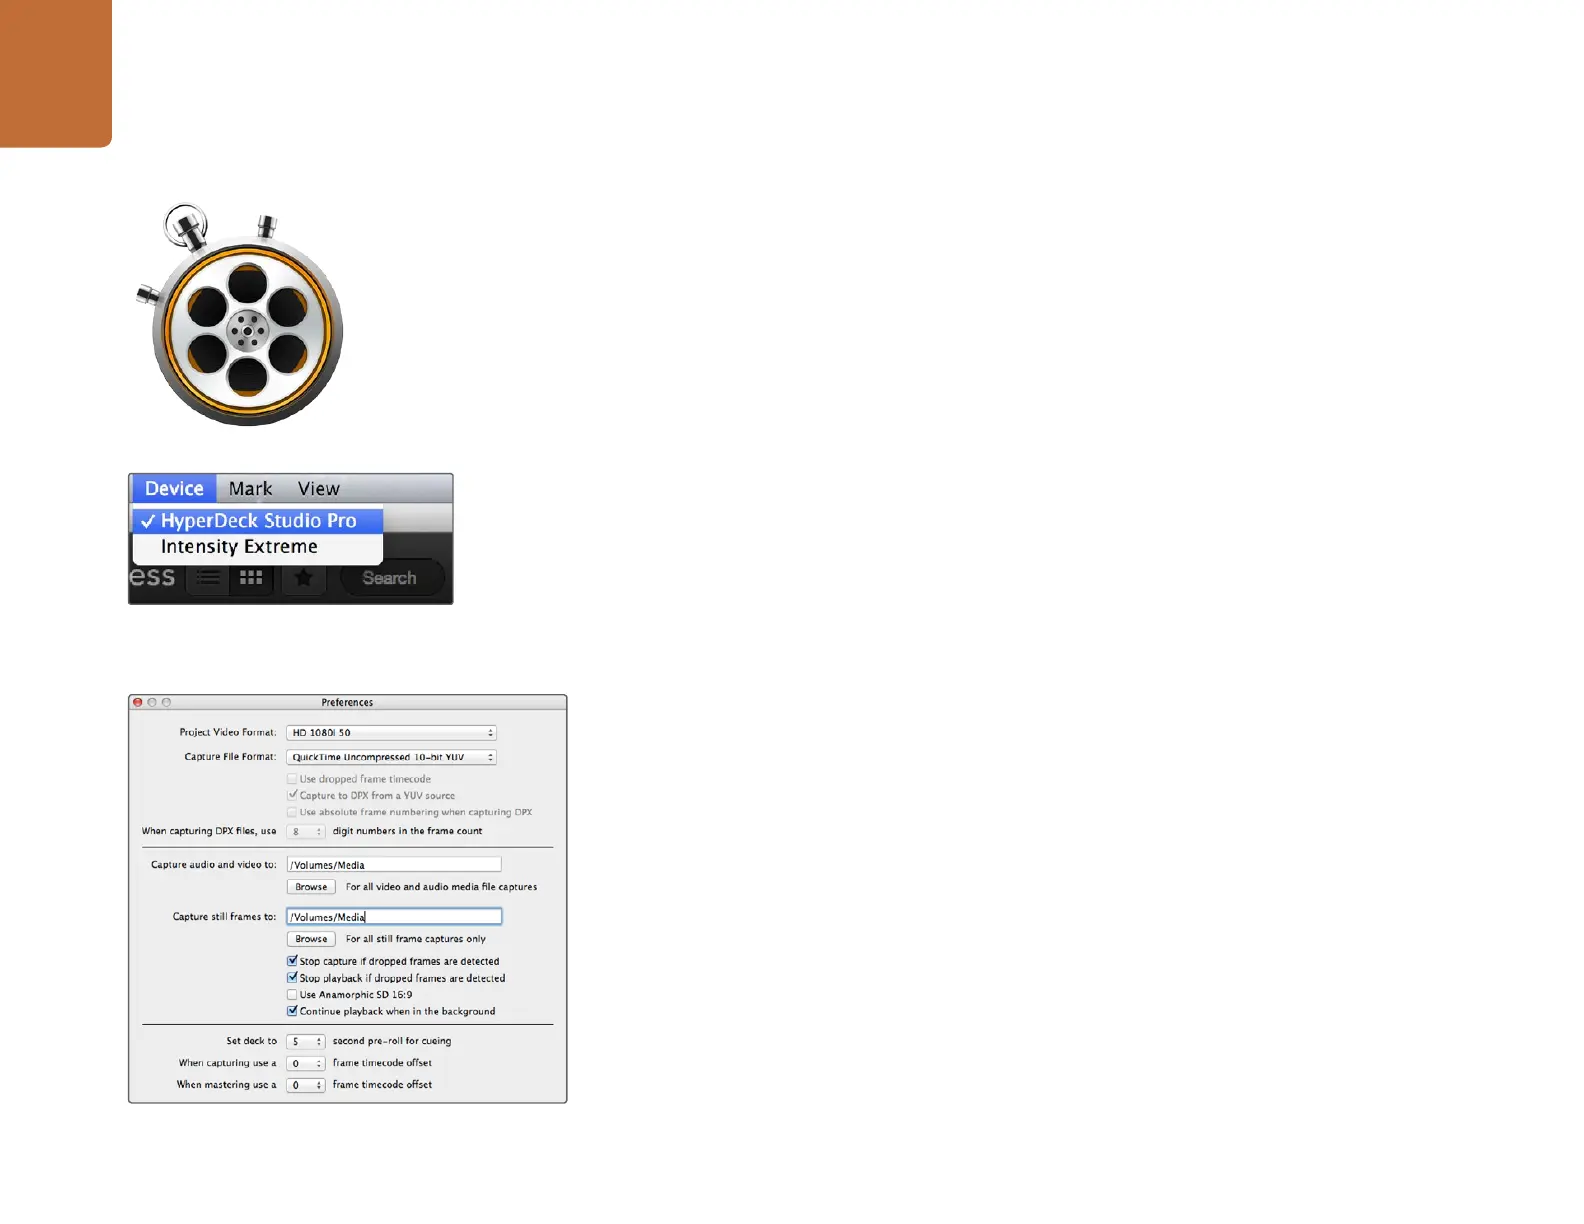
Selecting HyperDeck Studio Pro
If you have more than one Blackmagic Design capture product installed or connected to your computer,
go to the Device menu in Media Express and select HyperDeck Studio Pro. In the example pictured on
this page, an Intensity Extreme and a HyperDeck Studio Pro are both connected to the same computer.
Selecting your HyperDeck Studio Pro will allow you to choose suitable video settings for your project.
Setting Up a Project
Before capturing any clips in Media Express, you will need to select the settings for your project.
Step 1. Go to Media Express>Preferences. Any settings which are grayed out are only used with
other Blackmagic Design capture products and are not required by HyperDeck Studio Pro.
Step 2. Set the project video format (i.e., HD1080p) and also set the frame rate.
Step 3. Select from a range of professional compressed and uncompressed capture file formats
or even a DPX image sequence in the Capture File Format drop down menu. Video will be
captured in the chosen format and saved to a QuickTime movie.
Step 4. Set the storage location for your captured video and audio.
Step 5. Choose whether to stop capture or playback if dropped frames are detected.
Usually video applications stop playing video if you send them to the background. If you want Media
Express to keep playing video, even if you open another application in the foreground, enable the
checkbox to "Continue playback when in the background".
The final options for pre-roll and frame timecode offset are not used by HyperDeck Studio Pro when
capturing video via a Thunderbolt connection. They relate to tape decks with RS-422 deck control.
Select your HyperDeck Studio Pro from the Device menu.
Media Express Preferences
Using Blackmagic Media Express